The ears have it.
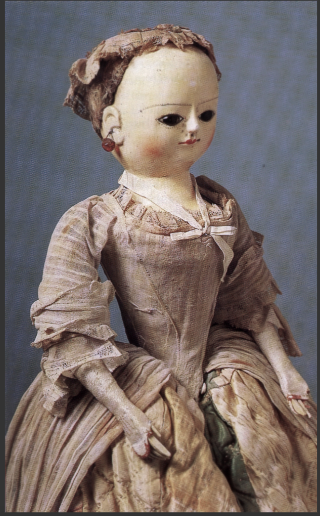
Many antique Queen Anne dolls have lovely delicate ears and some can even were earrings. Our doll designer was content to leave the ladies without, until the jewelry department started playing with colorful sparkly bits.
So it was off to do some research.
https://vita-soyka.livejournal.com/photo/album/493/?page=13
The lady above has a slit cut into the lobe of the ears so her dresser can slide her earrings in. Other ladies have a hole drilled into the ear lobes. Ladies without ears would sometimes attach earrings to their wigs if the hairstyle is Marie Antoinette size.
What to do, what to do?
The designer had two challenges with this project, one of making small ears from non stretch muslin and then two, figuring out how earrings can be worn.
After searching through doll making books (listed in our resource section) and watching YouTube videos the designer came up with a plan.
Sadly, the first attempt resulted in disappointment and the project was shelved for awhile. The sample was swept away in a suspicious clean up so there is no record.
After letting ideas percolate, the designer consulted with the jeweller and it was determined that the ears should come first and how to attach earrings would surely be a light bulb moment. In other words, we'll think about that later.
Patterning the ears:
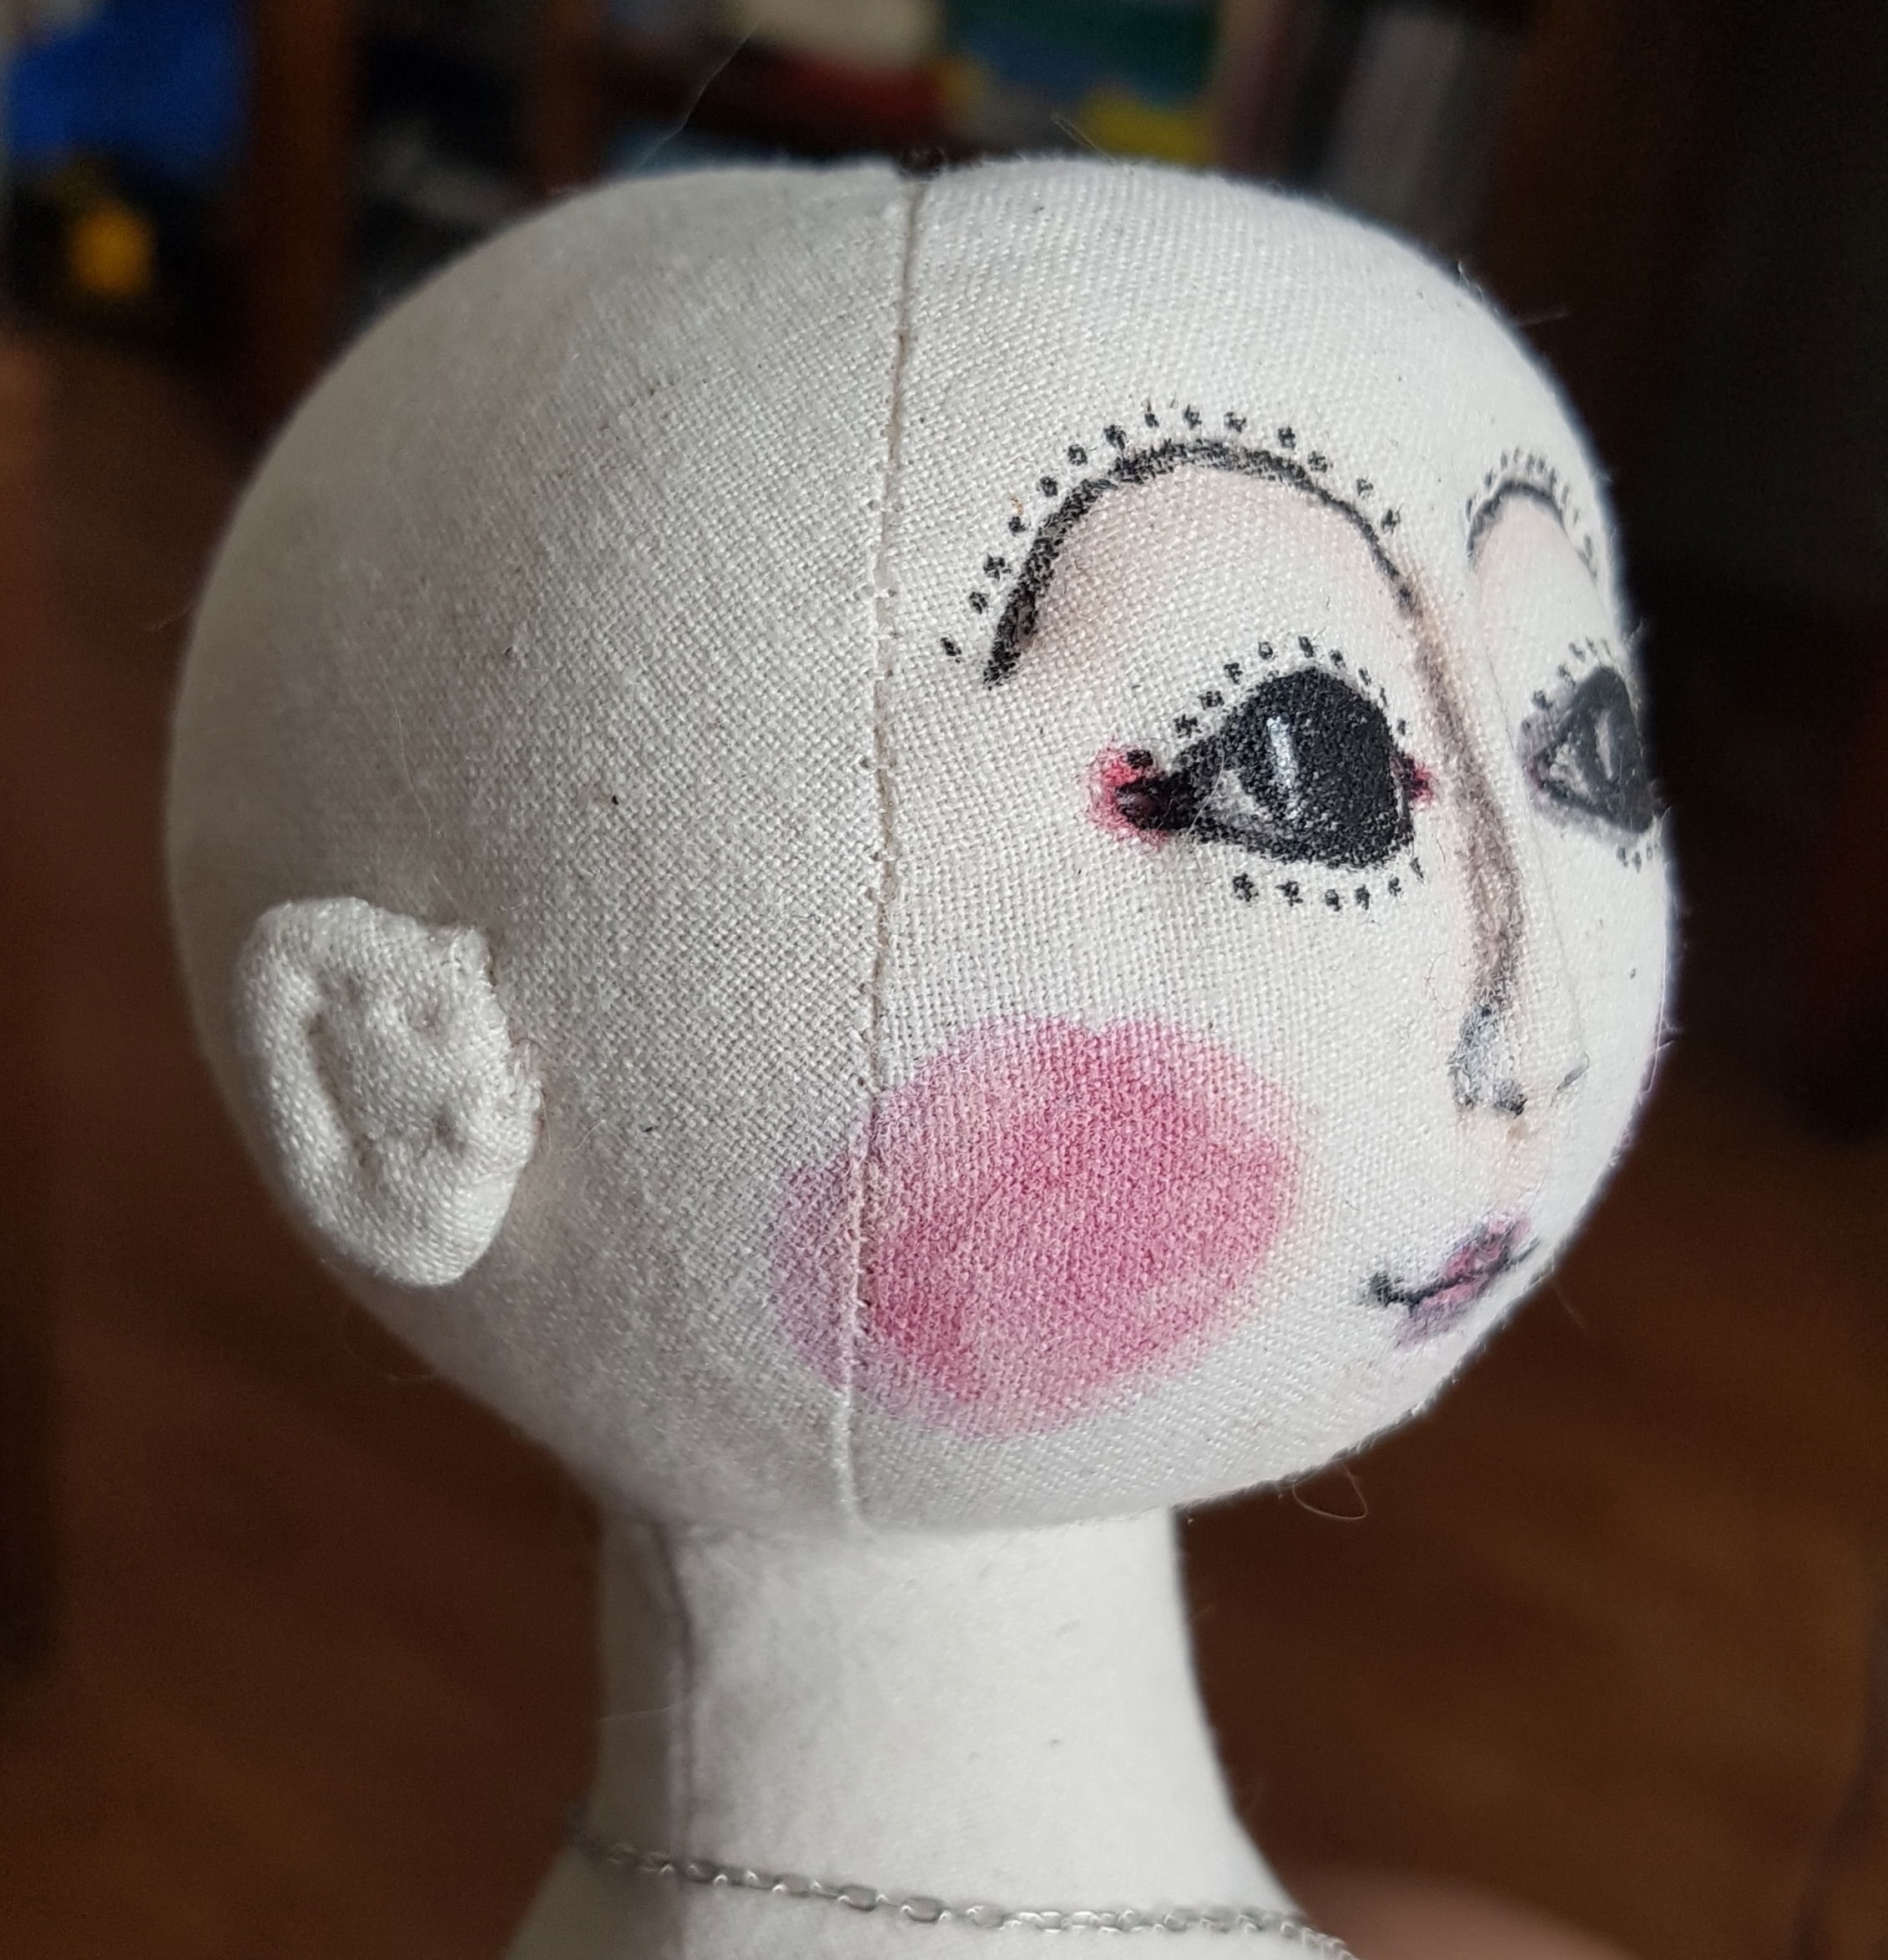
The designer adores little Arabella but she does have some big ears. Ladies from now on will boast shell like oreilles, just big enough to support earrings.
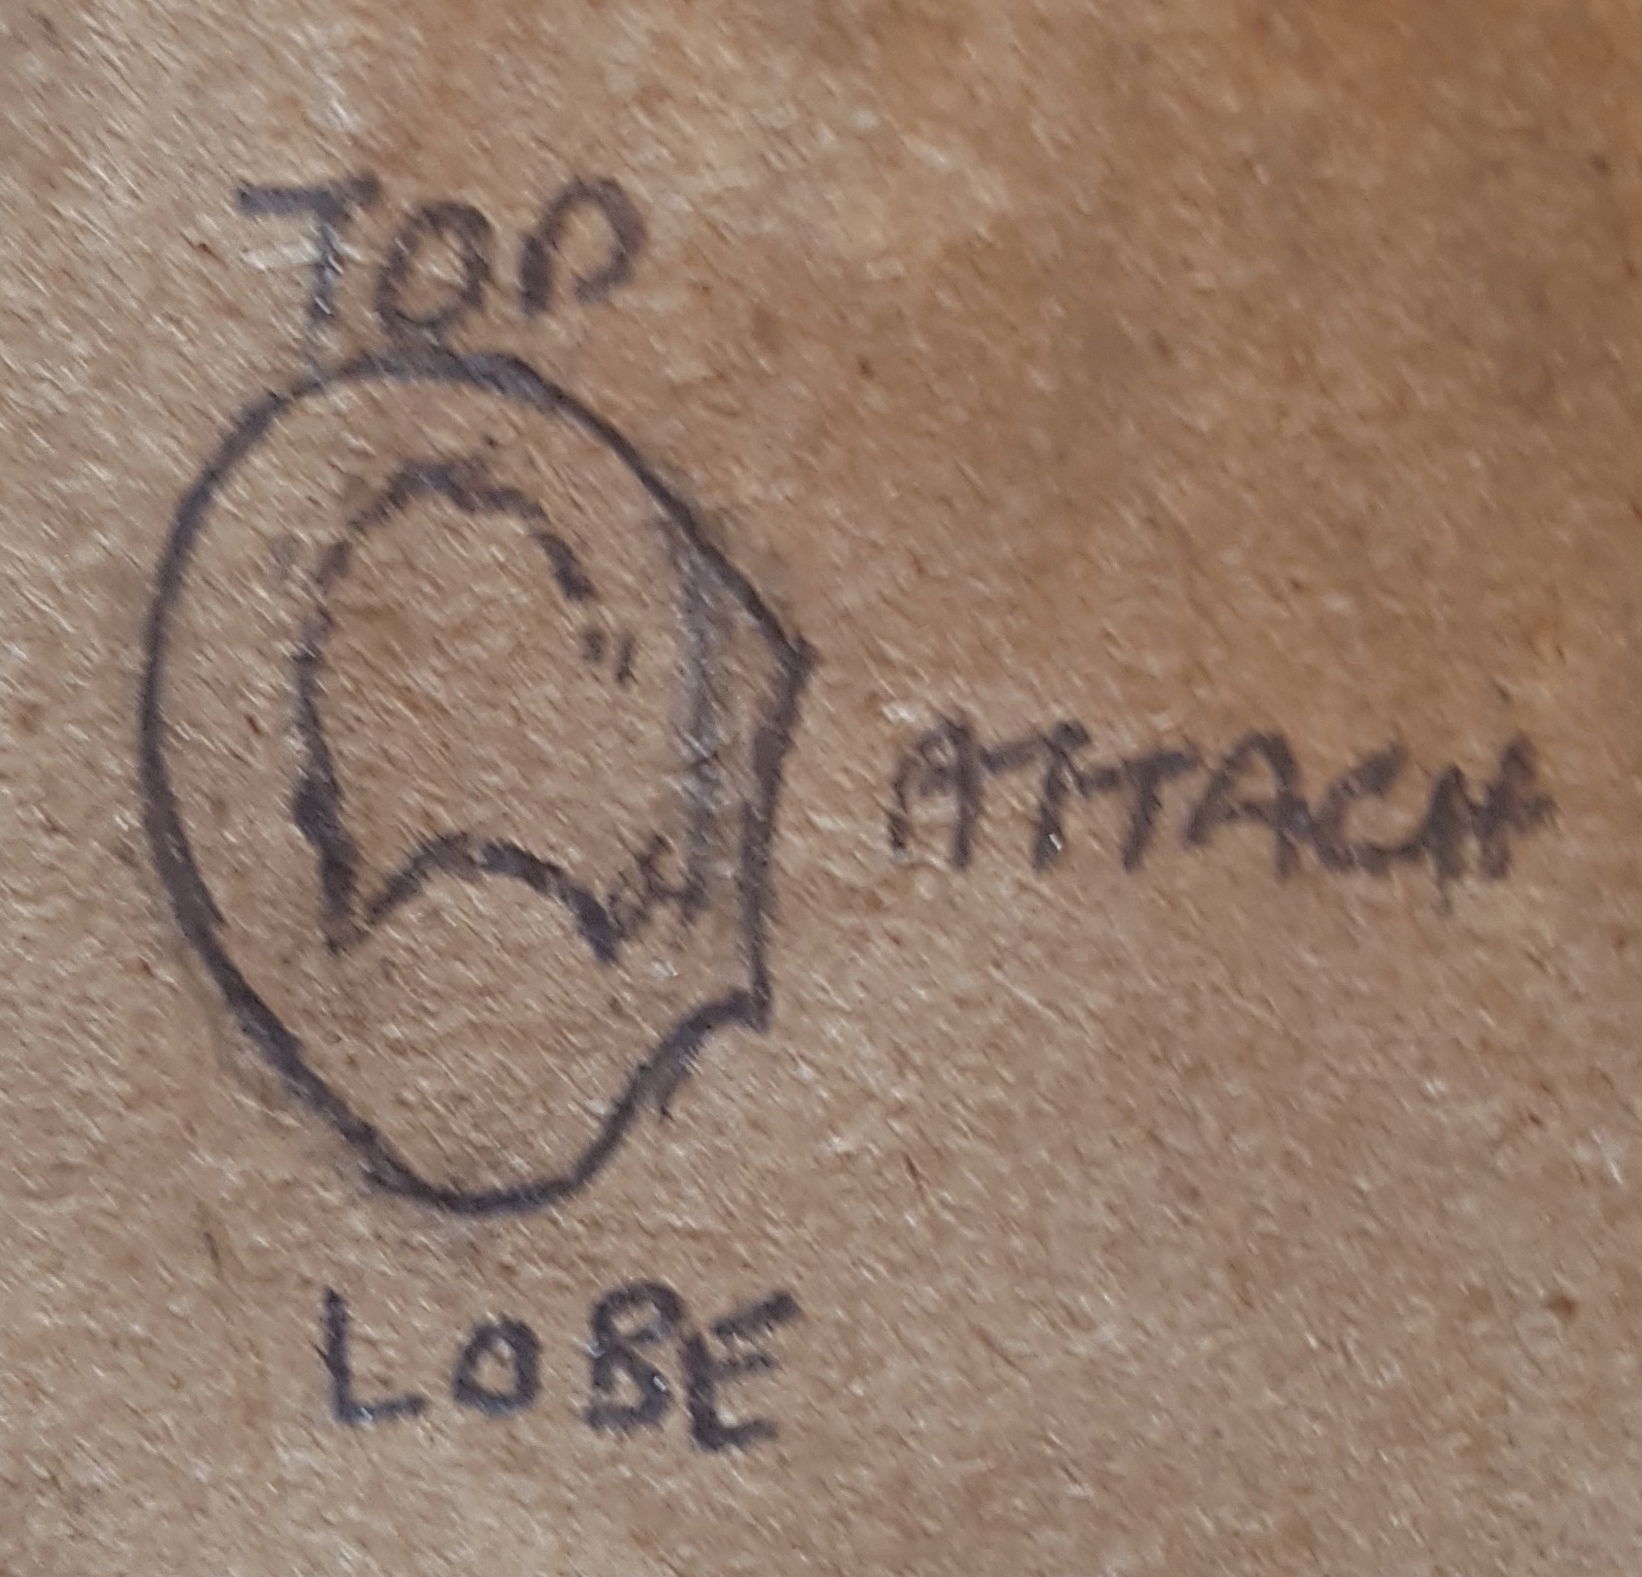
Basically the ear is egg shaped, with the most width at the top. After studying the size of the doll's head and using her as a mannequin, it's a matter of playing with paper and determining the pleasing size.
Check sample patterns on the doll to determine what works best.
Once everyone is satisfied, trace the chosen ear and add sculpting lines. Don't forget that in stuffing and turning out the ears they will end up a titch smaller. Draw the sculpting lines on the pattern drawing. Keep that drawing for future reference and be sure to pin the tiny pattern to it when you are done.
Cutting and Stitching:
Trace the pattern on to doubled fabric. No need to worry about right and left yet, or adding the sculpt lines. Don't add seam allowances either. Most importantly, DON'T CUT THEM OUT.
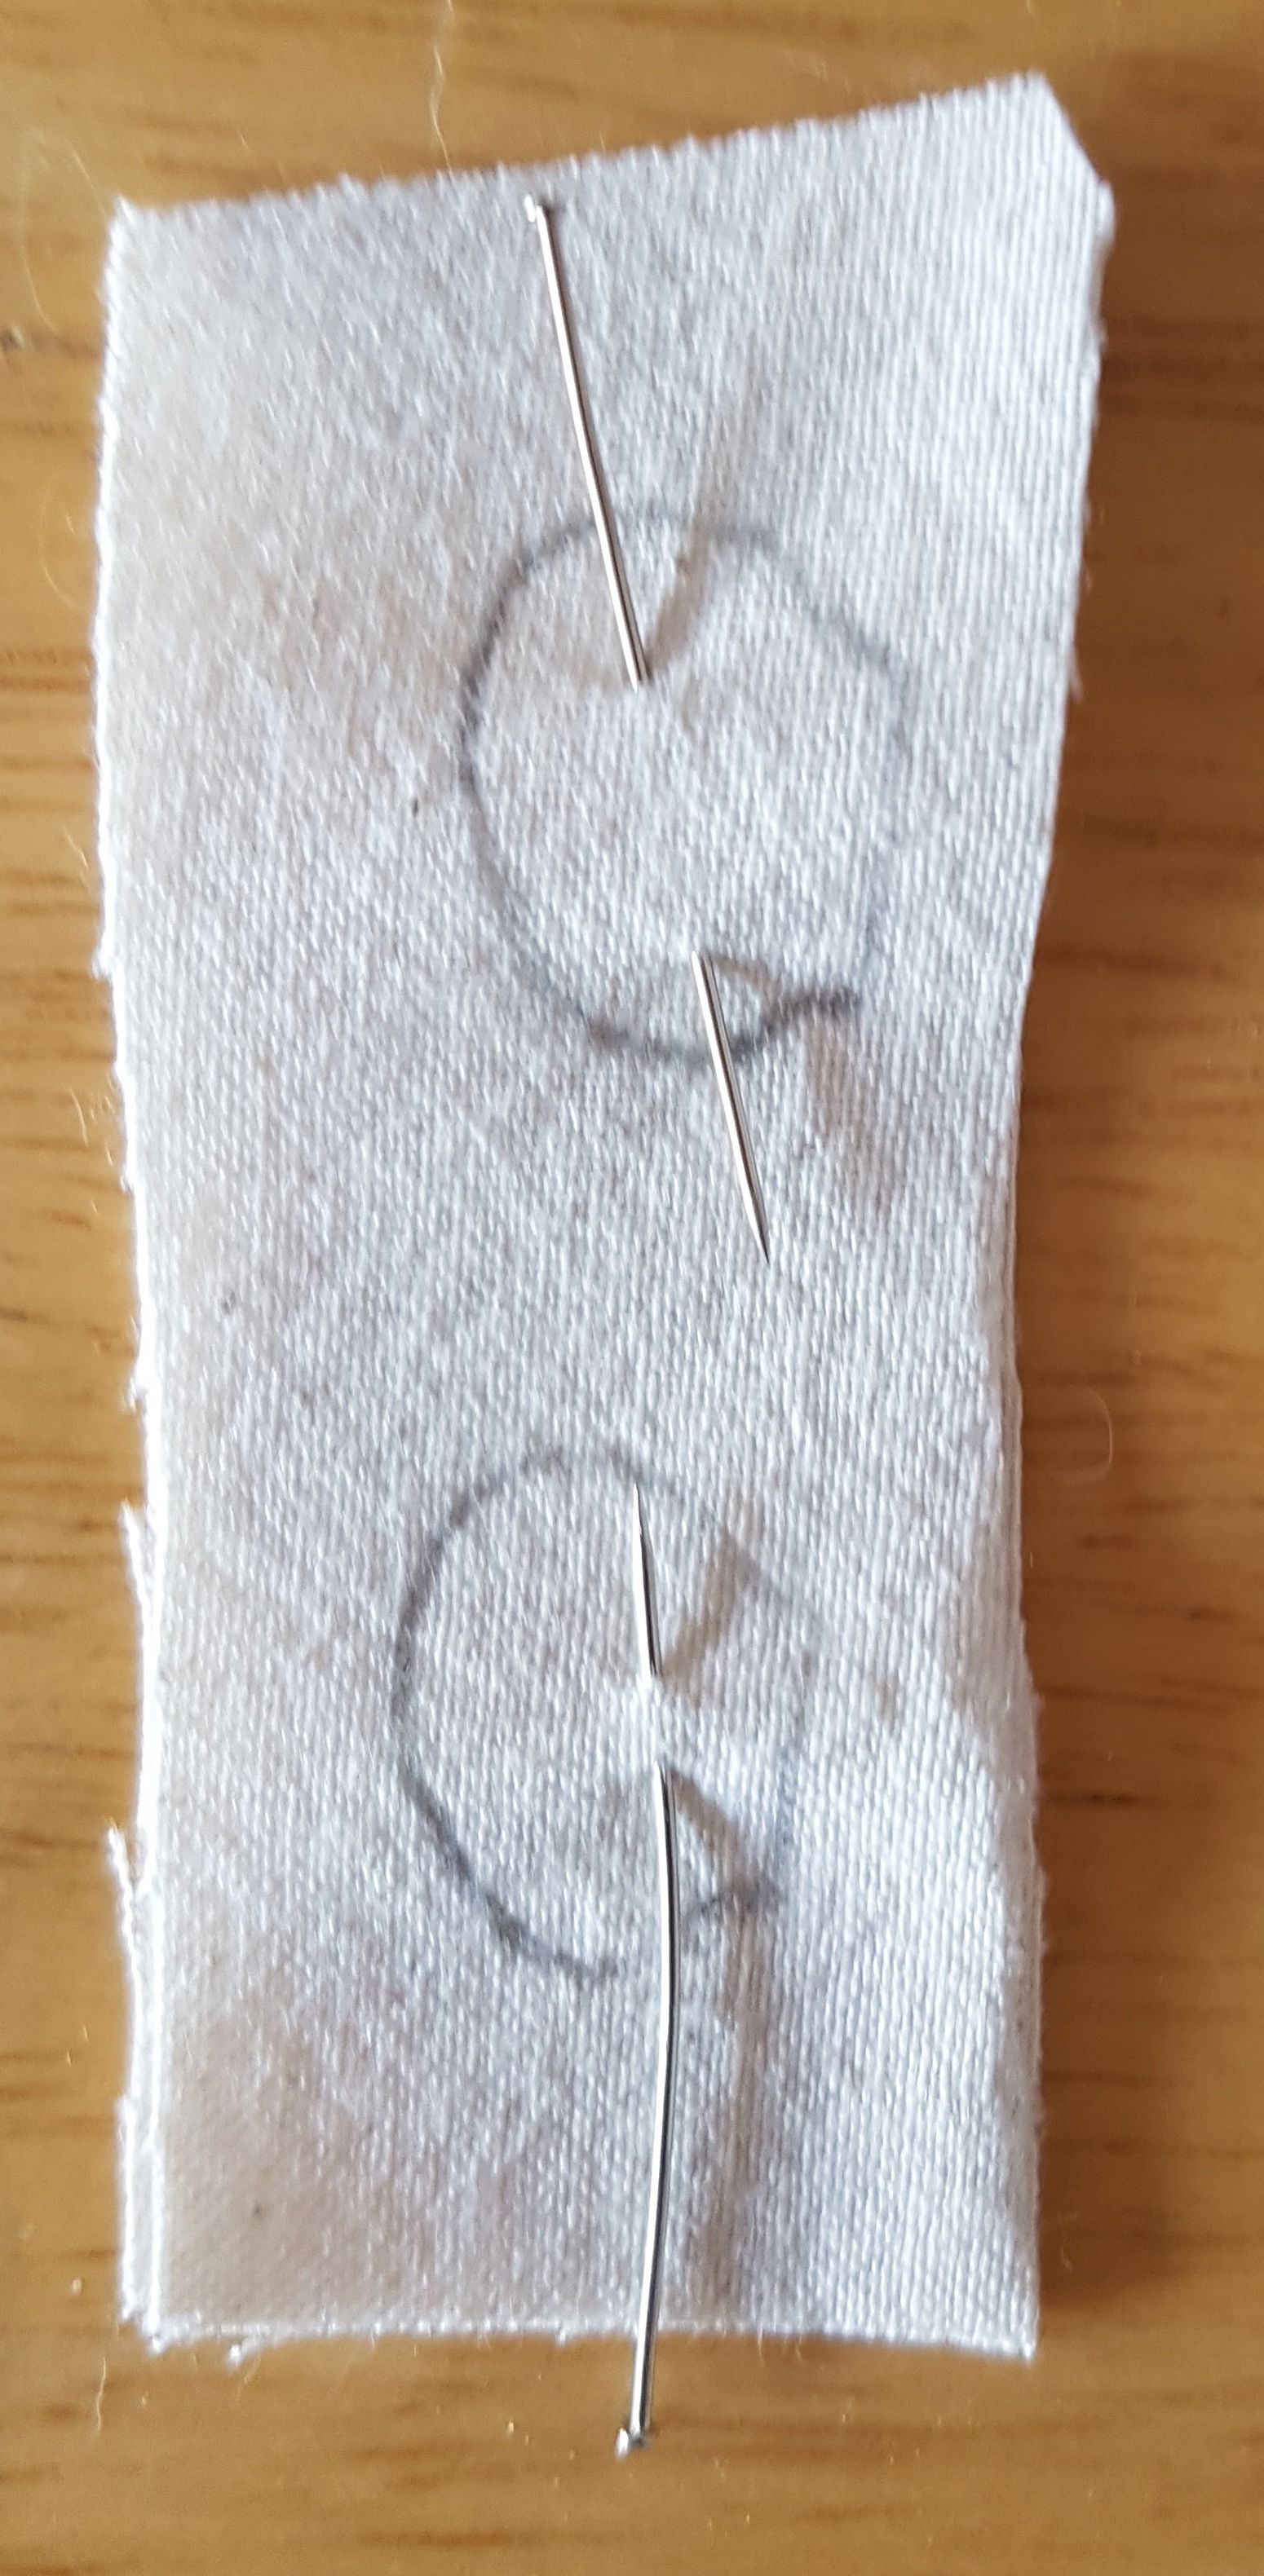
It's easier to stitch the ears on a piece of fabric that fingers can manipulate. Especially if machining them. It also prevents the wee seam allowances from fraying on woven textiles. The stitcher in the shop hand stitched the small items with a solid back stitch. And it was probably just as quick as machining. Even with going around twice. Certainly less annoying.
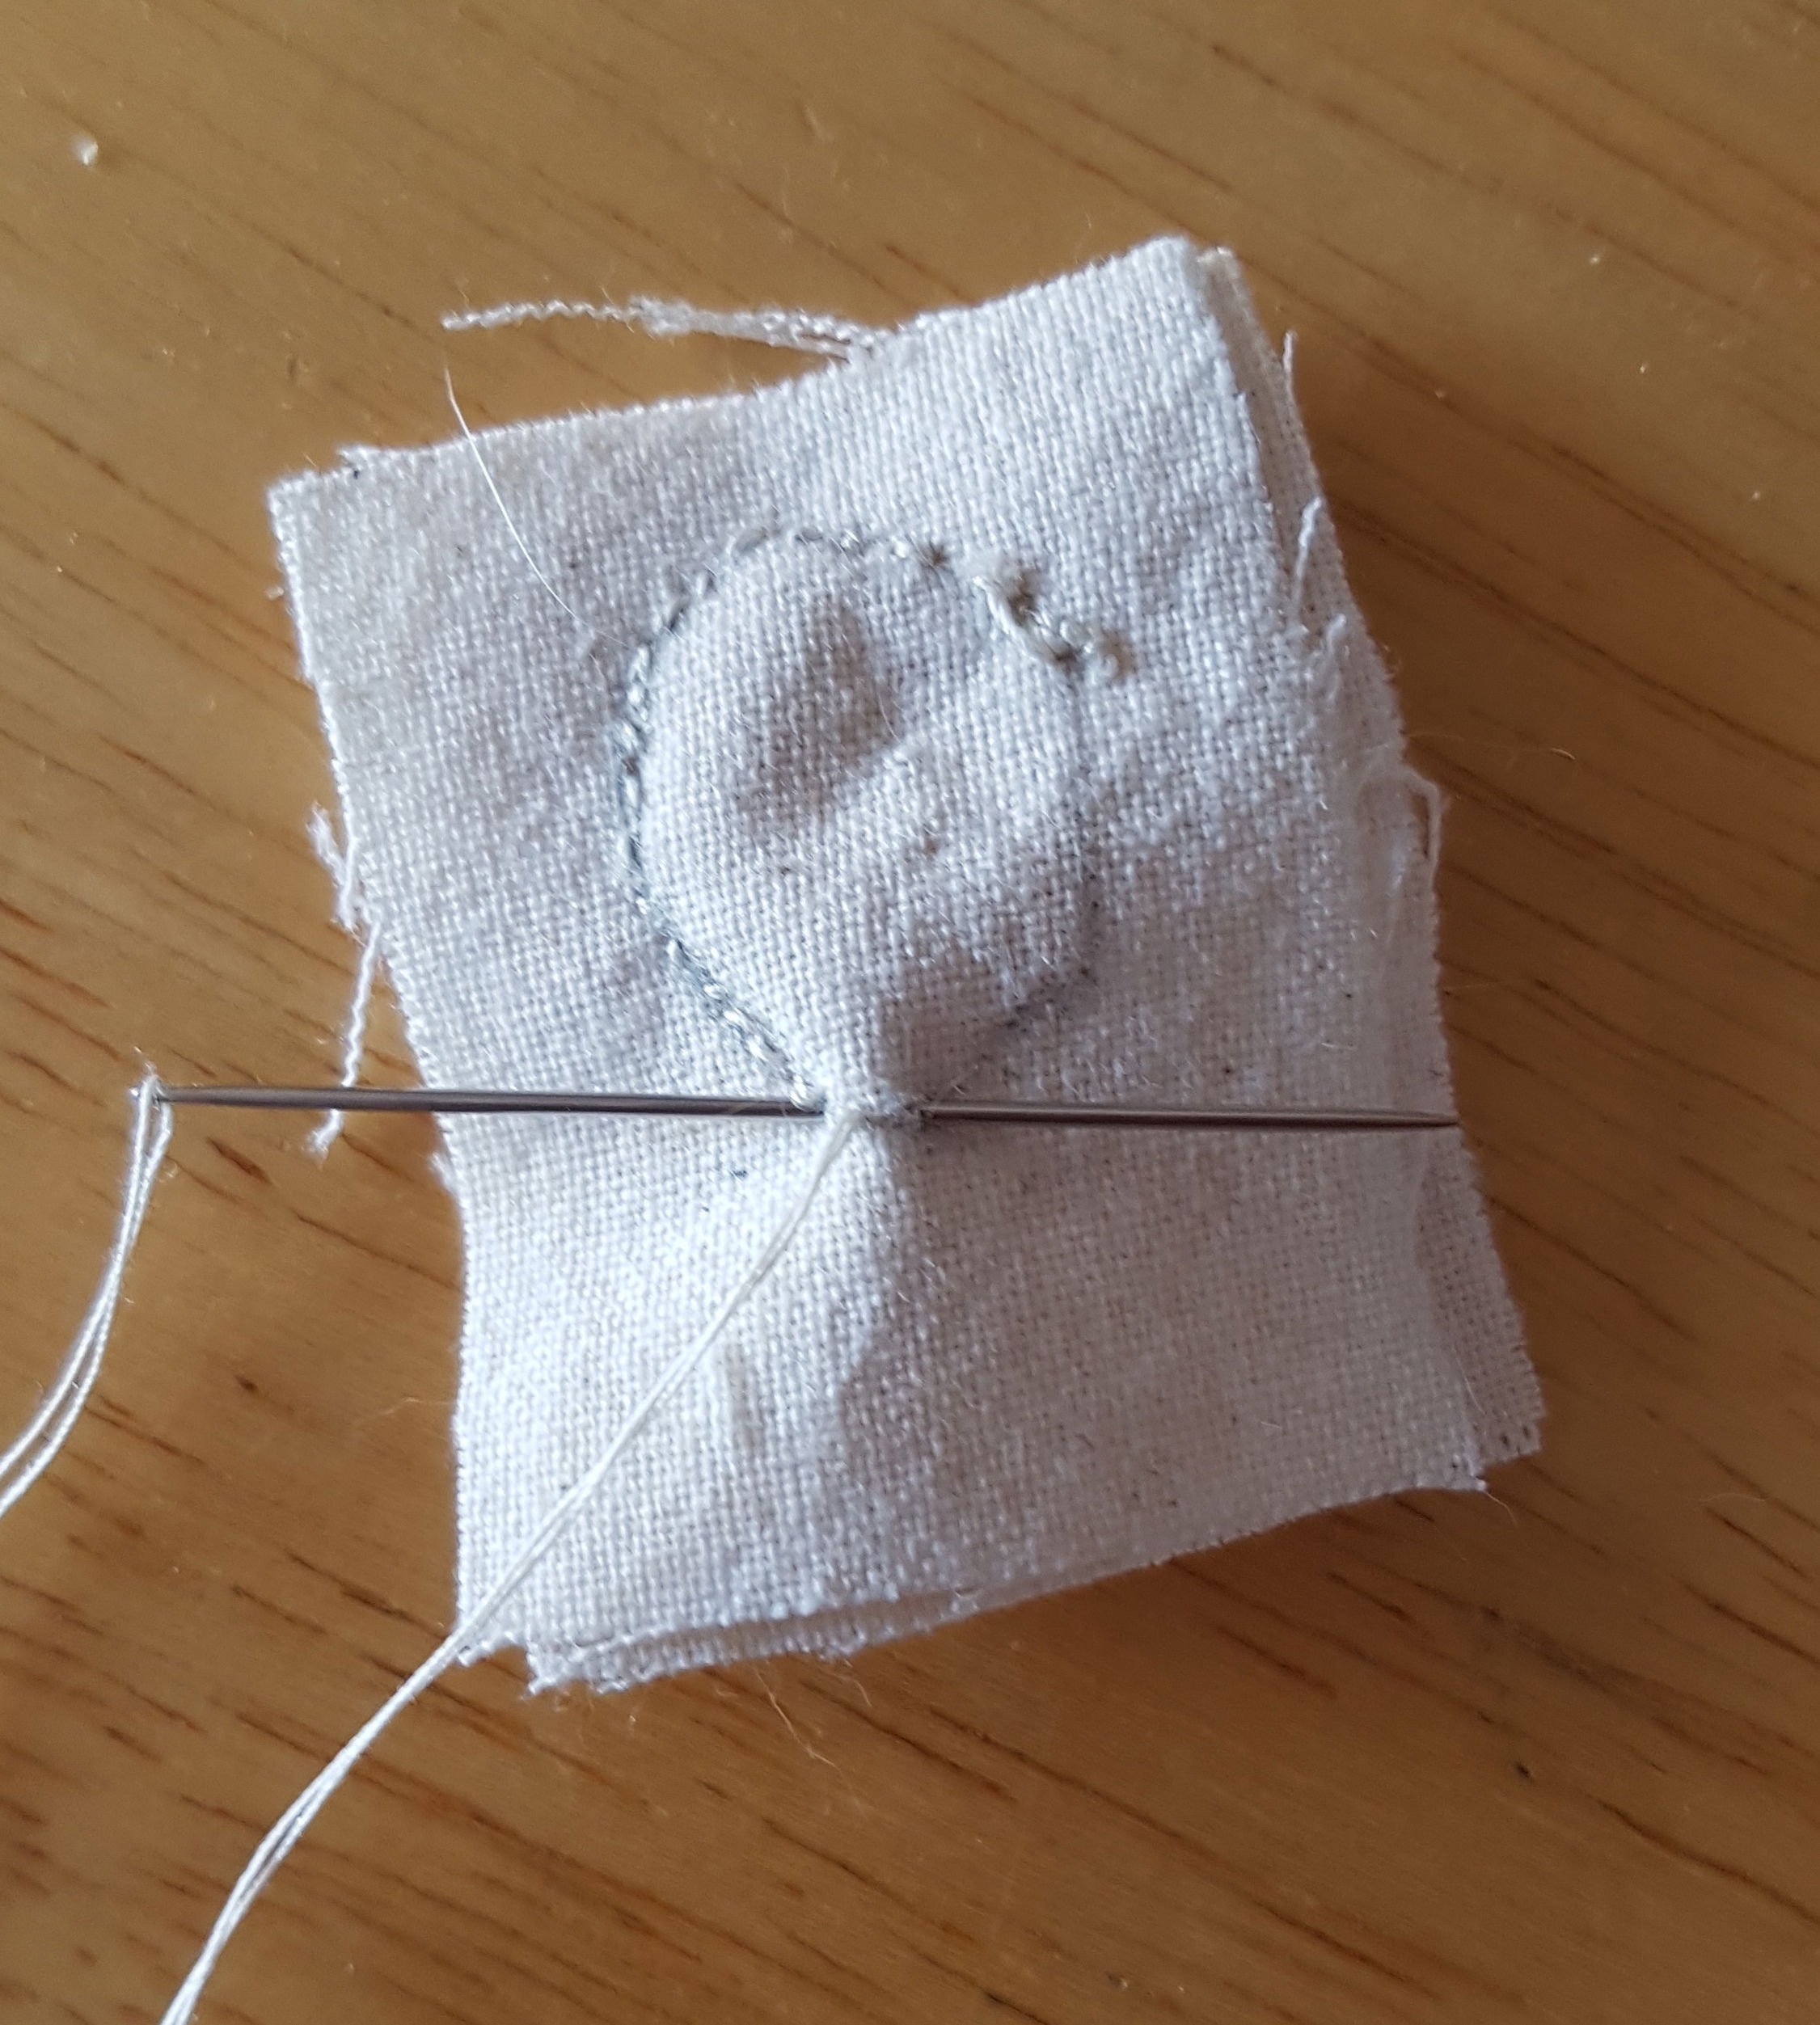
Once the back stitching is completed the ears can be cut out, adding seam allowance that will not fray too much nor take up too much room in the ear. No need to clip anything.
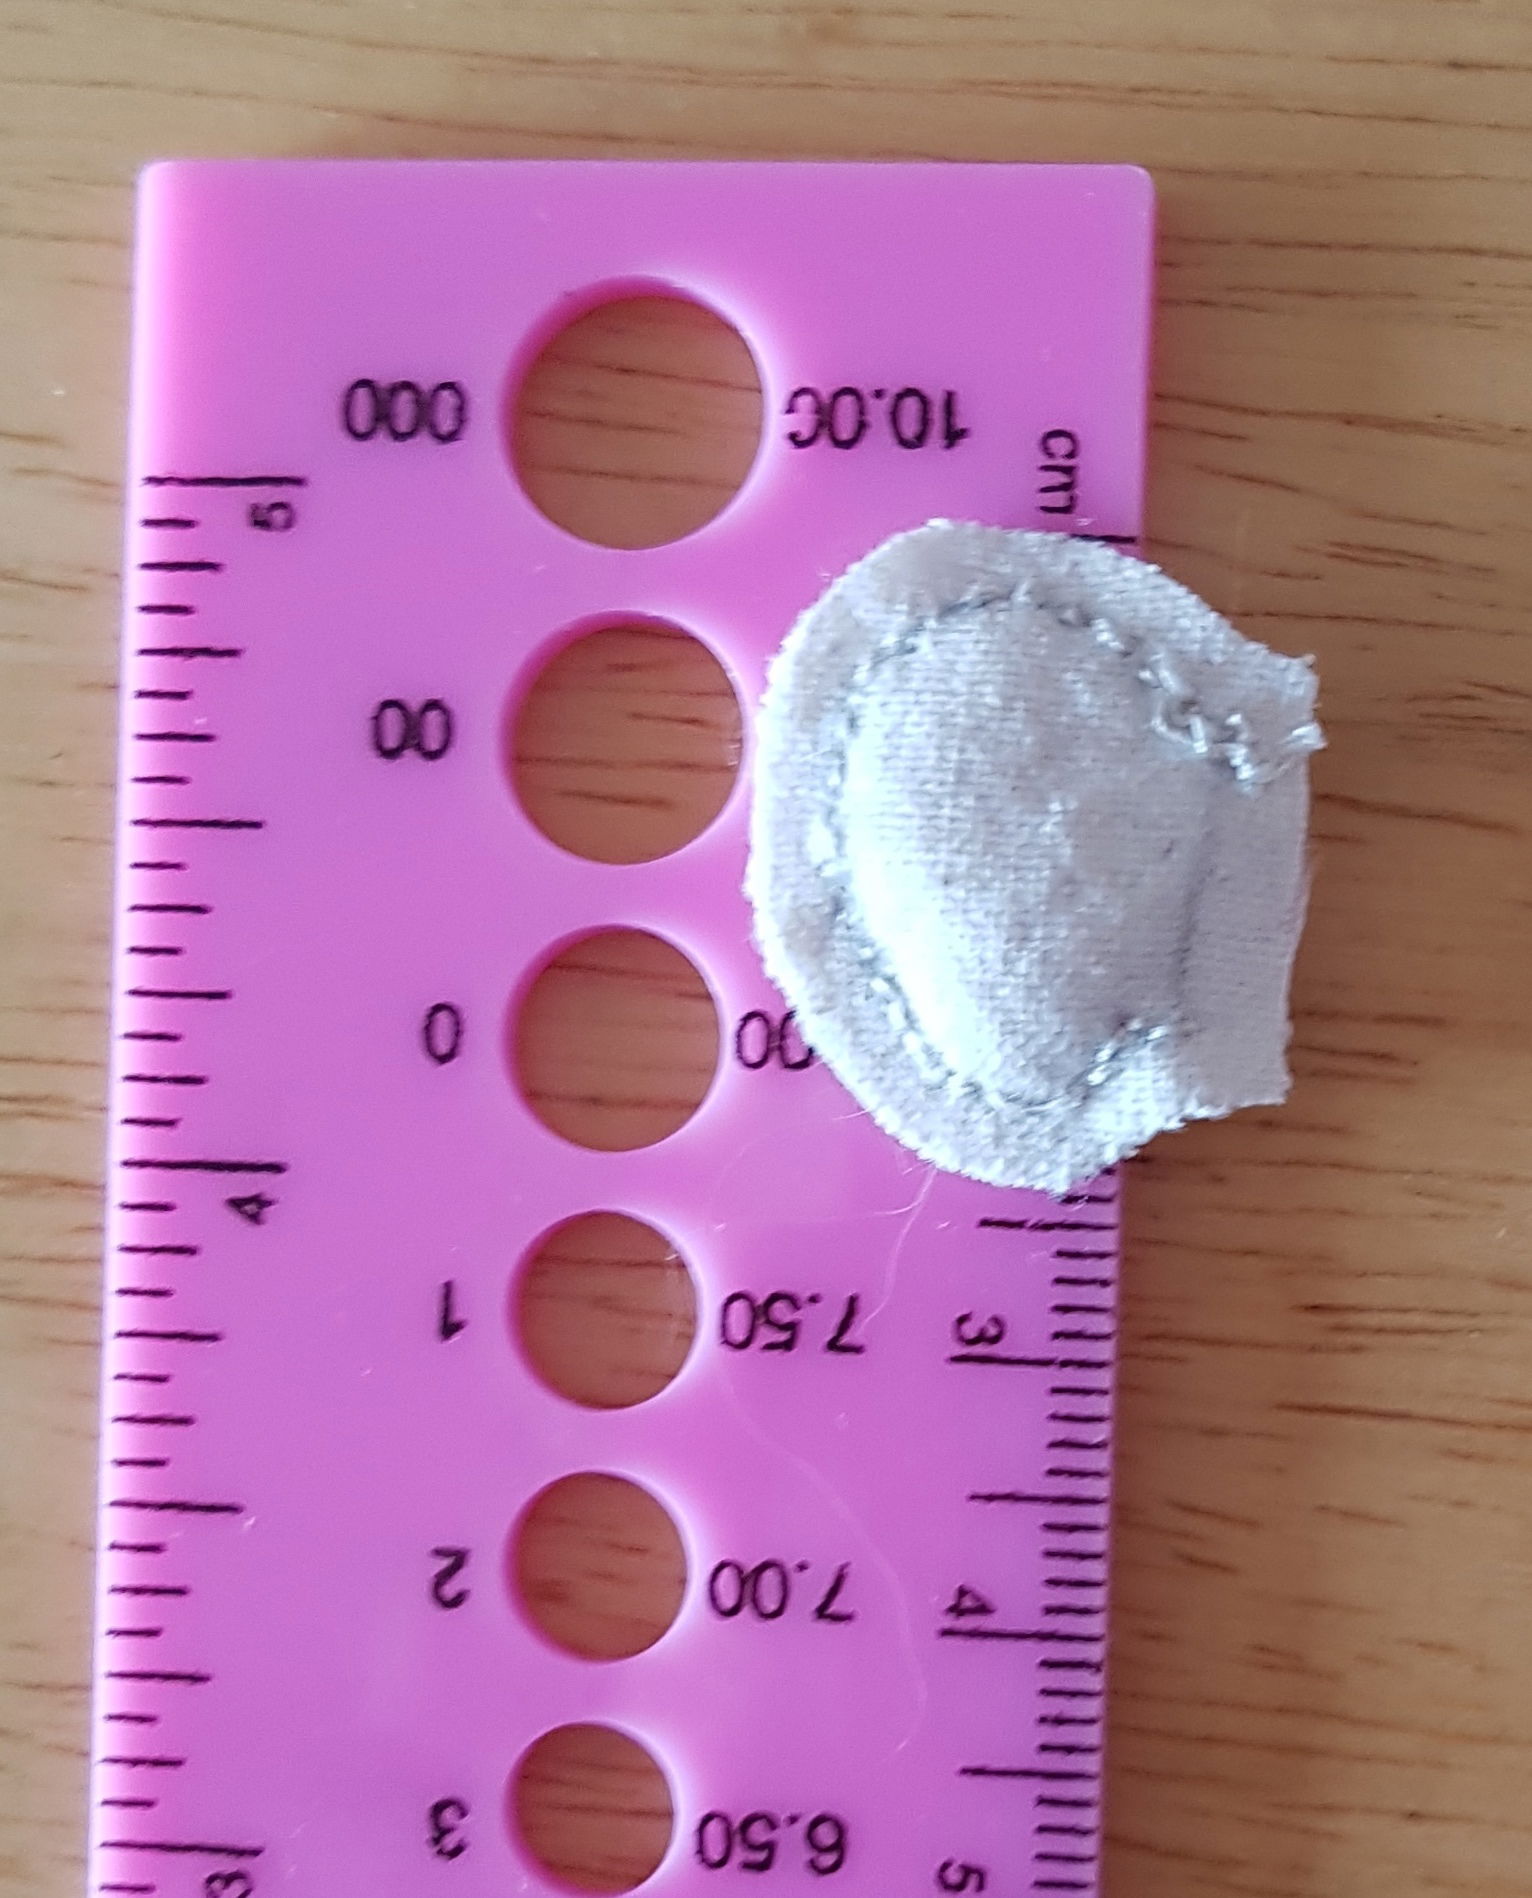
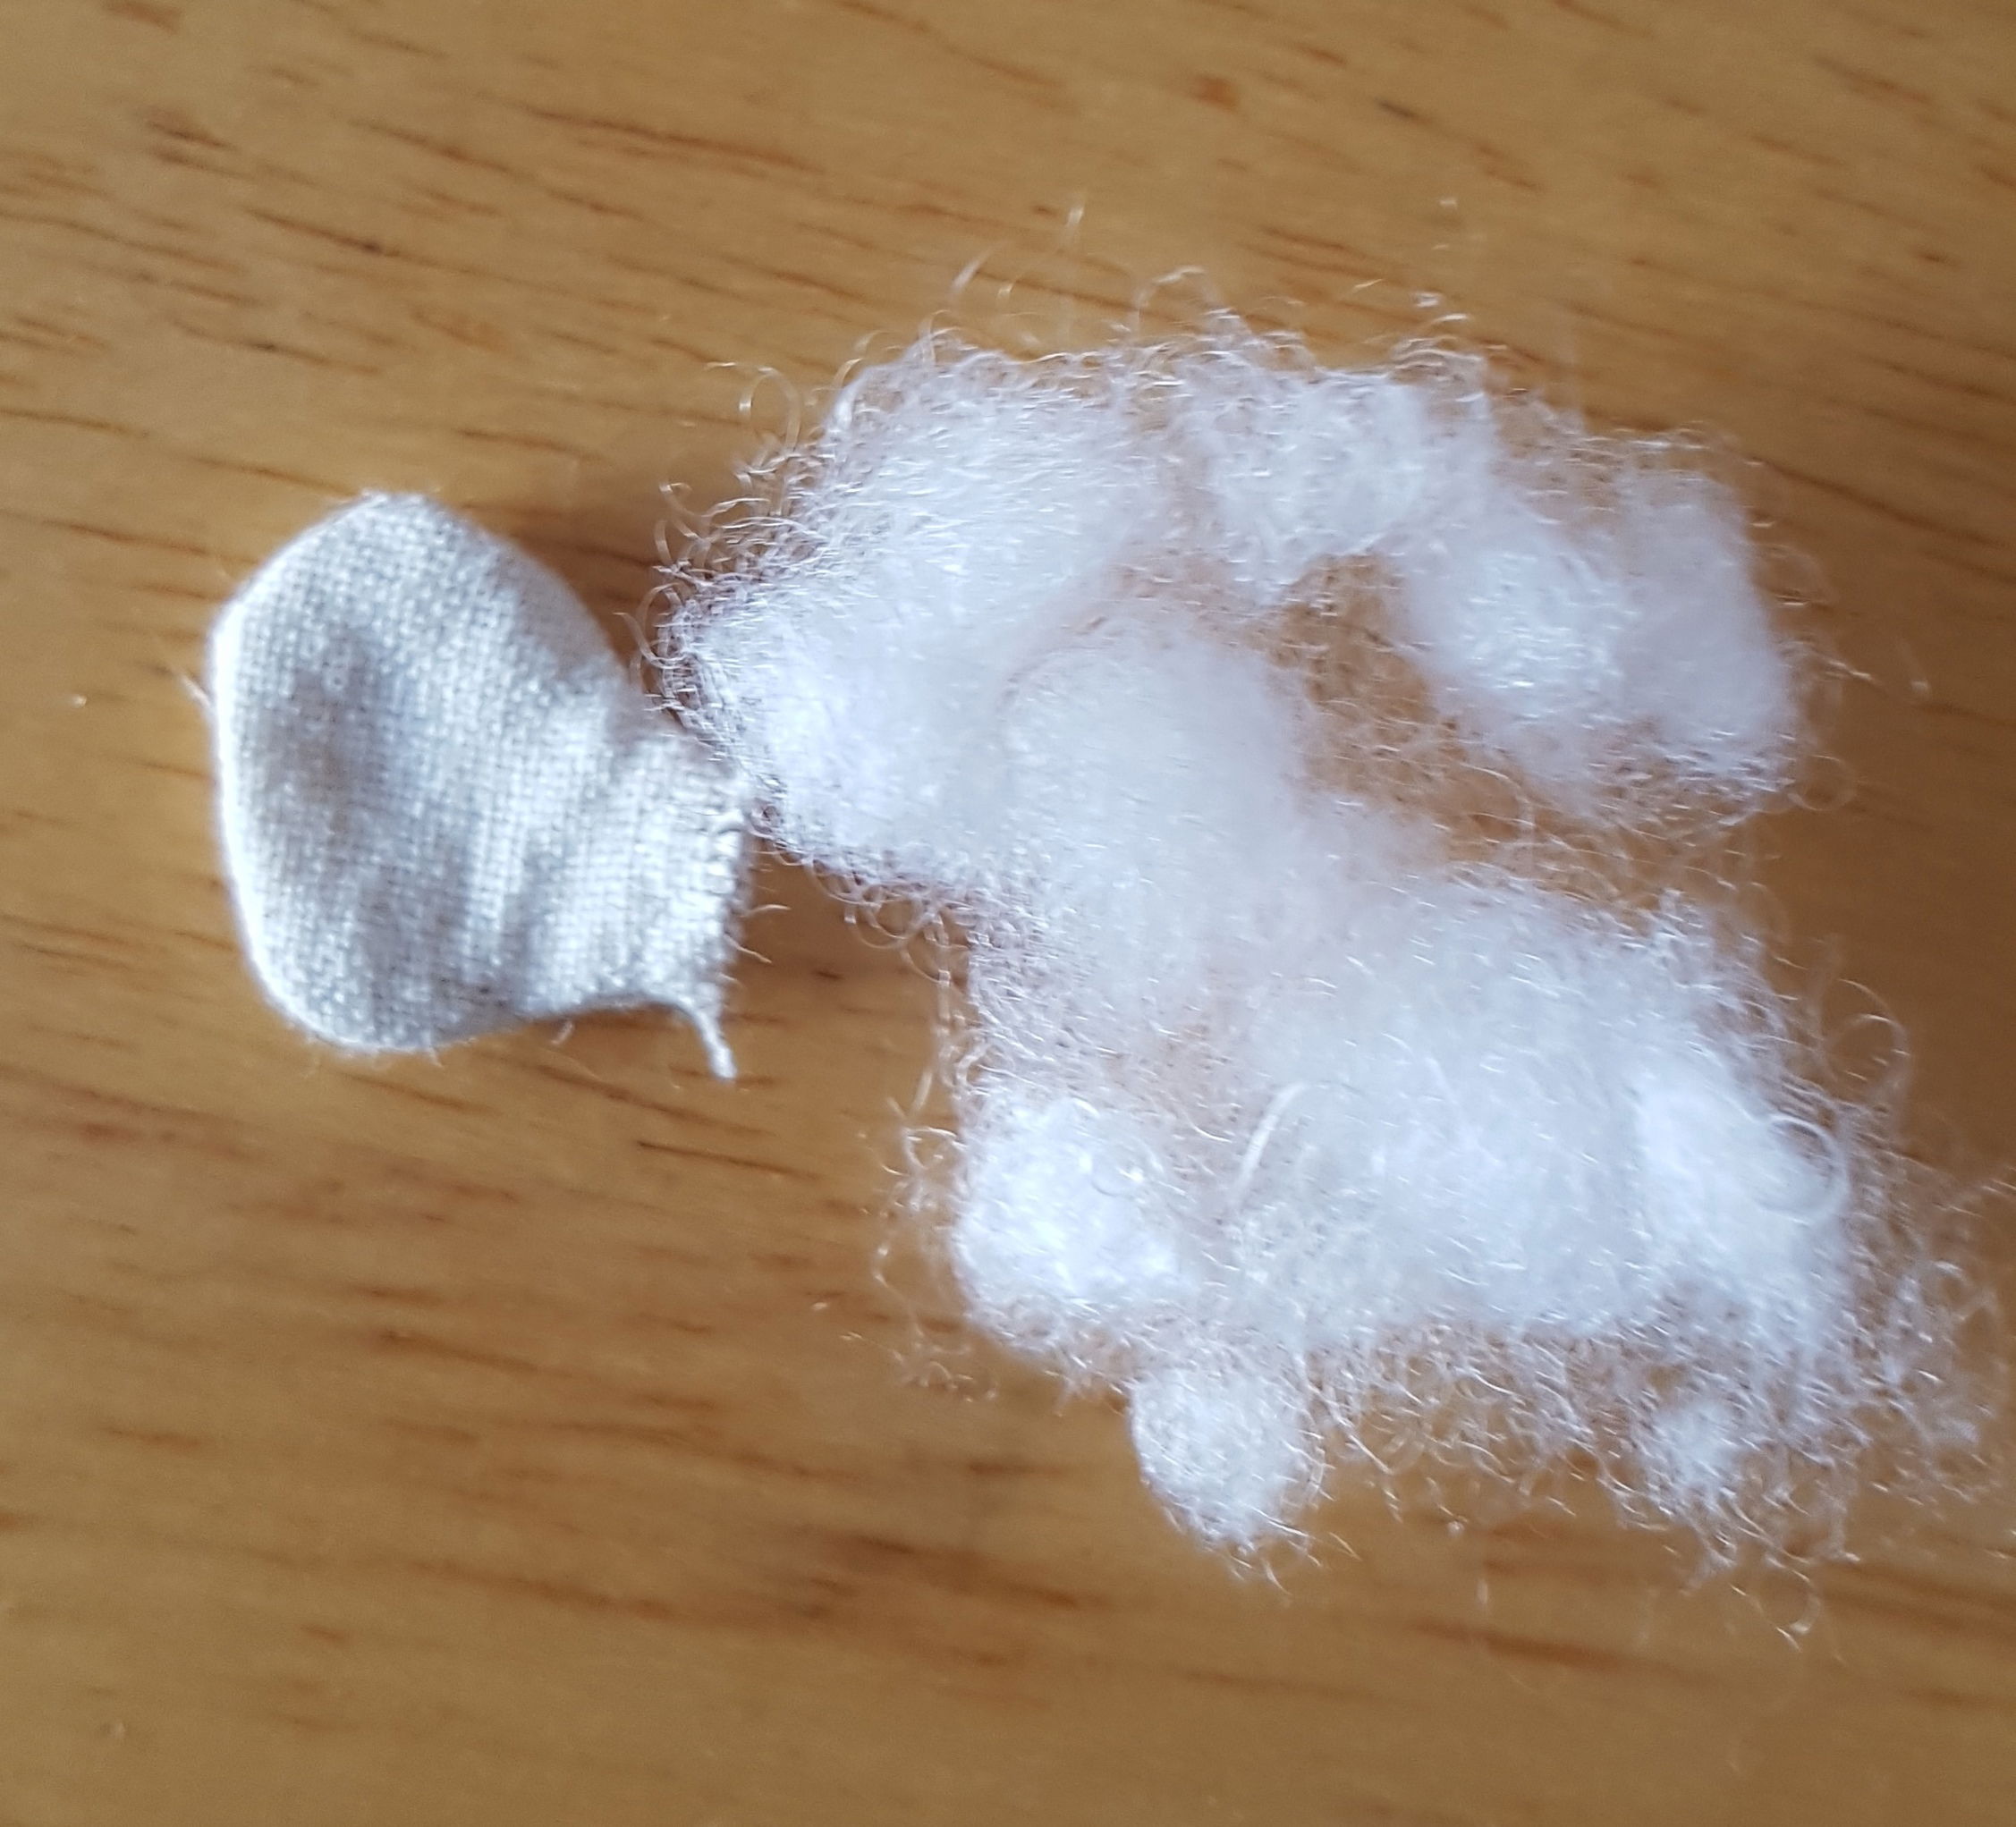
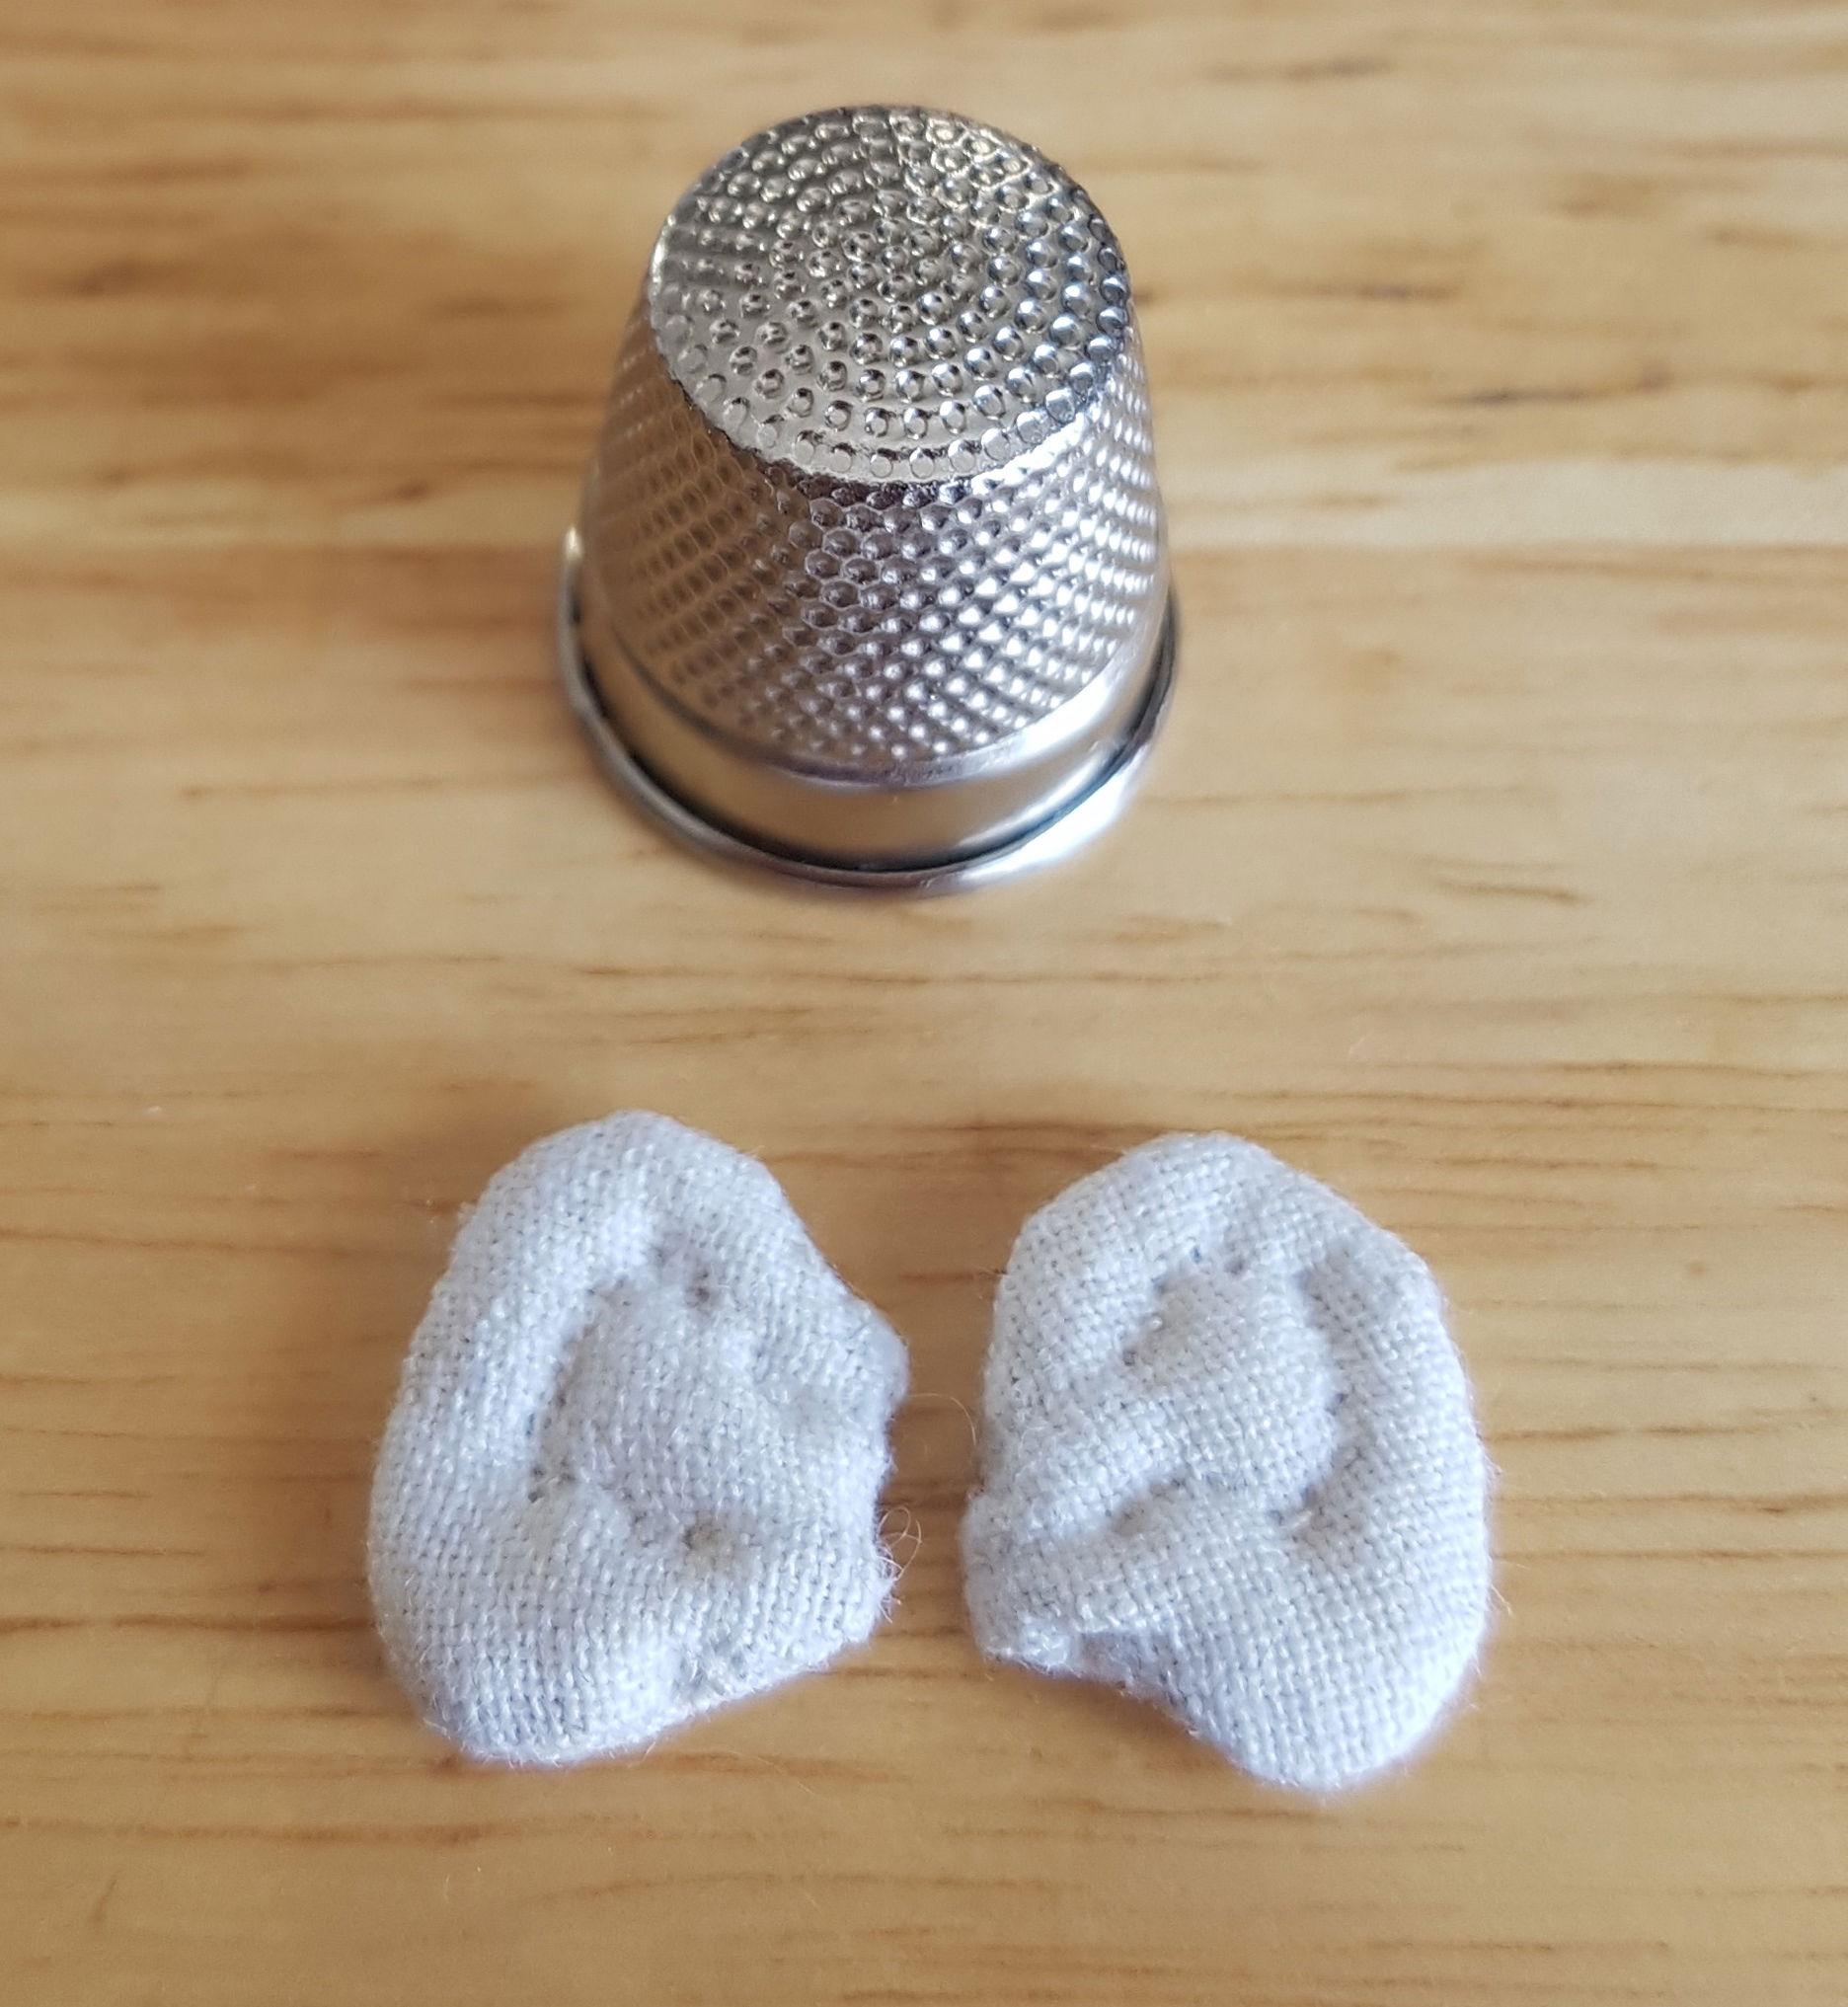
Then it is turning the ears out with the hemostat. (Hooray for hemostats!) Get in there and push out the seams to round out the contour. Gently, gently.
Stuffing and sculpting:
Stuffing the ears gives something to stitch into when applying to the doll and makes the sculpting stand out. The seam allowances fills out the edges, so only a bit of filler is needed.
Tuck in the seam allowance at the opening and, with single thread, close it up. That closed edge will be stitched to the doll and will be visible, so make it nice.
It's easy to mix up the top and bottom of the ears, so check with the pattern before sculpting. Maybe baste stitch a few times to mark the top?
The stitcher decided to wing it with sculpting by studying the pattern drawing. The removable pen would certainly be useful, but since the lines haven't been traced, it would still be winging it. The bigger the ears, the more detail that can be added of course.
It's all about right and left now so remember to flip the 'pattern'.
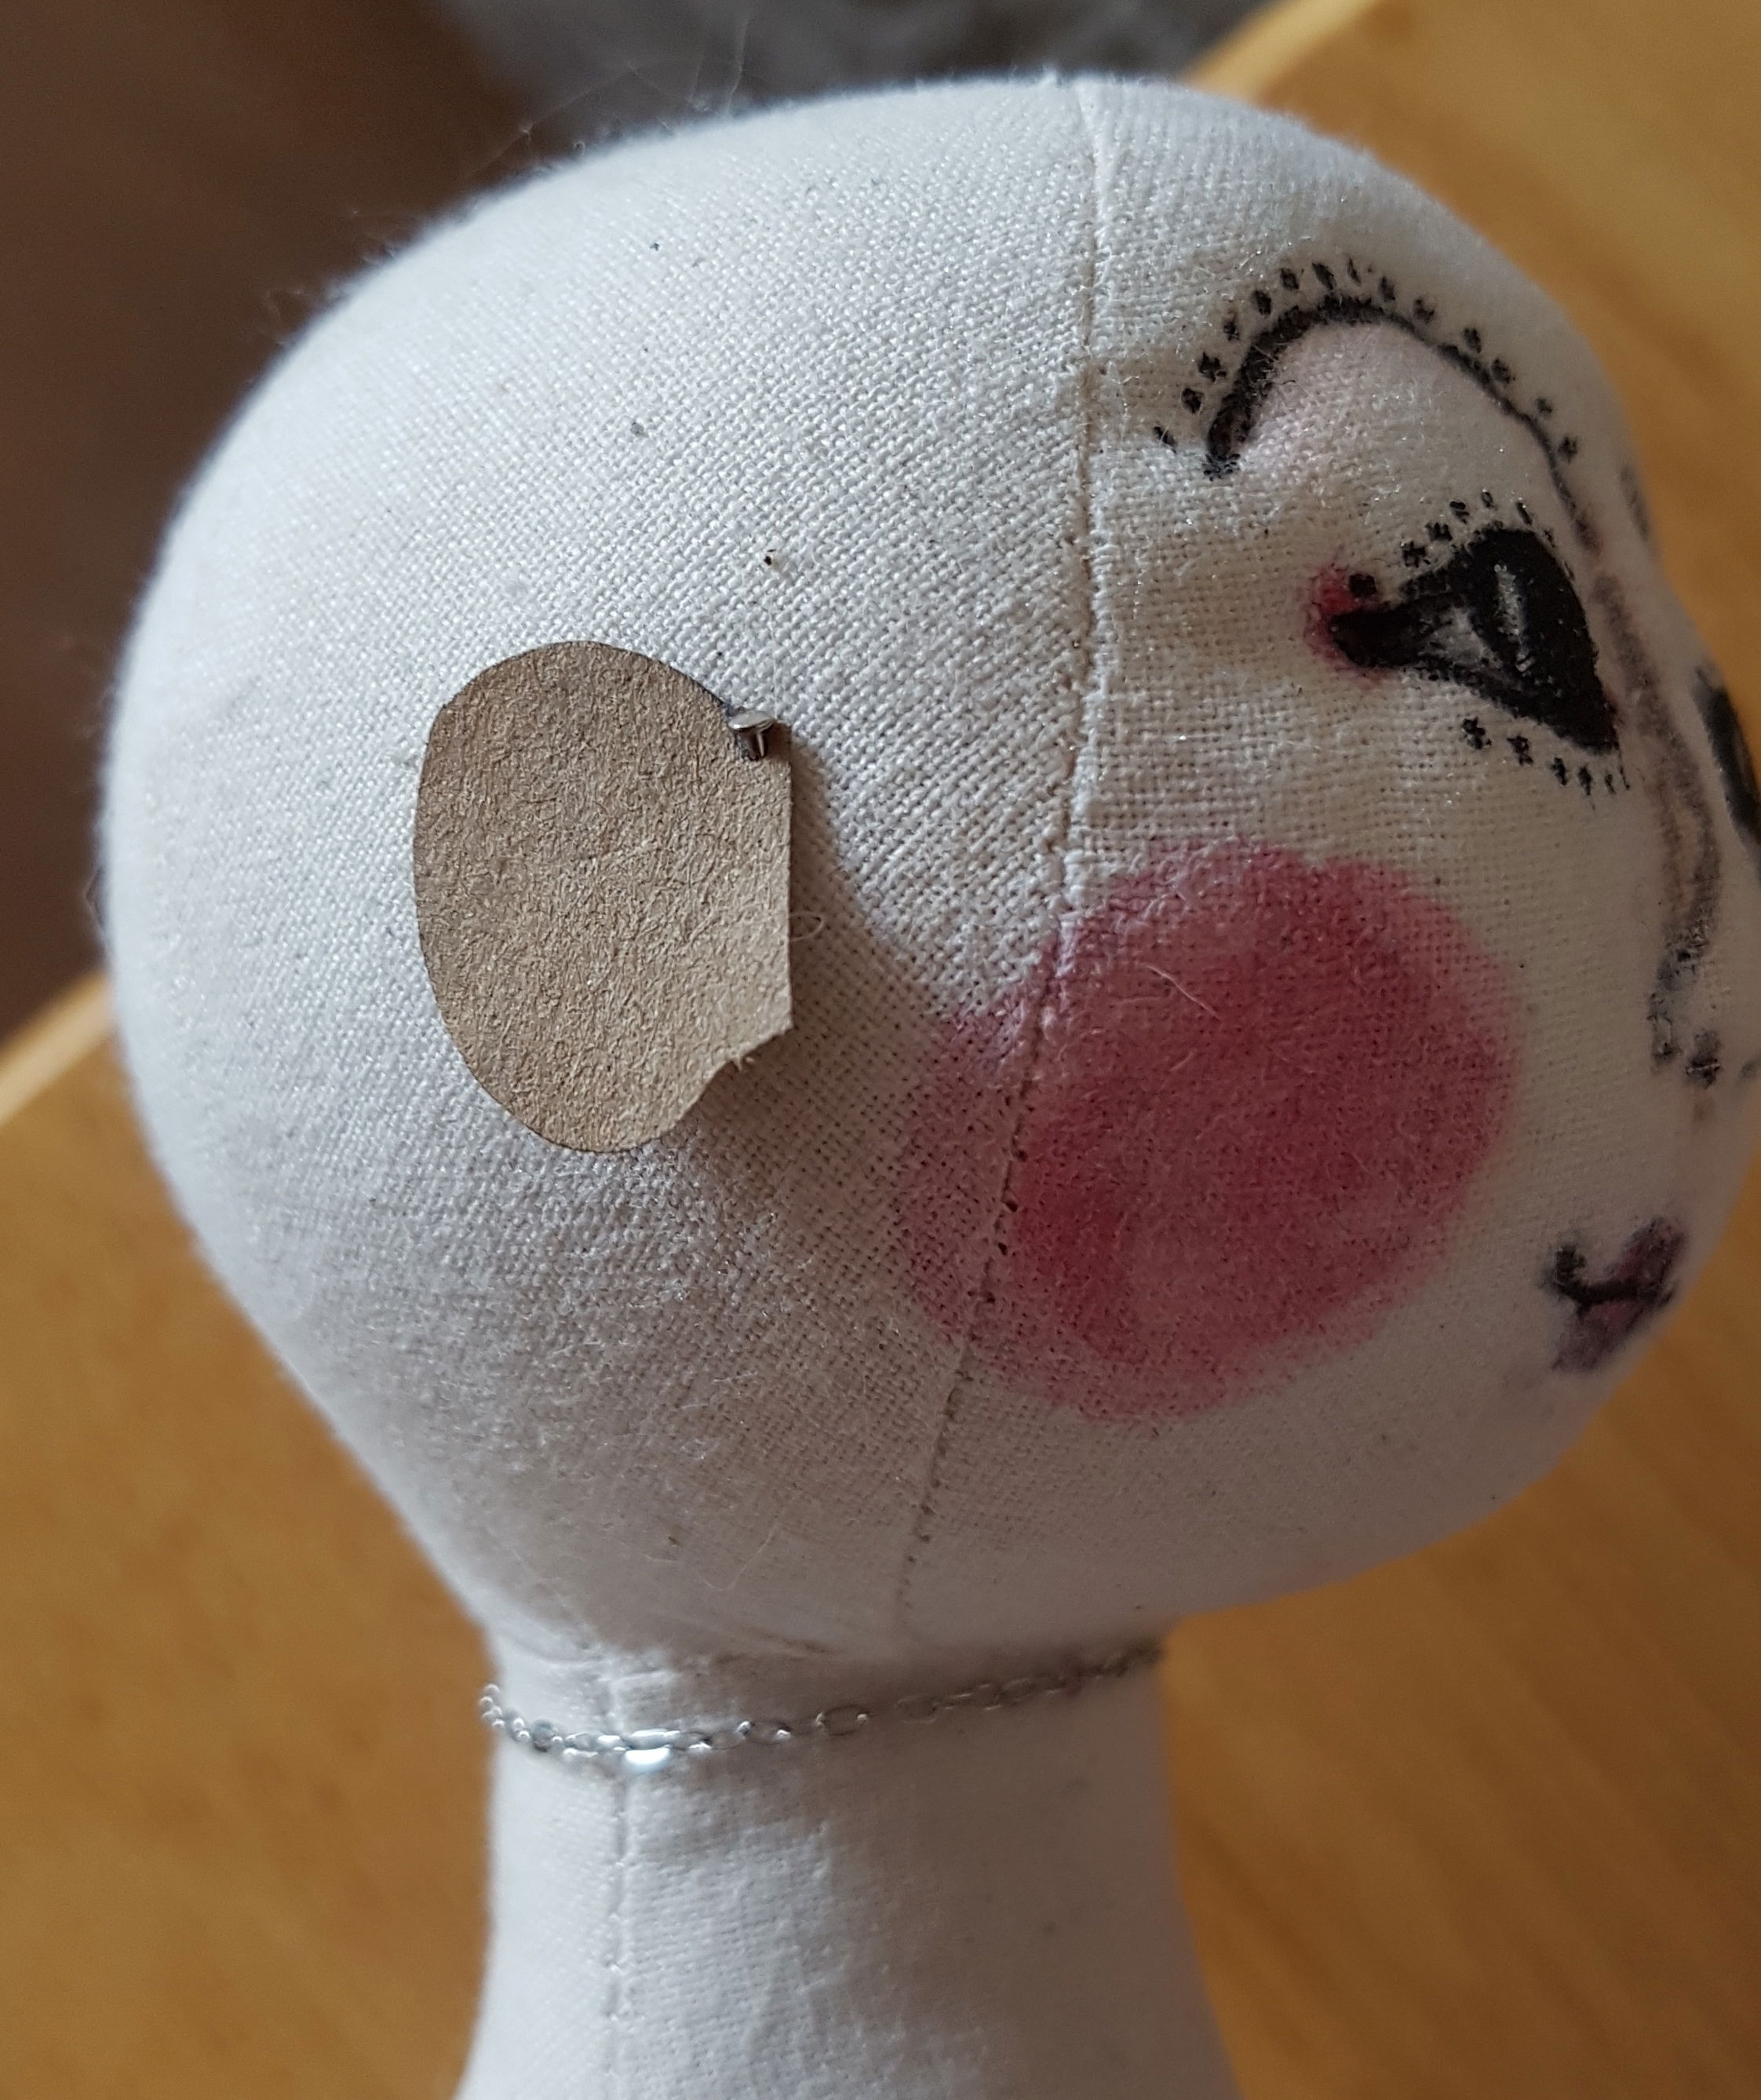
Using double thread, pick stitch through with small stitches. It's okay to go all the way through. The ears will be stitched on securely and it won't be possible to see the back of the ears without working hard at it. Use the thumbnail of the hand holding the ear to push the filler into place. The outer edge and lobe should be rounded out.
Attaching the ears:
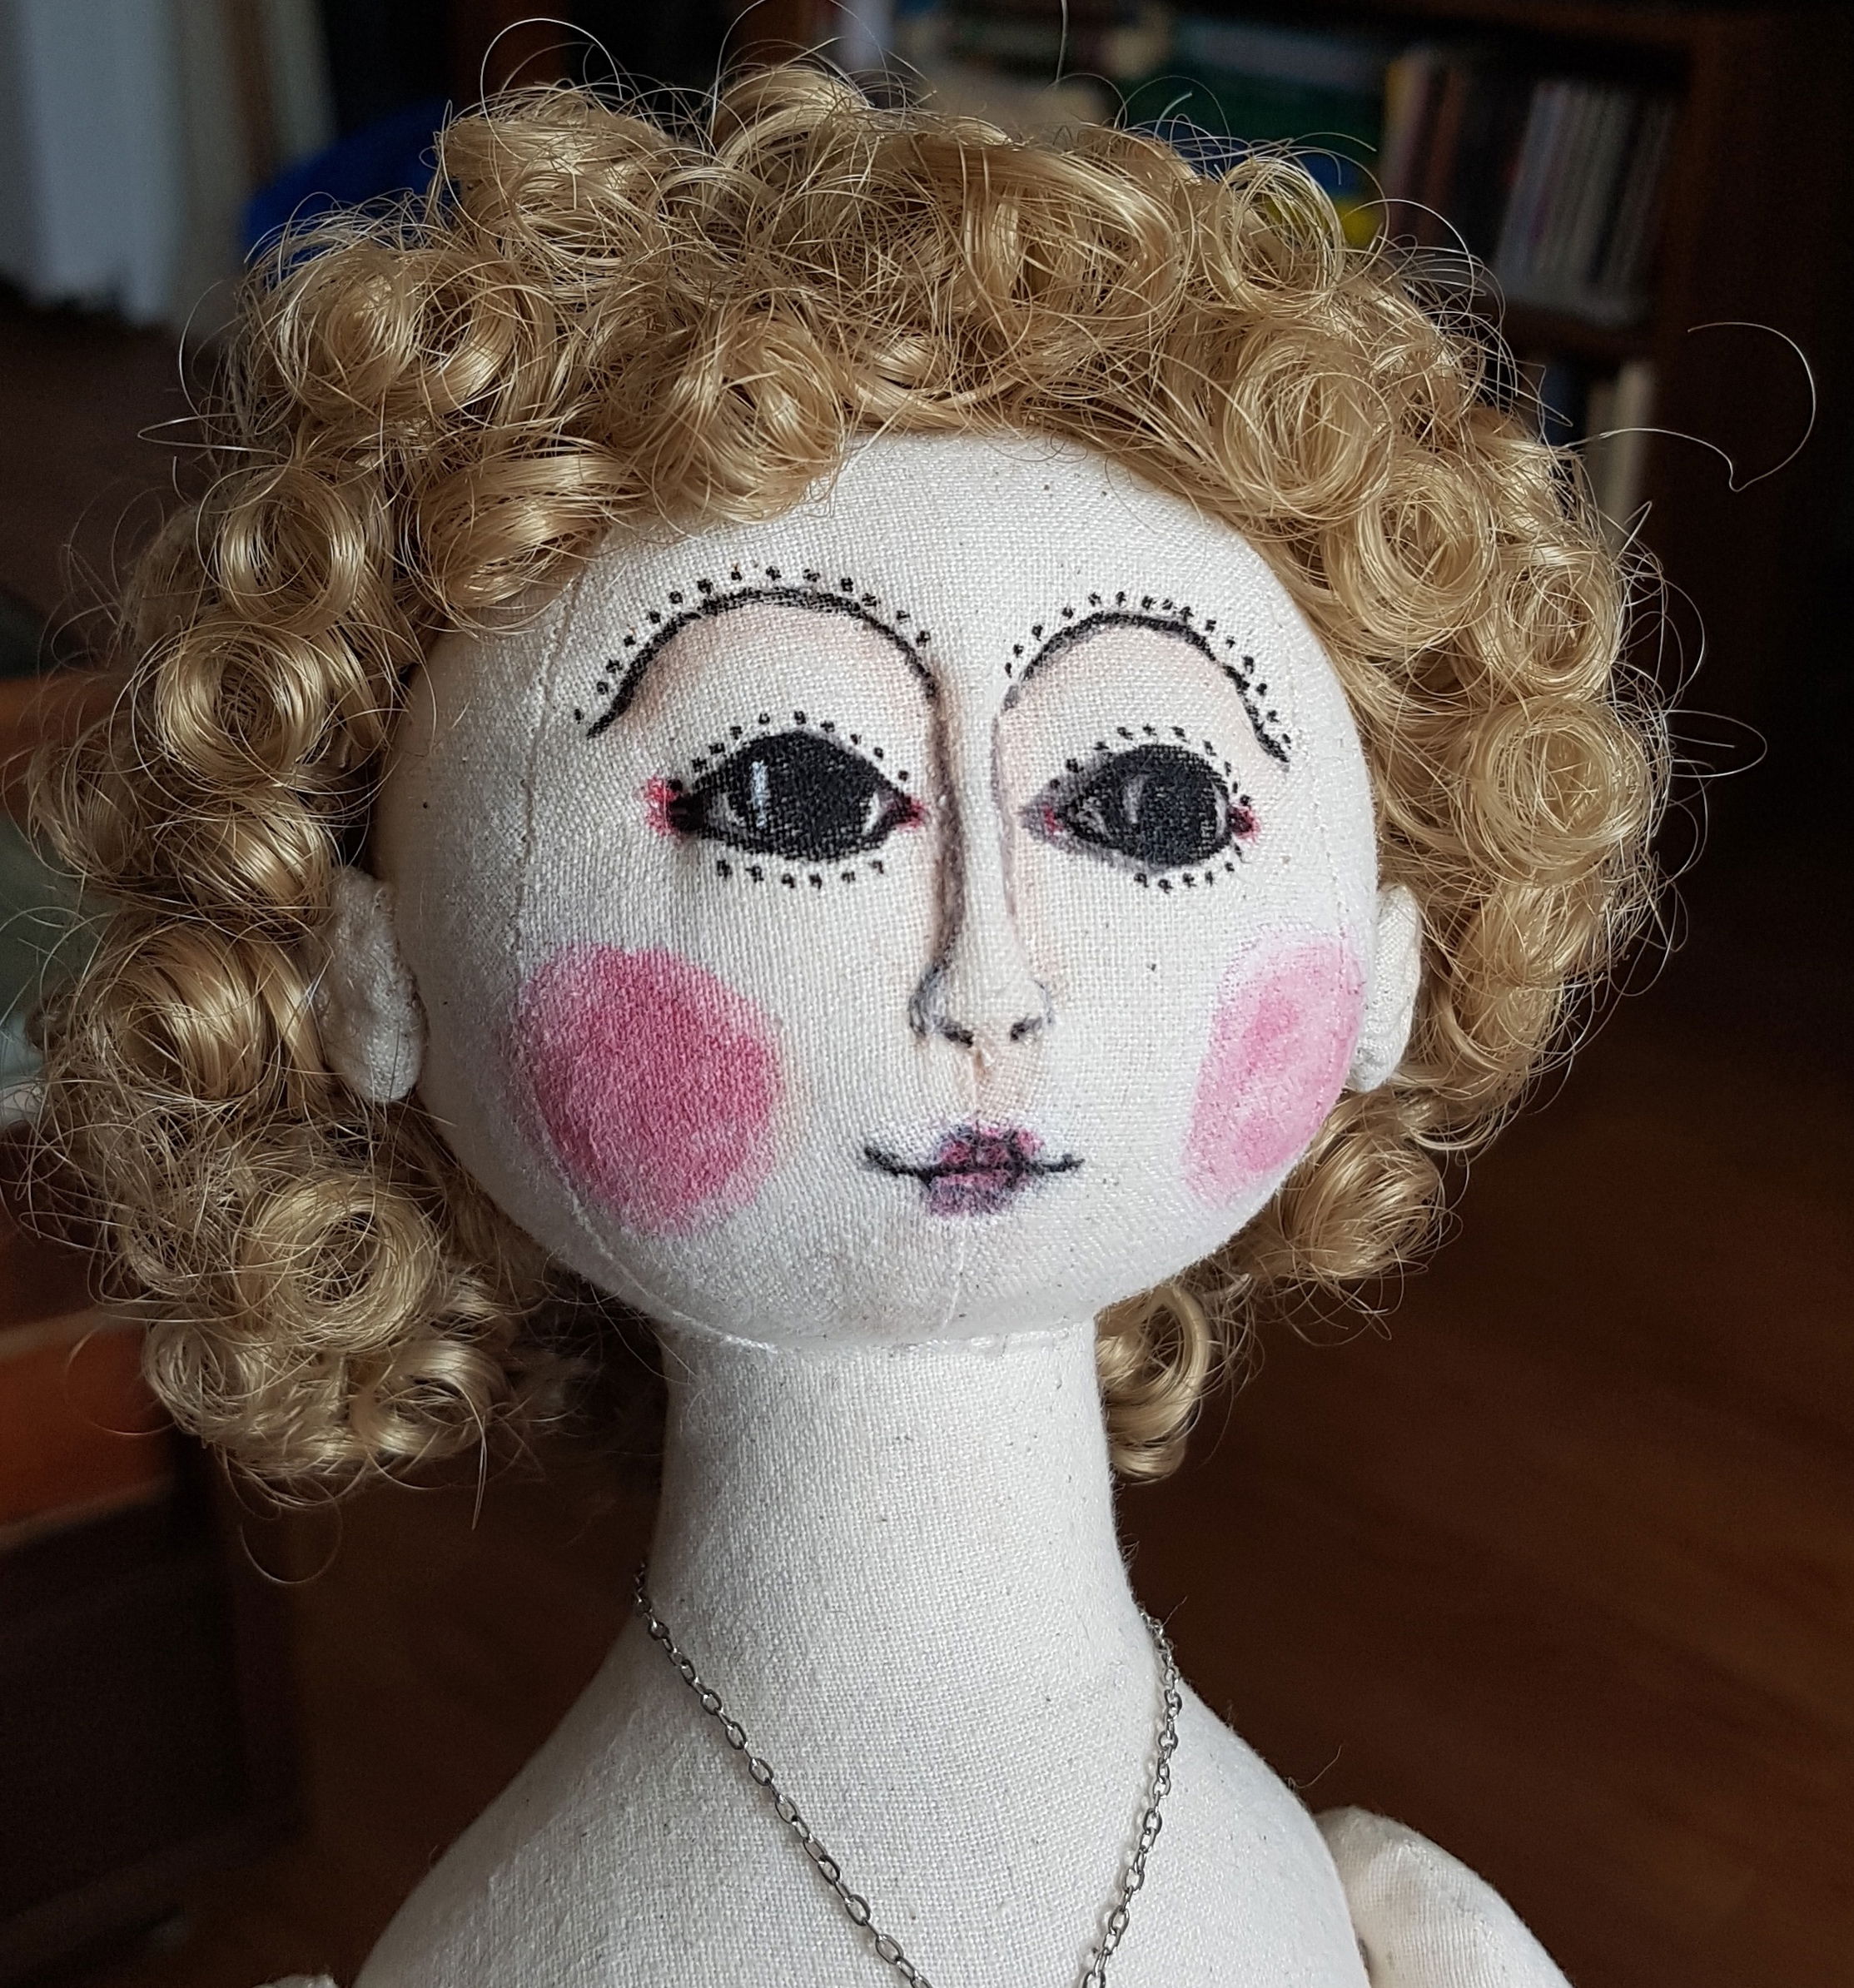
It isn't uncommon for stitchers to be obsessive about studying persons' ears once they come to attaching the Queen Anne's. When drawing a face, the standard rule is that ears sit vertically between the eye and the mouth. As to how far back they rest horizontally varies, but with the Queen Anne's the shop rule seems to be that ears are 2 to 2.5 centimetres from the eyes.
Get out the tape measure and ensure the ears are placed symmetrically. Check distance from nose to ear closure and from the bottom of ear to where head meets neck. It helps to look at the doll from the back, so the features are not distracting. Put on the doll's wig to see if they interfere with styling and adjust as necessary.
Pin the ear in place in such a way that it is secure but not a porcupine to sew. Pinning both at the same time can be painful, so mark the other's placement with a thread baste or removable pen.
Using single thread, stitch along the opening first, hiding the stitches and smoothing out the seam as much as possible. Stitch a few millimetres up the top of the ear. Remove the pin(s) and stitch the back of the ear down to the head, pulling the ear in close but still allowing the lobe to sit free for earrings. This step makes the ears secure and prevents them from sticking out like a little monkey's.
Then it's fun matching and stitching the opposite ear.
Enjoy a sigh of relief and take a moment to admire the work. It's amazing how much a difference it makes to the face when ears are added.
Make a cup of tea and maybe research some 18th Century earrings. The next post will be about the method our shop uses to put in some glittering bling.
Post script: Didn't I just find the best doll ear making video ever! Check out dOllydreams Youtube video. She does it all so well. https://youtu.be/szL1bmQiU6E?si=JfiCrdH4WKUV4Hcm