Painted Faces
The Shop Crafter here. Several blogs ago the boss promised to present my approach to painting the Queen Anne faces. Though they are cloth dolls, our ladies still represent the 18th Century babies and aesthetic. This involves research, planning and design decisions. All things I enjoy. The techniques I chose for painting their faces are based on supplies I have available and the tools in my skill set.
Looking for more help? The Clairebearsfolly Penny pattern on Etsy came with terrific instructions on how to sculpt, draw, paint or embroider doll faces. The website resource section lists some doll makers' books with good info too. There are many references for painting doll faces out there on websites and on YouTube. Check them out. You might find a more comfortable method that matches your skill set.
Supplies:
1. Super fine indelible, waterproof pen/marker. Black. This is not optional for Queen Annes as most of their features are outlined with black. Do NOT use Sharpie Pens. They can bleed into fabric and fade when washed. Different doll artists recommend different pens, so do some research and decide what you can afford.
2. Disappearing sewing pen/marker. Fine point. Really fine. I use Black to preview the desired effect. Amazon sells sets at a good price. Read the reviews first though.
3. Watercolour pencils. A basic set is enough. I use mostly the reds, black and browns. Maybe blue in future, for eyes.
4. Clean water in a little tub.
5. Brushes. Small and smaller.
6. Plastic wrap or bag to cover the doll's body. Just in case.
7. A wet rag. Just in case.
8. A sewing pin or needle.
9. Krylon Workable Fixatif. Expensive and smelly but 'prevents smudging and allows easy rework'. I have yet to try reworking anything after using it.
Tips:
- If you haven't used watercolour pencils, watch some YouTube videos first. The bestest biggest tip is to not wet the pencil itself. Draw first and then brush the area with a small amount of water.
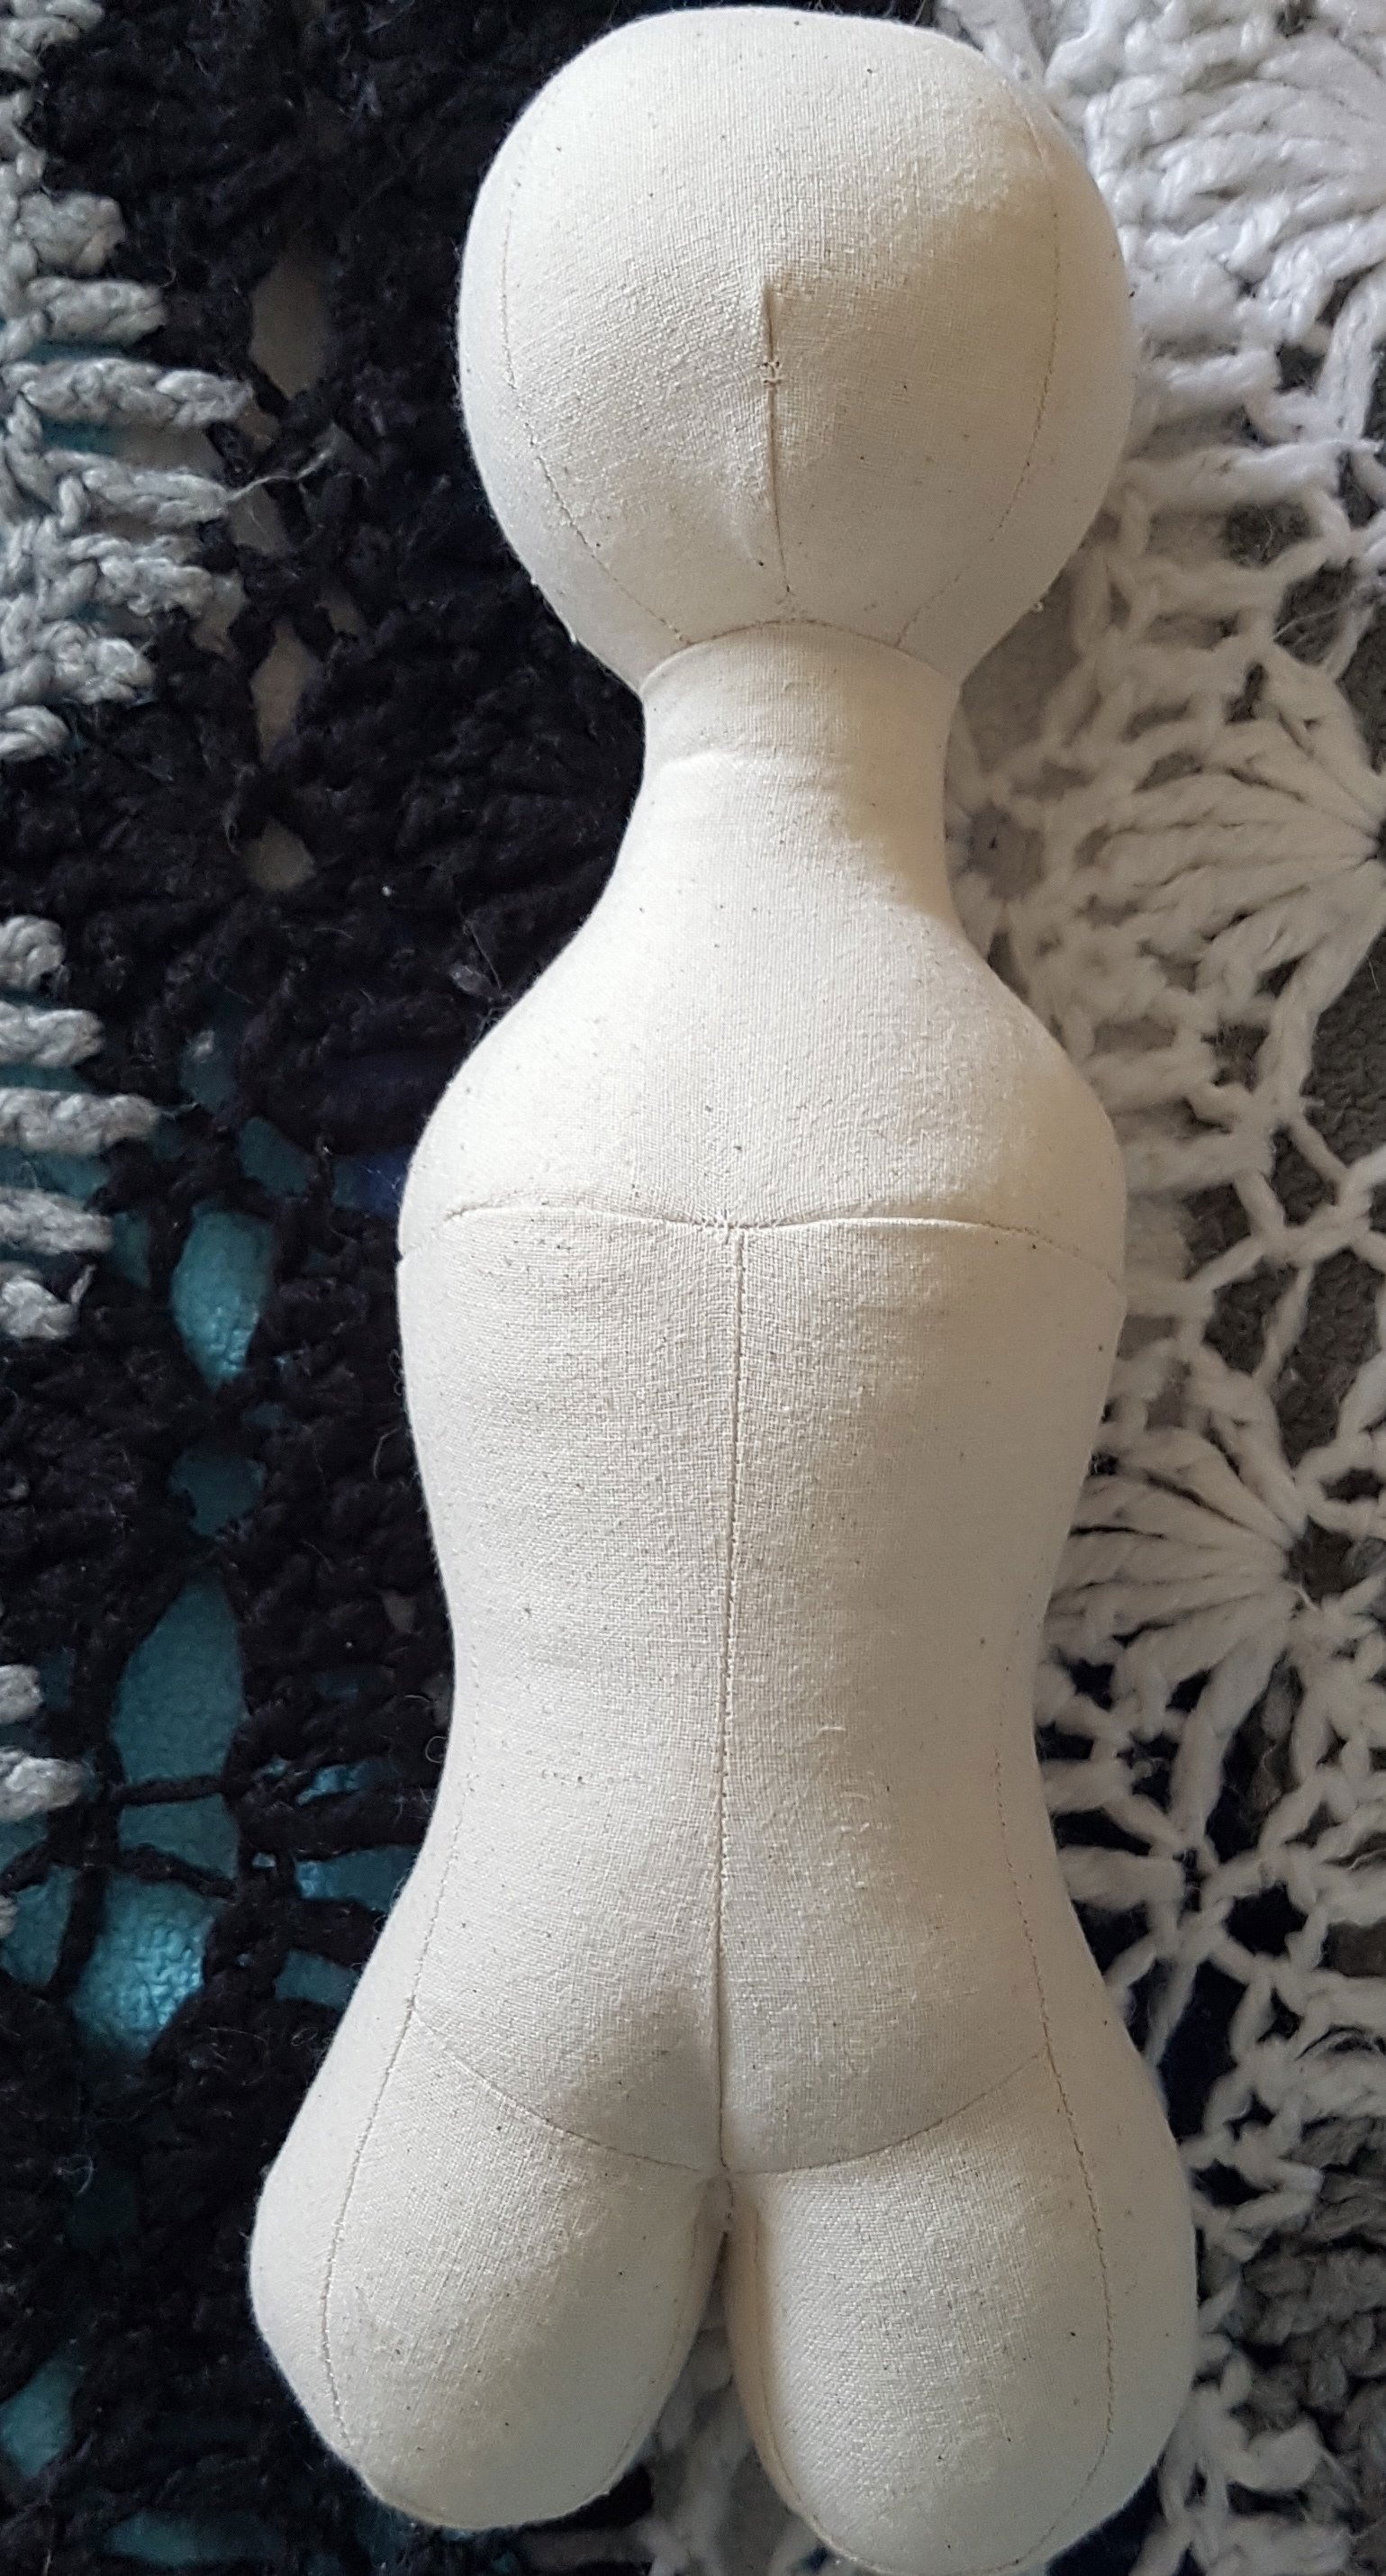
- Work with the doll's torso and head only, to make handling the doll easier while working.
- TEST your pens, paint and fabrics to ensure the face will not wash out before or after fixing. You never know what your doll will get up to. See how in my instructions.
- Draw the face on the doll and then sculpt the features.
- Paint the face only after you are happy with the sculpt.
- Take your time. Step back from the doll. It's easy to get carried away and overwork it all.
- Document your process. Note your research resources. Refine and adjust steps and designs. Then do it again!
Testing the supplies:
Most collector dolls do NOT go in the wash. But it's important to test supplies to ensure they do not vanish or bleed into the fabric and are indeed permanent.
My babies are made with cotton muslin. Most muslins have a sizing in them and often weird bits, and cotton will shrink at least 10%, so machine wash and dry the fabric first.
It takes some patience and a spritzer water bottle to iron the wrinkles out. Keep at it 'til it's relatively wrinkle free. I will even re-iron the cut out doll pieces before sewing. Smaller wrinkles usually flatten out when the doll is stuffed.
1. Test your disappearing pens first. Some sewing markers leave an oily residue, so test them on what ever fabric you plan to use. Practice drawing a face on a washed off-cut and see if the iron will remove all the pen without residue.
Use just the tip of the iron on the fabric to remove the pen. Or hold the iron so it steams just above the fabric. Nothing there? Yay.
2. Draw another face on your swatch with the indelible waterproof pen/marker on the fabric. Practice making small eyelash and eyebrow dots. Quick dots with the tippiest tip of the marker.
3. Let it dry. Hand dunk this test swatch in warm water in the sink. Rinse and place in a folded towel to press the water out. You don't need any more wrinkles.
4. Iron the swatch dry for instant satisfaction. Is the indelible marker still there? Yay again.
5. Now fill in the test features with the indelible pen and watercolour pencils. DON'T wash it yet. Let things dry.
6. Gotta fix the paints now. Go outside to do this. You don't want to breathe in the spray, so check the wind direction. (Guess what happened when I sprayed my first swatch?) Spray the whole test face with the fixative. Keep the spray light by holding the can away from the swatch and yourself, as recommended.
Two coats does the trick. Let it dry thoroughly between coats and after the final spray. Put the doll to dry where no one can smell the fixative. It's stinky. Leave it in a window sill or outside in a safe spot.
7. Dunk the dried swatch in warm water as you did the first time. Let it dry.
7. A good result? Now that you know it's all useable, move on to painting your Queen Anne.
Planning the face:
Research on my favourite websites produced lots of inspiration for how my babies could look. I chose historical examples that work well with my doll's actual head and face shape. Some of the vintage ladies' faces are kinda funky or out of proportion. That's part of their charm. That and their glass eyes does make them a challenge to recreate.
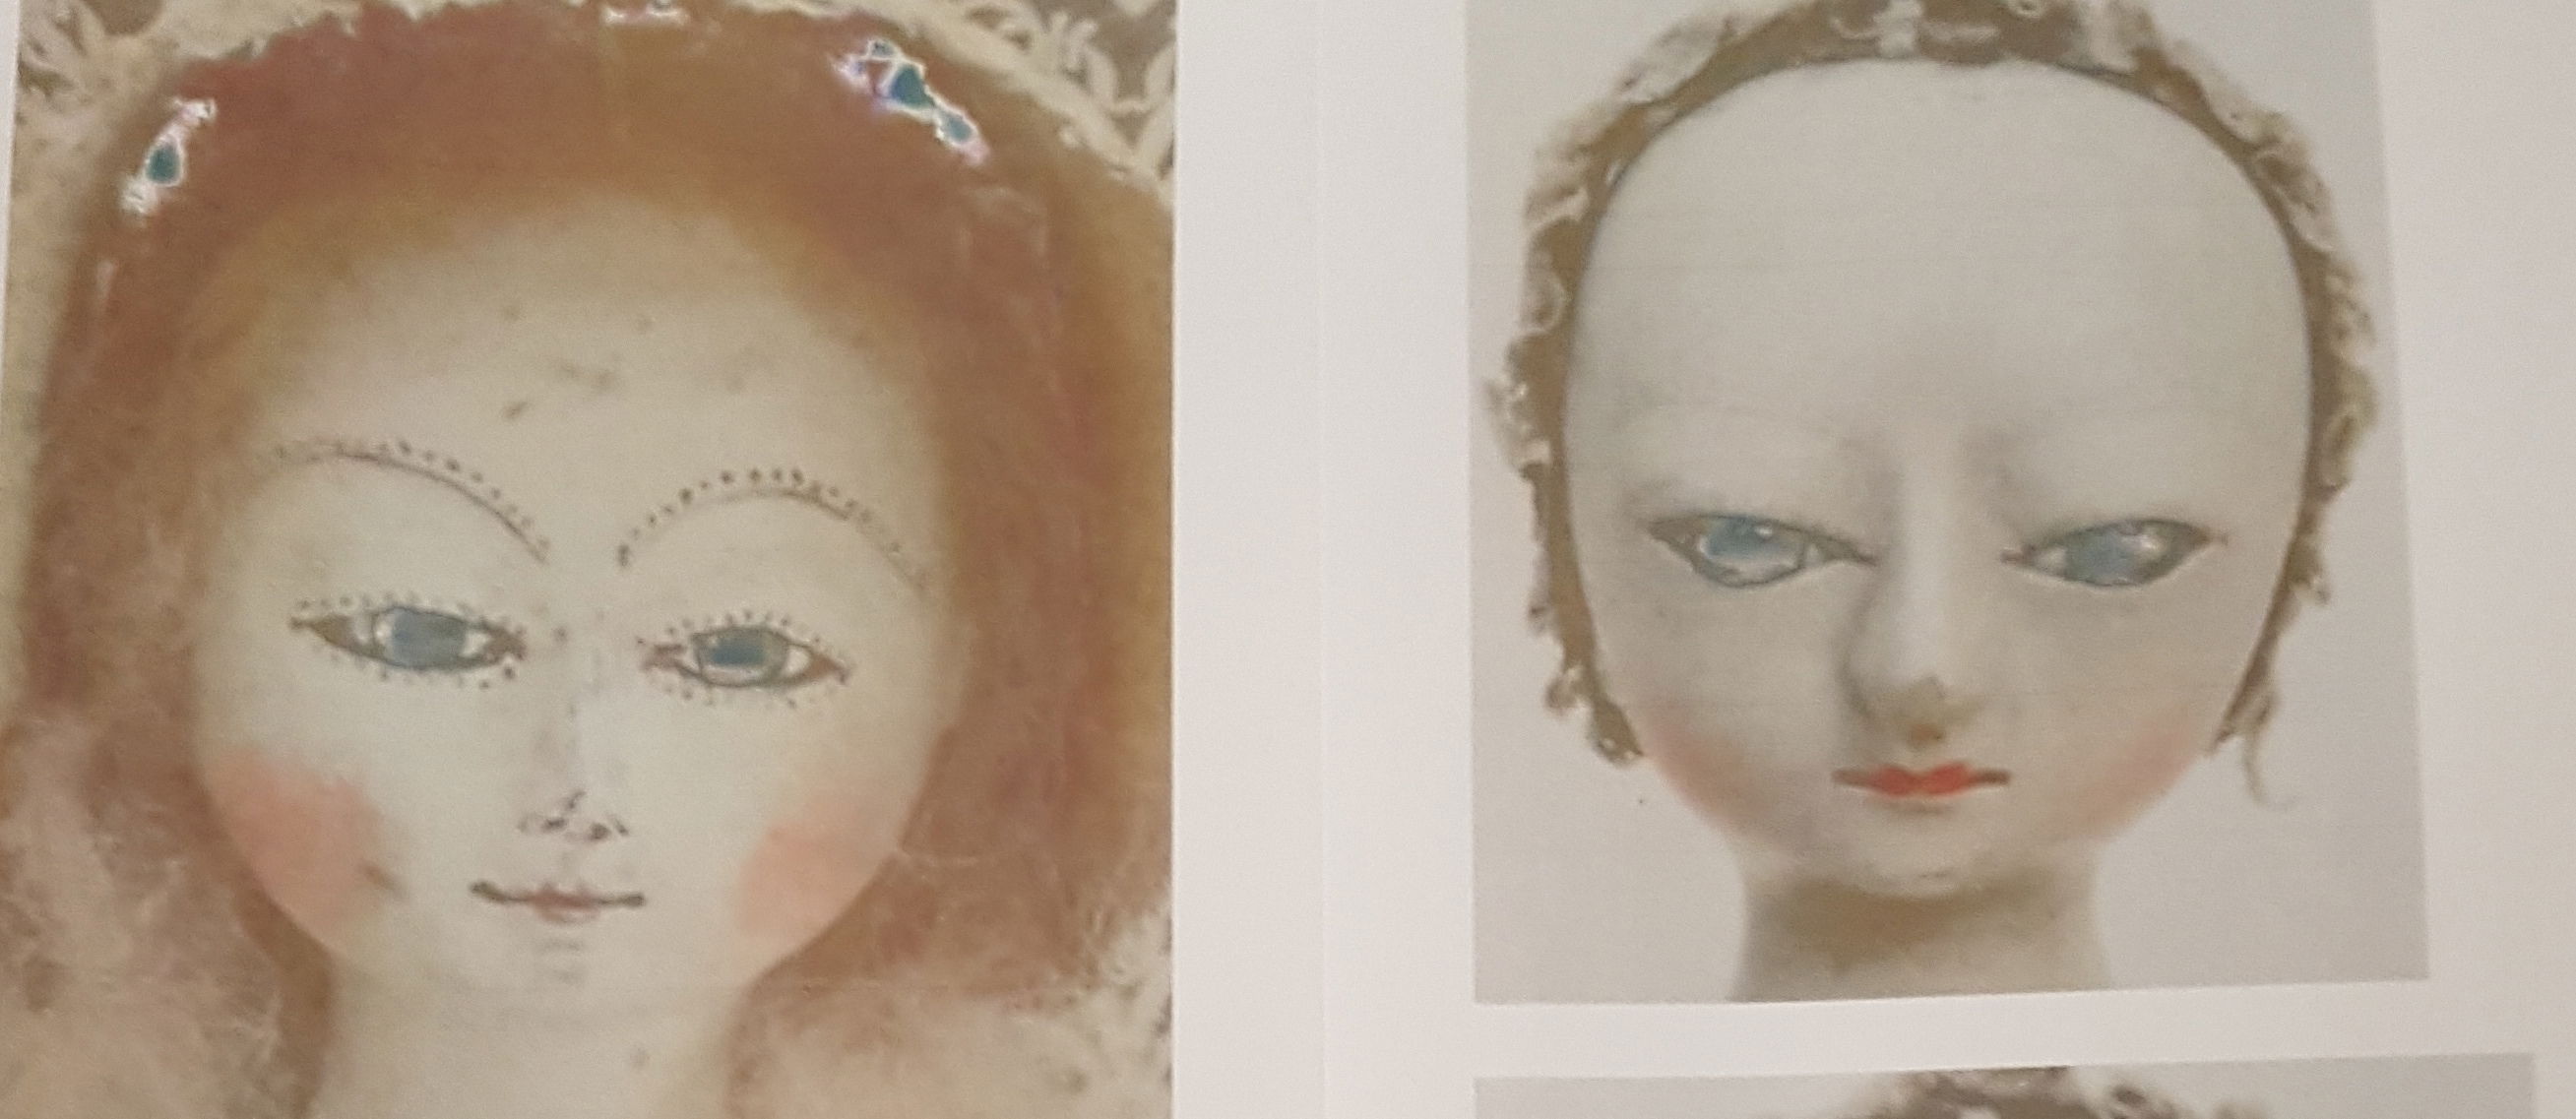
Inspiration for Abigail Inspiration for Lavinia
http://atticbabys.blogspot.com/ and http://theoldpretenders.blogspot.com/2013/11/the-newest-old-pretender.html
How to get from photo to face:
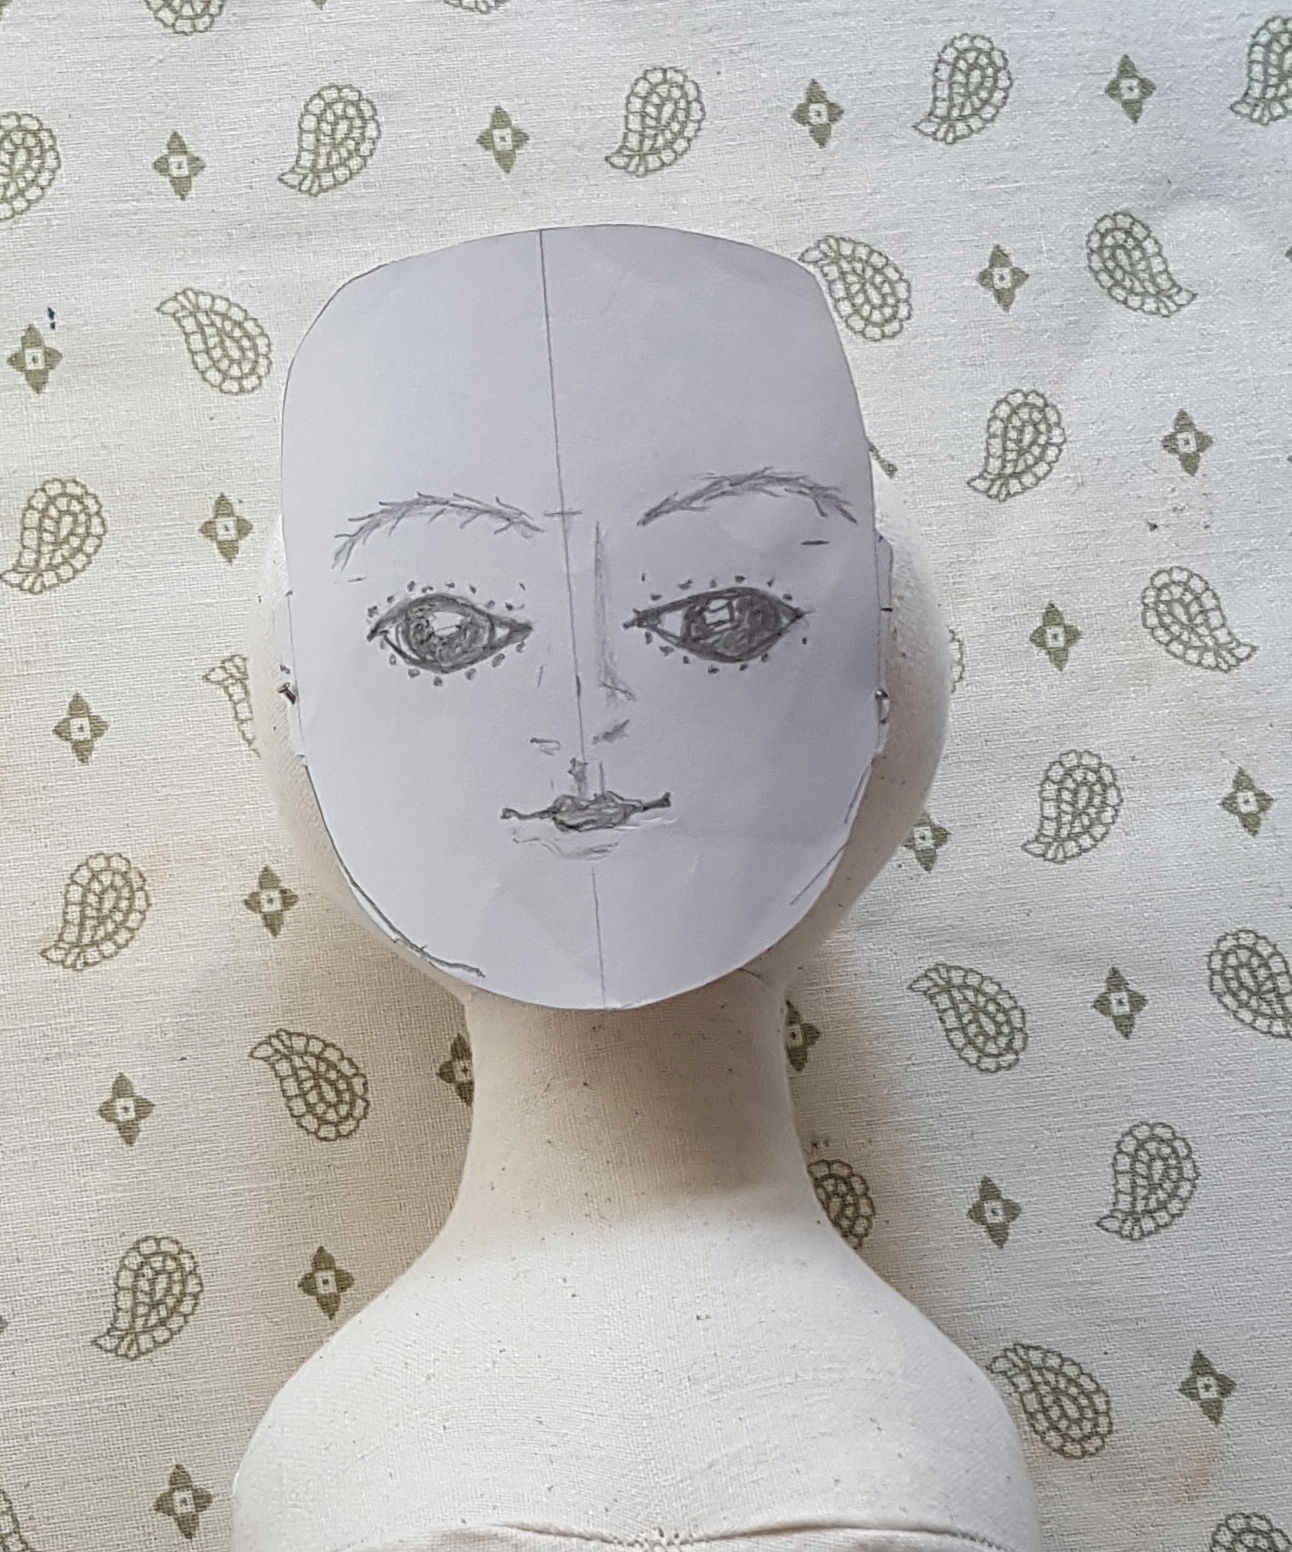
Screen shot website examples you like. You can scale your chosen screen shot in an app and print it out to create a template. I find this onerous because it takes a while to perfect the correct size, but it does work. OR simply measure your doll face, mark out its outline and practice drawing the features. You can use your drawing as a template too. I free hand on the doll now. Talk about practicing first!
Pin the printout or drawing on the doll. Step away and take a look. Is the placement and proportion pleasing? Should the face look bigger or smaller? Move it up and down. Take some notes on what you decide. Take measurements if that will help make changes. Draw or print out the new changes.
Using the template:
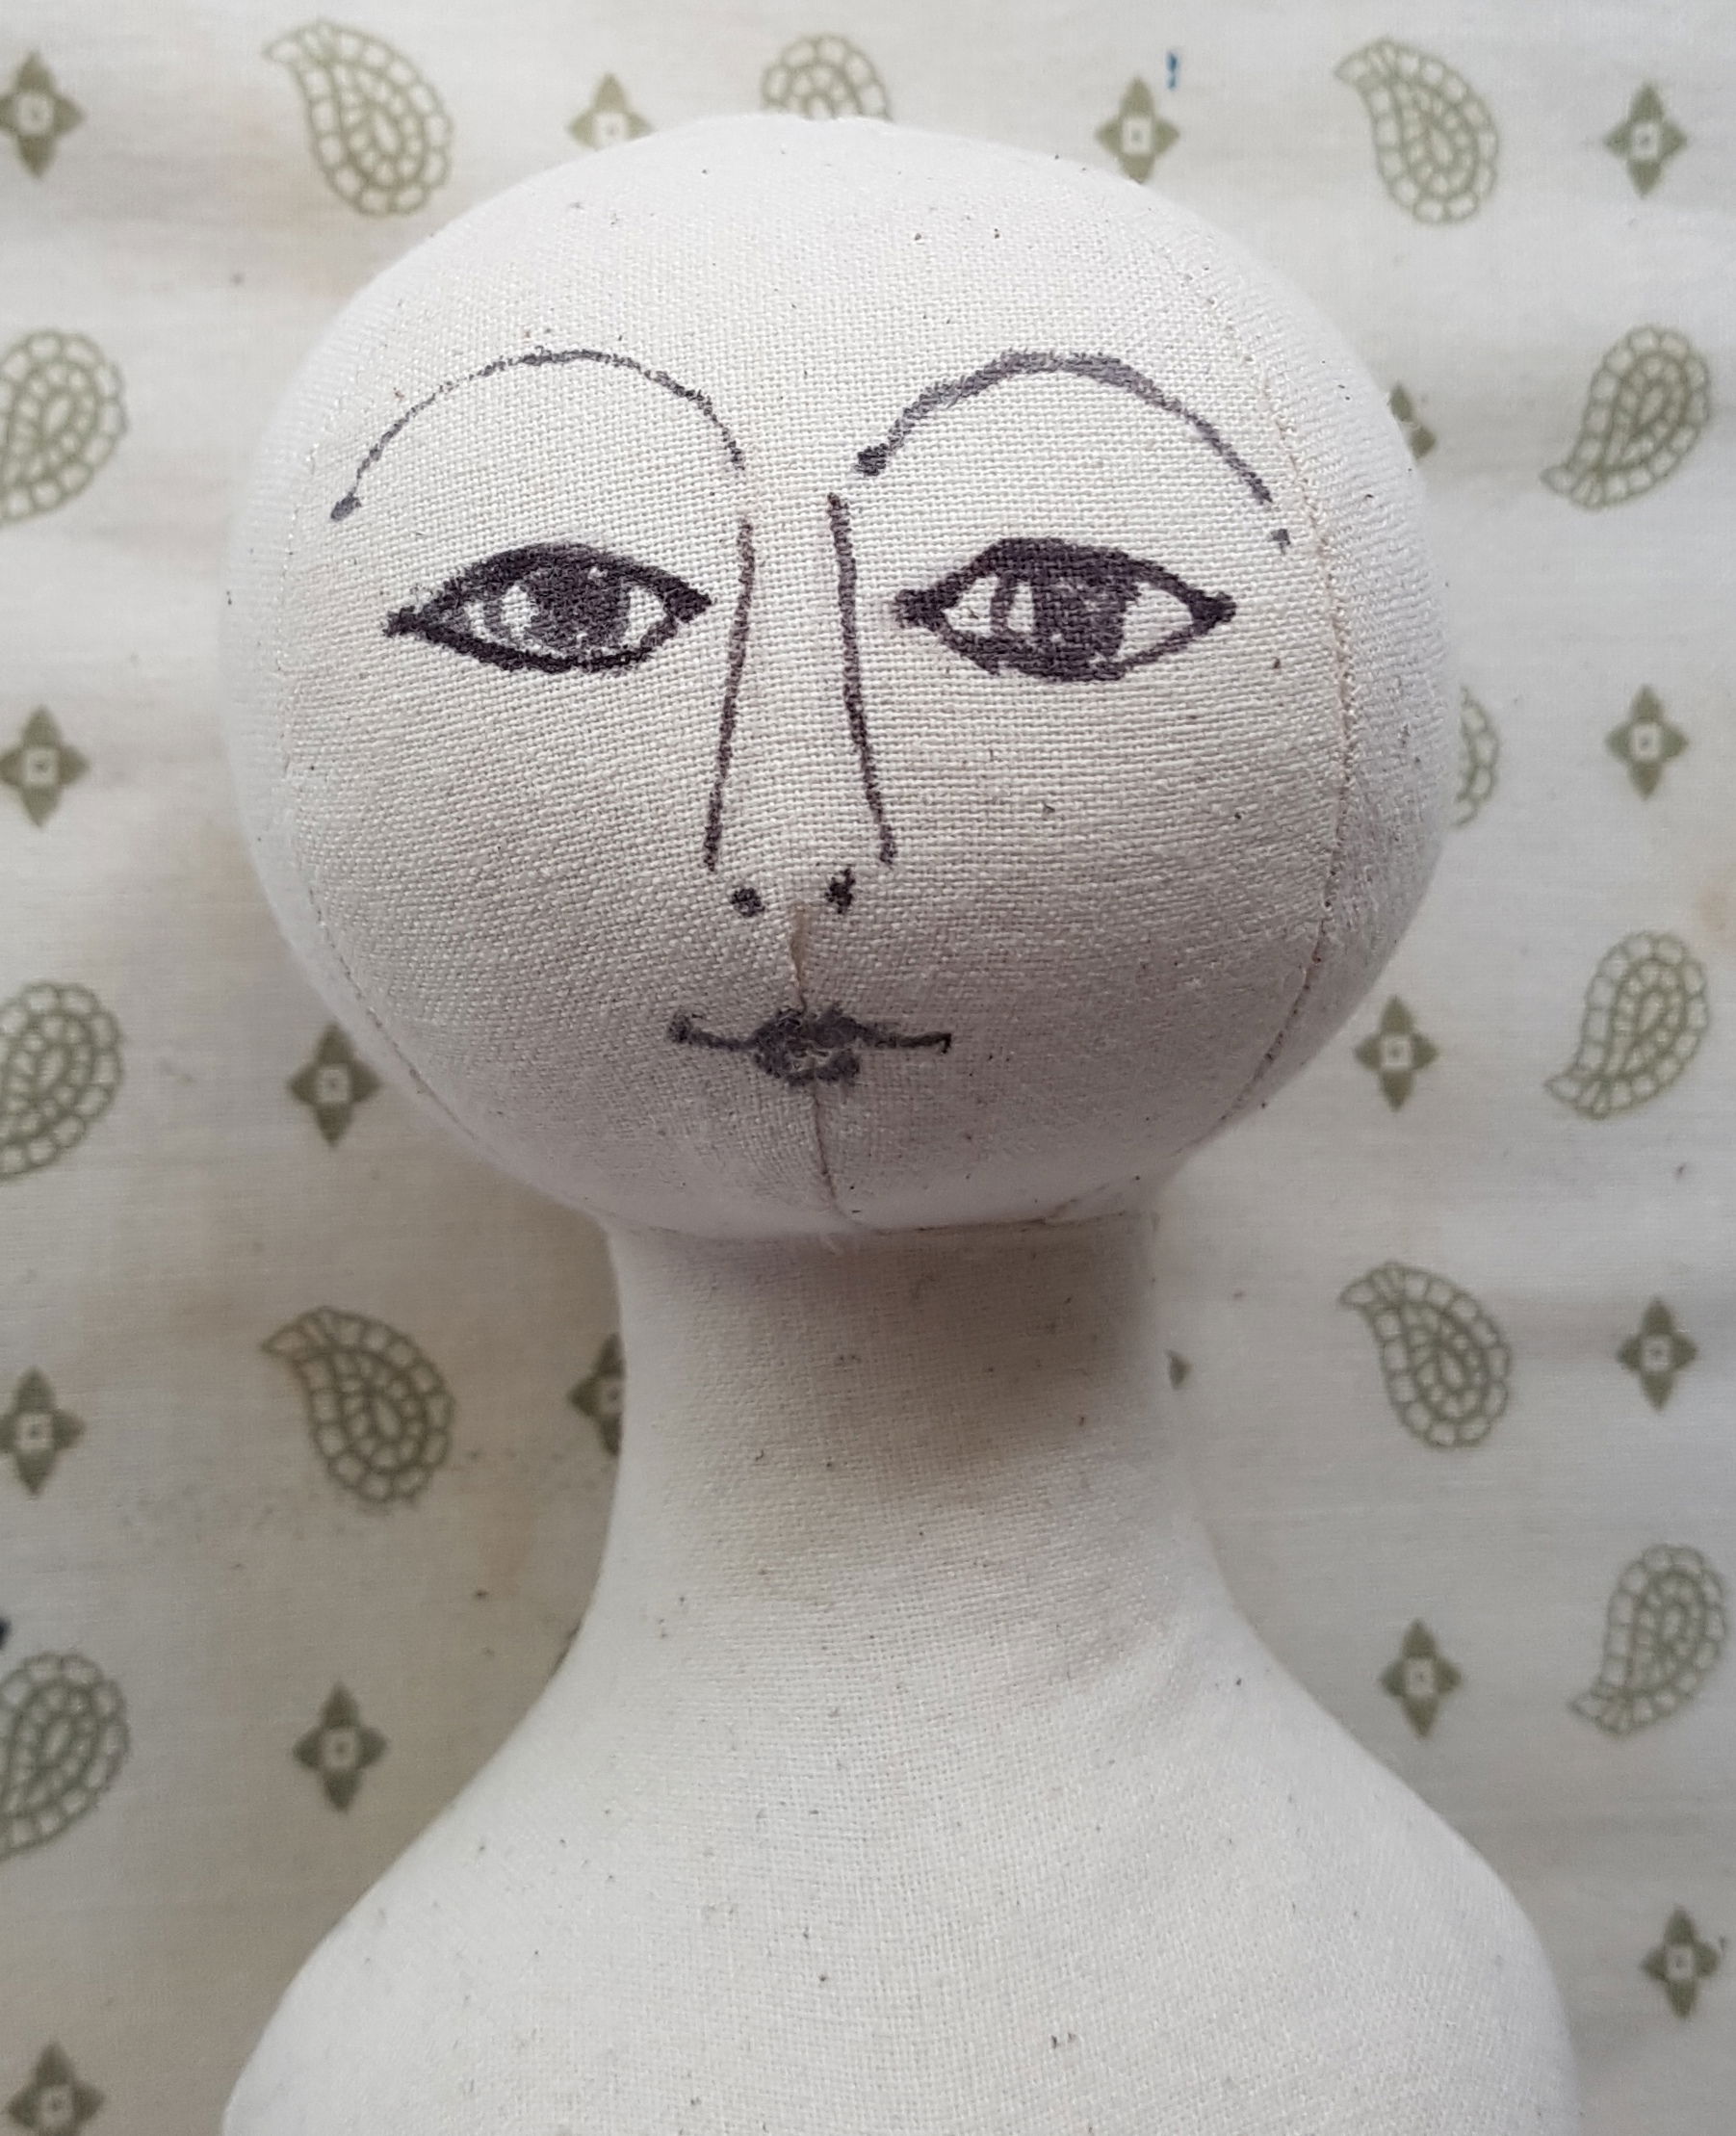
- To create a template, use a needle or pin to poke a small hole at the ends, top and bottoms of the eyes and mouth of the face. Poke holes at the ends and height of the eyebrows and at the nostrils. Poke as many pin holes as you think useful, but don't make them too big or too confusing.
- Practice this next step on an off-cut of your fabric first. With the disappearing sewing marker, lightly dot through the pin holes. Remove the template. Can you see the outline enough to work with it? Practice until you are confident. Maybe make the poke holes a bit bigger.
- Now pin the face template to the doll. Keep it symmetrical and balanced. Step back and look. If you are satisfied, then get to work with that disappearing pen and mark the dots. It's a bit different on the round face than when it's flat, but don't fret. The pen will disappear, remember.
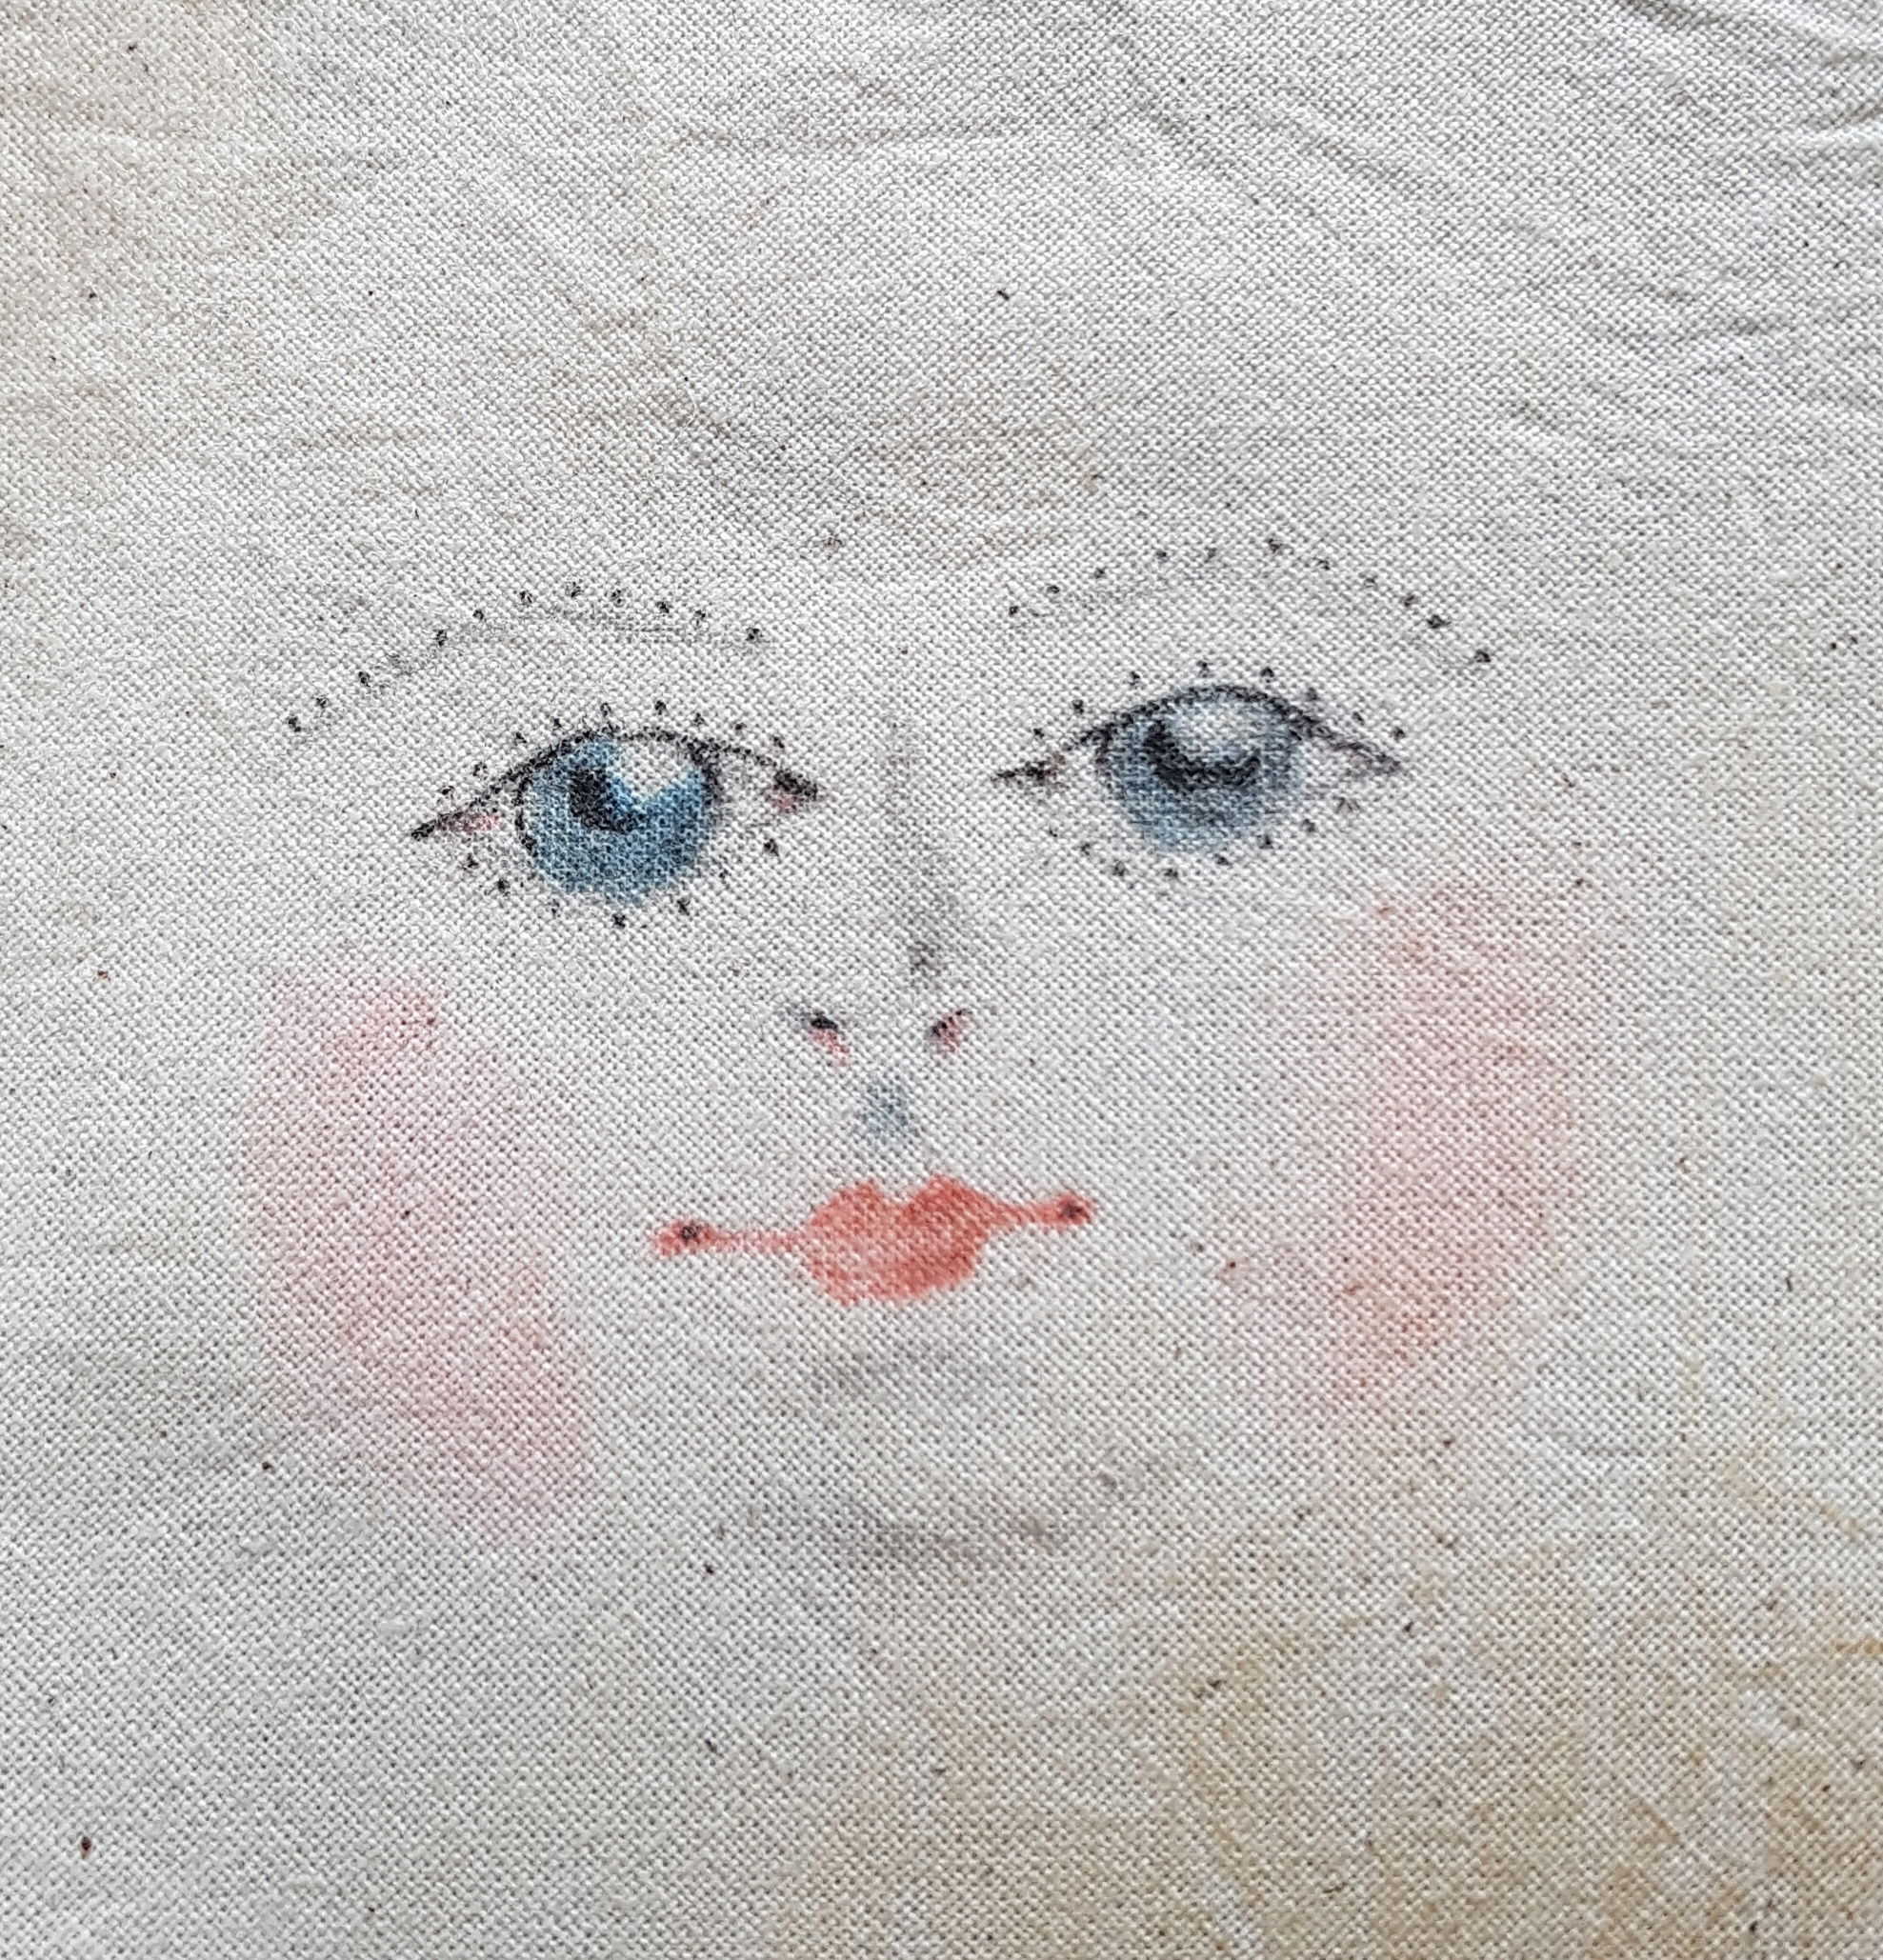
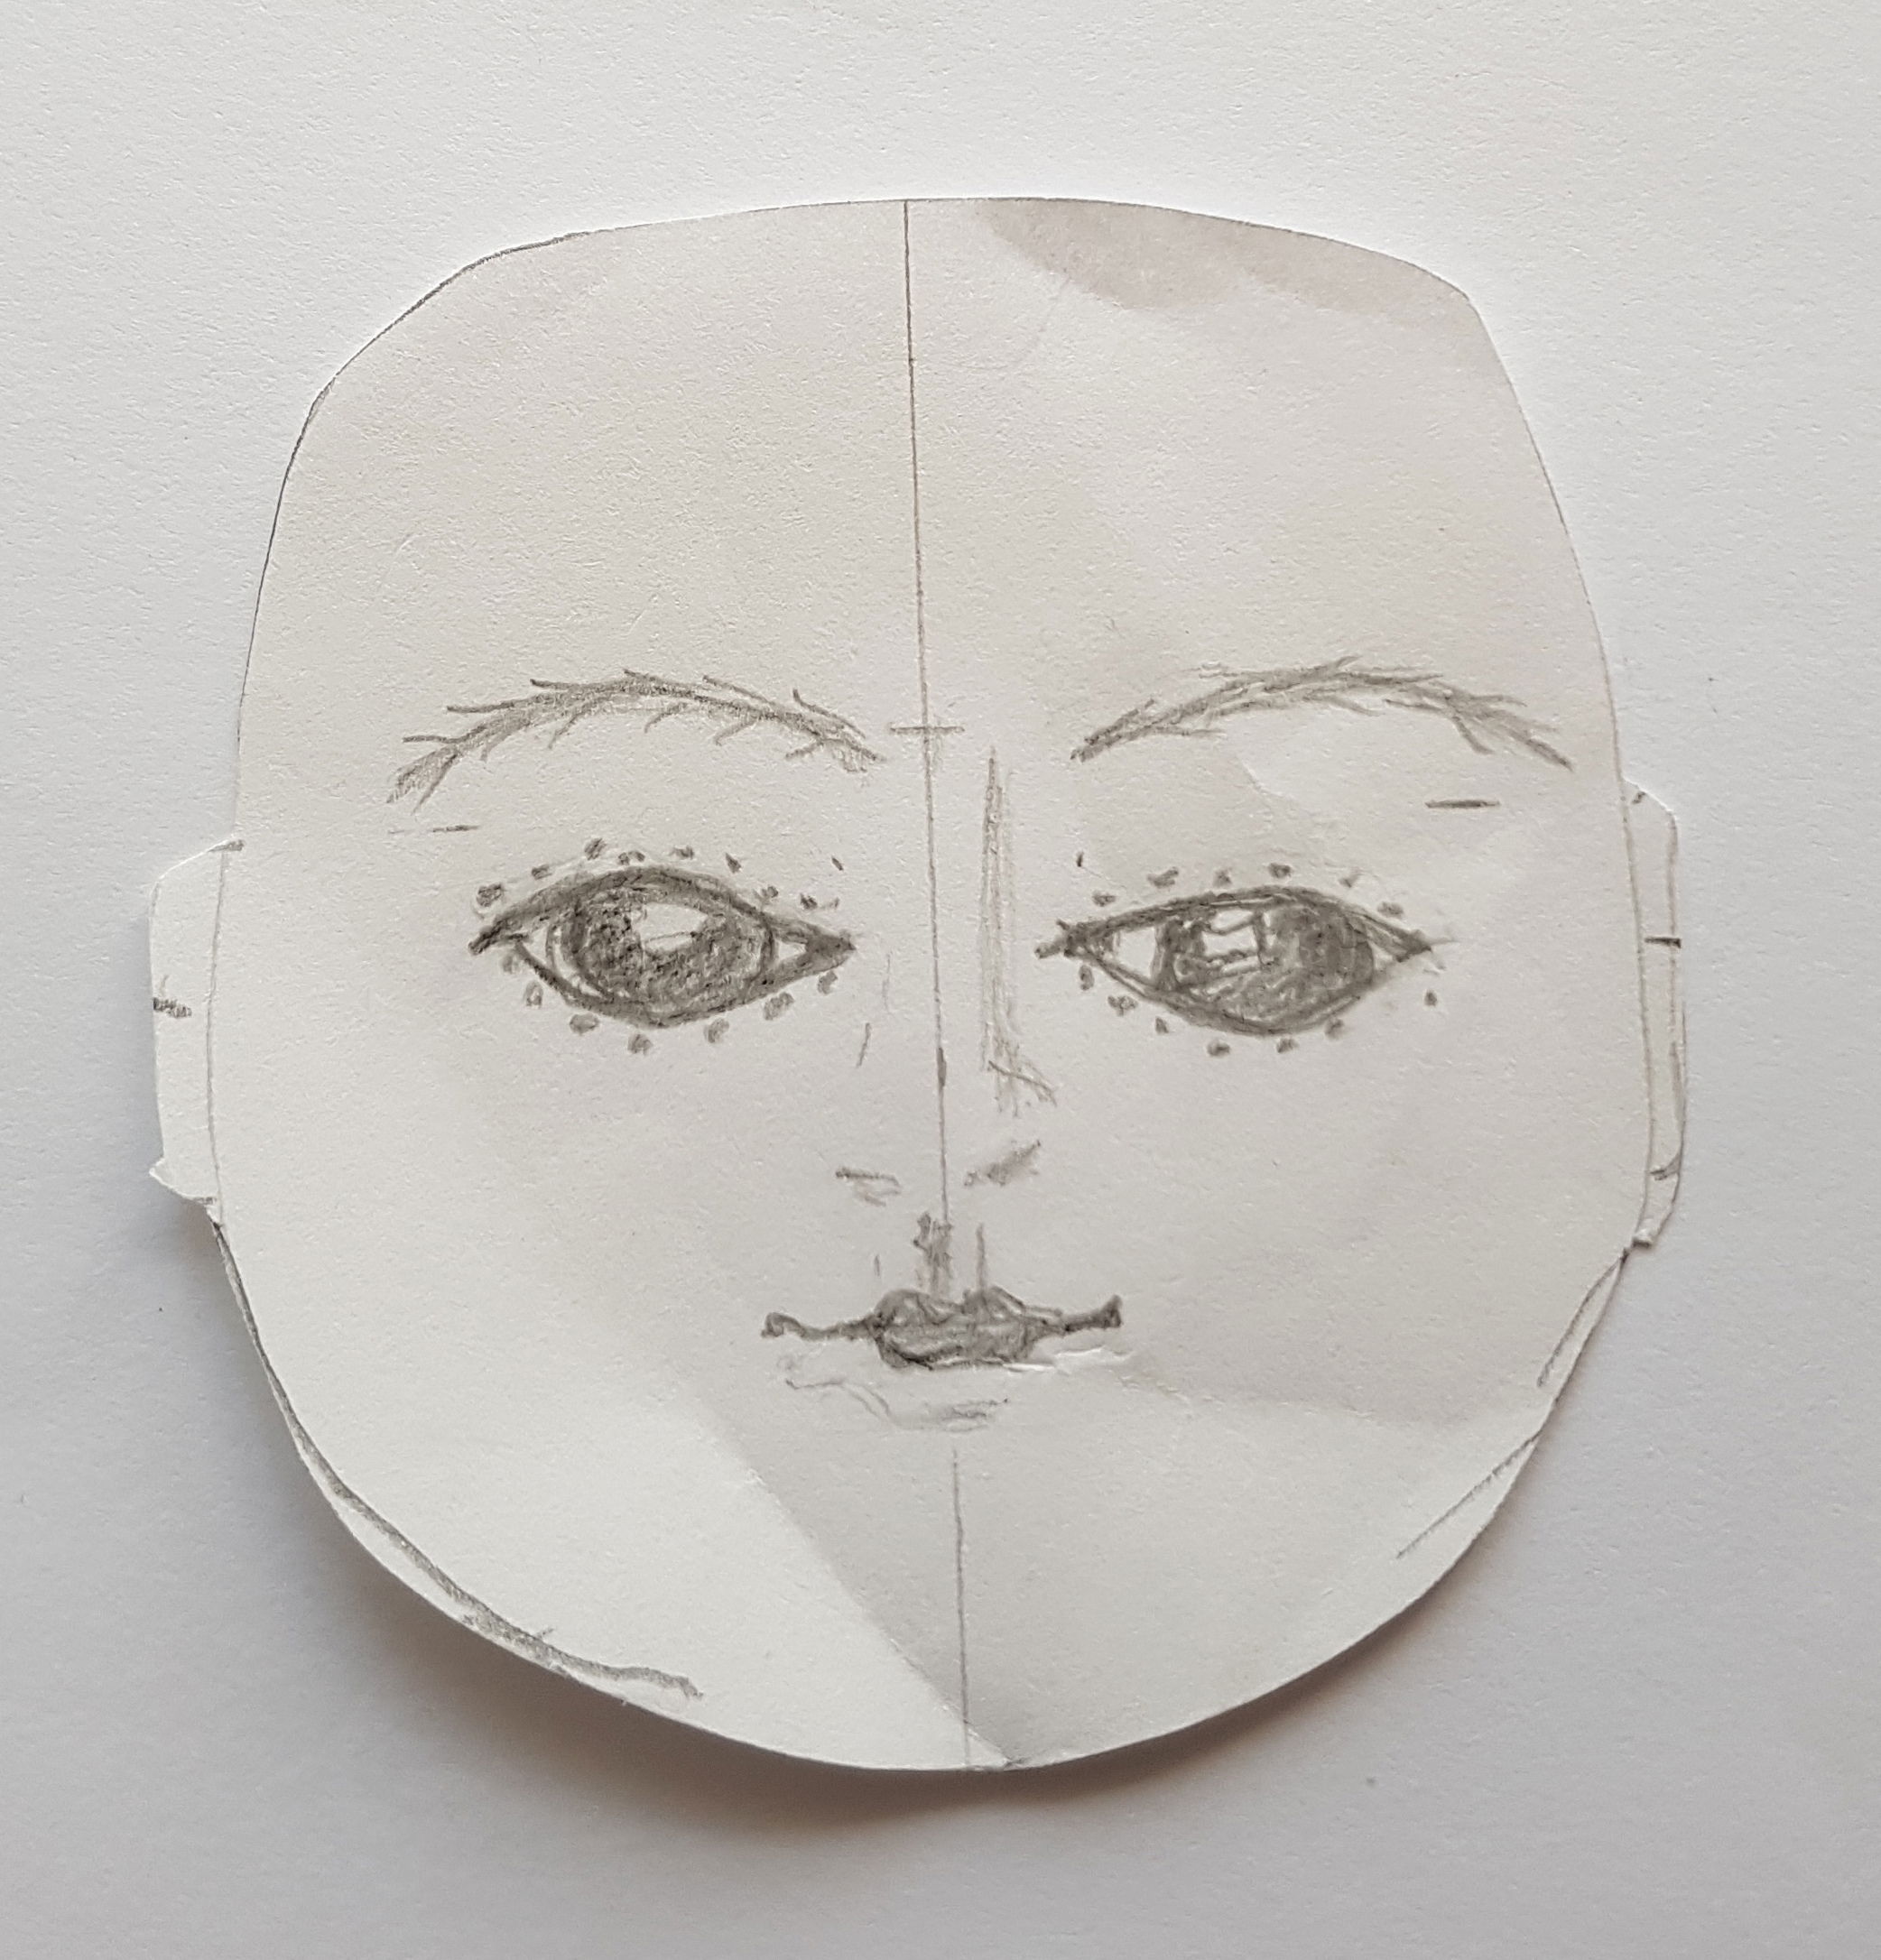
- Remove the template and lightly draw the features' outlines using the same disappearing pen. Draw the nose as a guide for sculpting. Fill in the pupils, leaving the highlight bare, enabling you to see the entire effect.
- I wait to put in the eyebrow and eyelash dots until I am painting the permanent face. But if you are curious, go ahead.
Disappearing marker drawing for Abigail. Her nose will slim out with sculpting.
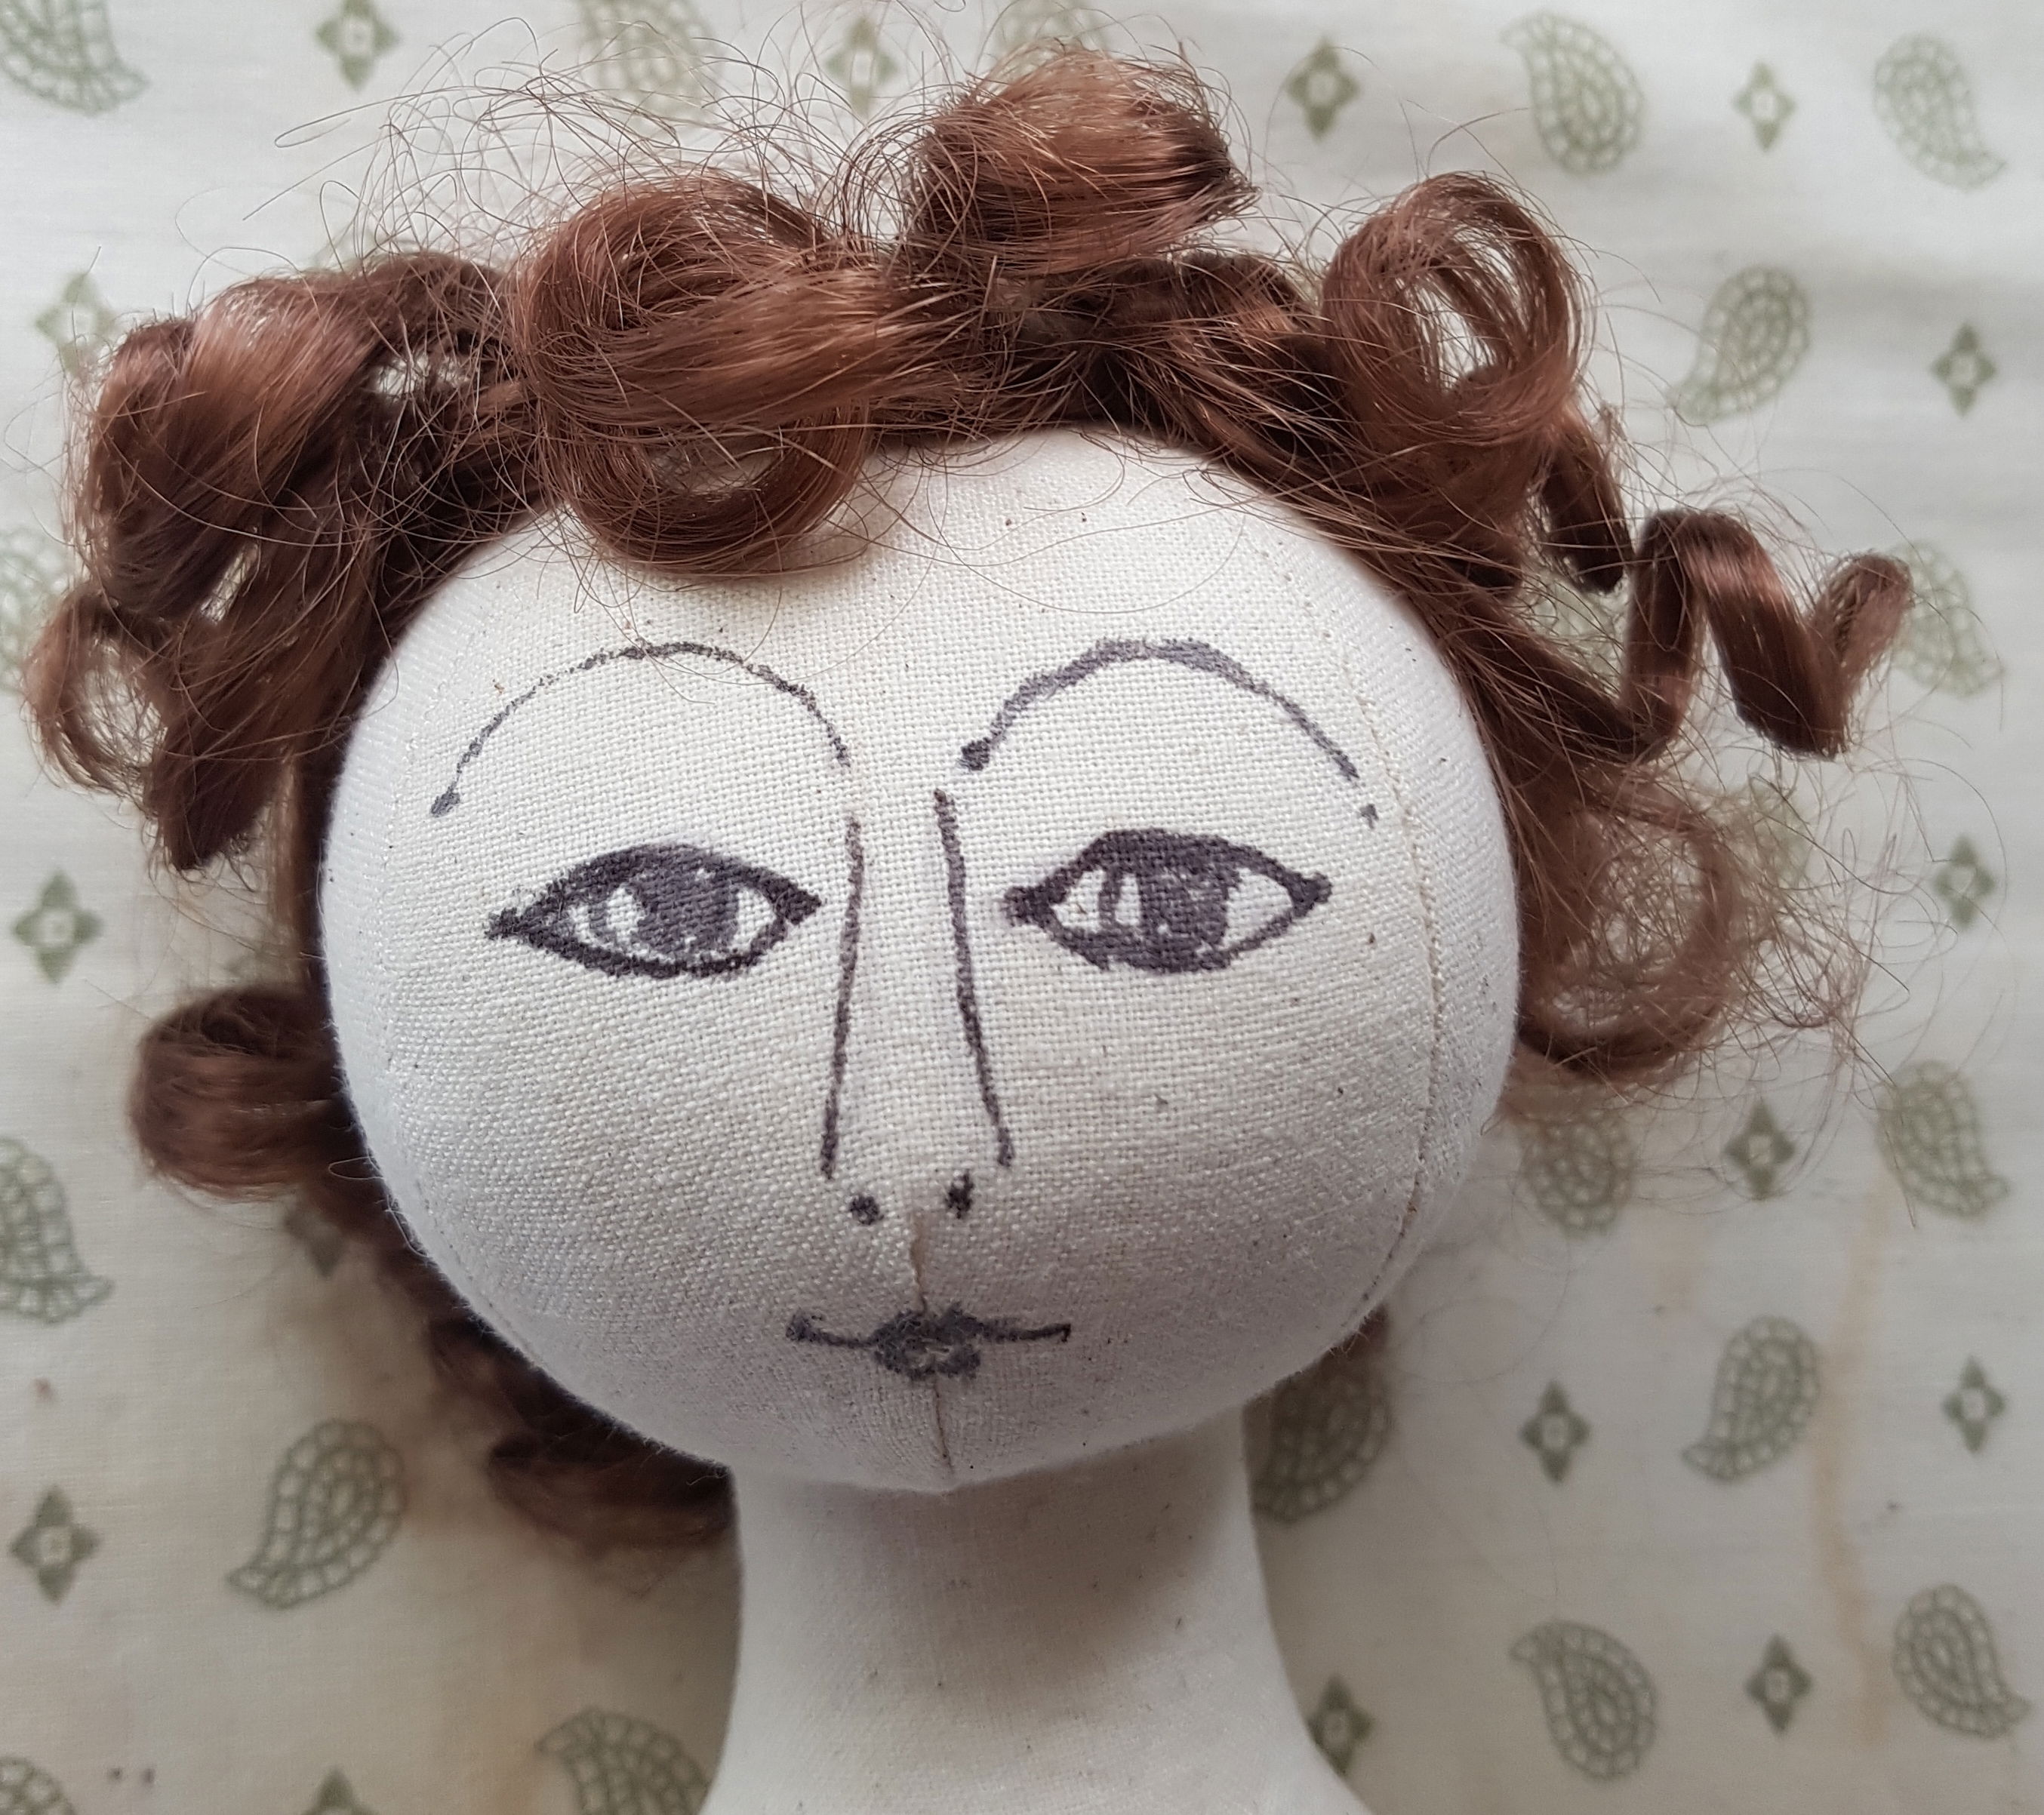
- It helps to put the doll's wig on at this stage. Your baby will look more 'real' and give a hint as to how she will look when completed.
Step away again and have a good long look.
- Happy?! Then take a deep breath and a well deserved tea break.
Sculpt the face using your drawings as a guide.
I have not included these instructions since this is about painting. And there is more than one way to do this .
I recommend the excellent instructions provided in the Clairbearsfolly Penny pattern as a good start. And there are other artists providing info out there if you need help. My Resource section lists helpful books too.
TIPS:
- Keep in mind that Queen Anne features are not always symmetrical. And they are not spaced as most 'modern' doll eyes and noses are. Many of them have eyes, nose and mouth all in the bottom half of the face! I'm not ready to go there with that much historical accuracy yet.
- I sculpt the nose first in case it alters the placement of the eyes and eyebrows. Better to find out it's a problem now. Make changes by simply removing the offending feature with the tips of the iron and then redrawing. Your template can help with that.
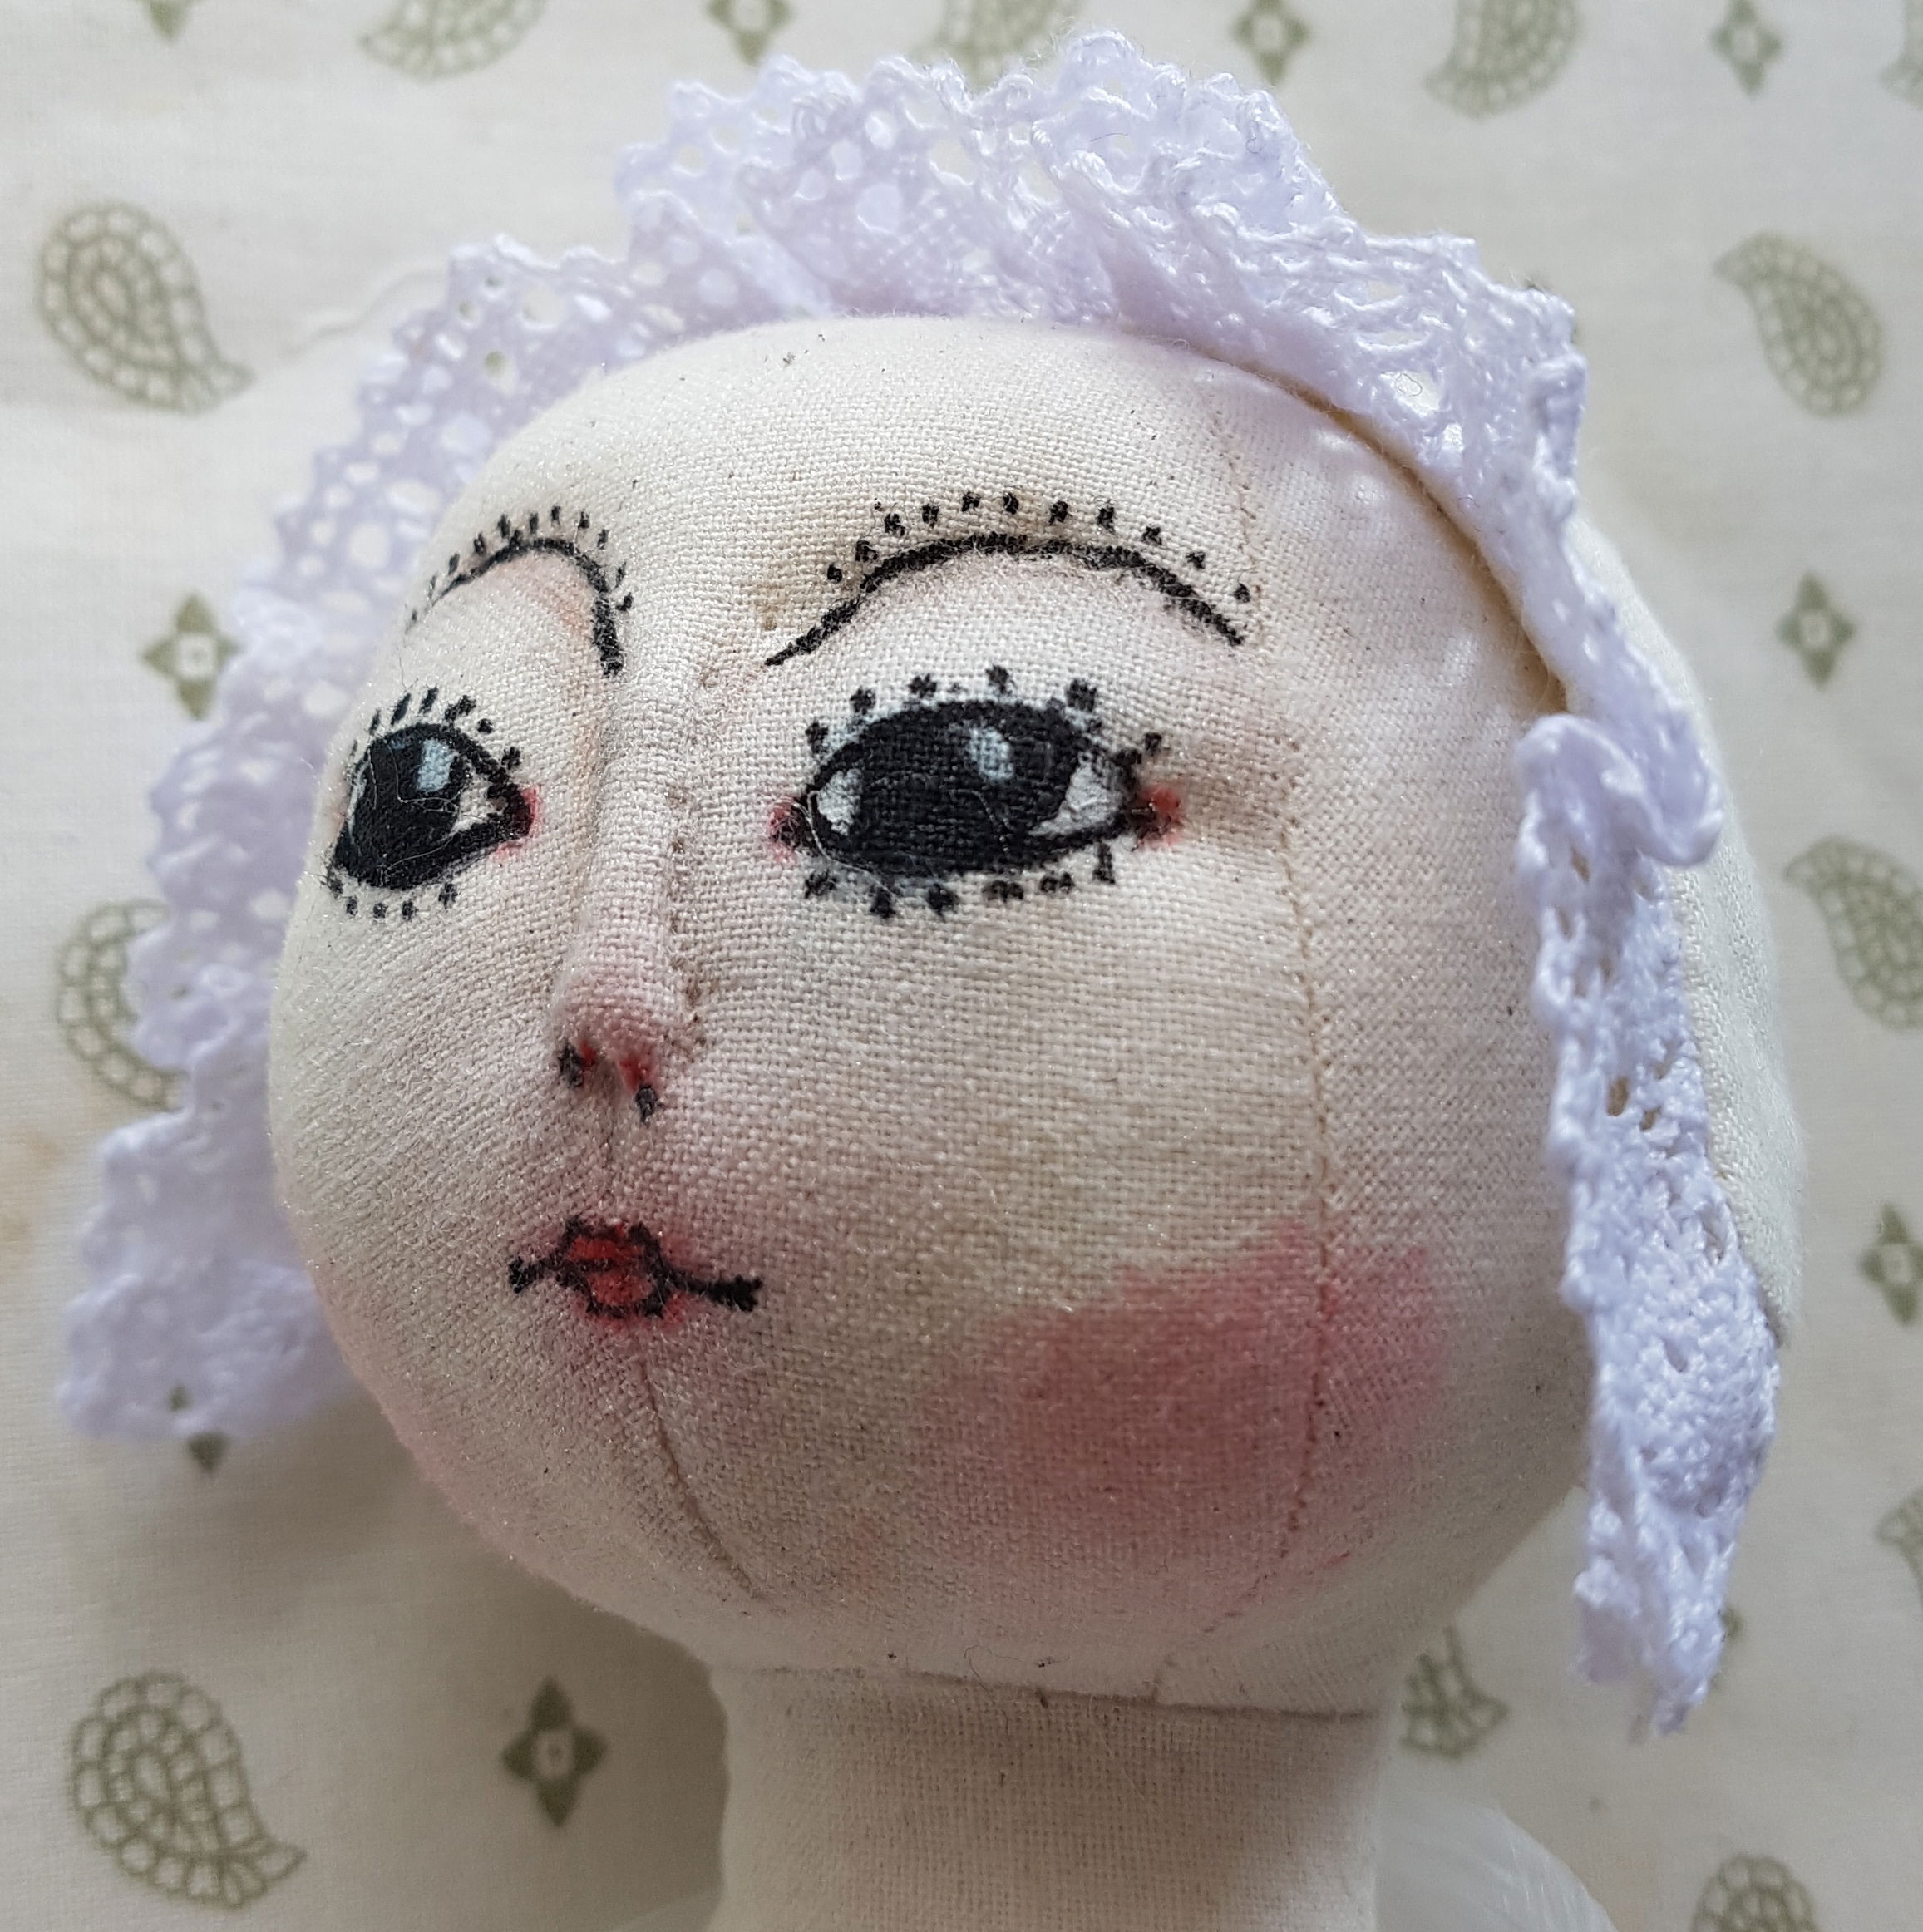
Painting for real:
Once the face is sculpted to your satisfaction, and features are approved, it's time to apply your Queen's make up permanently.
1. Have all your supplies ready and waiting to go.
2. Protect your doll from the neck down with plastic wrap or a bag. No worries then about handling the doll with painty fingers or water tub accidents.
3. Outline on top of the disappearing marker drawing with the indelible marker. Go carefully and stick with your drawing. Making changes on the fly is nothing but trouble.
4. Do the nose first and then the eyes. If you take up too much of the corners or the highlight of the eye with the marker, you can add some white watercolour pencil later on.
5. Next draw the eyebrows, with one smooth arc of the marker.
6. For the mouth, I will sometimes draw only the line between the top and bottom lip. Does she smile or not? Up to you.
7. With as small a marker tip touch as you can manage, add the eyebrow dots (sometimes feathery hairs) and eyelash dots.
8. Hold the iron over, but not directly on, the face so the steam removes any traces of the disappearing marker. Do it now to see if you've missed outlining anything. Also, the marker won't go away after the fixative is applied.
9. Have a look at the face from a bit of distance again. And breathe.
10. Make only small, easily doable changes now. It's tempting to over work and keep going, and going and going . . .
Dangerous when wet. Watercolour pencils are on deck.
TIPS:
-Be clear about where to apply the pencil. The colours are NOT fixed when dry. They will continue to spread as more water is applied. The muslin will absorb and bleed a lot of water for colour to travel through.
-The total effect will look much lighter when dried. So let everything dry before adding any more colour.
- If needed, add the pencil a bit at a time and then brush with a small amount of water until you get the colour or shading you desire.
Let's do it:
1. Where do I use the pencils? To shade the curve of the eye under the eyebrows, along the nose and under the chin with a mix of medium brown and tiny titch of black. Pull the shading out and down with a wet brush. Sometimes I add a light short line under the bottom eyelid too.
2. The mouth is dabs of red on top and bottom lips, keeping the shape on my template. Add a dot of brown to the top lip so the bottom stands out. Dot with the tiniest dot of water to colour. Use the rag quickly if it looks like it's going to bleed.
DO NOT rework the mouth with water. Ever put a red shirt in the wash with your whites? It's the worst for spreading. I will add some pencil to define the mouth if needed, but without adding water. It's okay, we are fixing the colours.
3. The cheeks are basically red circles. Make them as dark or light as your lady deems fashionable. Placement is based on your inspiration/template. You can soften the circles' edges with a bit of water. But don't get crazy. Or too close to that red mouth with that water. Practice on an off-cut first?
4. Vintage Queen Annes have red dots at the corners of the eyes and mouth and marking the nostrils. Make this the very last touch with a slightly dull red pencil and no water in sight. The fixative should keep the pencil dots in place. I haven't tried a red marker yet. Do a sample first if you do and let me know how it goes.
Finished the makeup job?
Put your baby aside and don't look at her until all the paint and pen is thoroughly dried. You will be surprised at how different she looks when you give her some space.
Ready to make it really permanent?
1. Ensure your baby's body is protected with plastic wrap or bag.
2. Fix the face just as you did with the swatches. Don't spray too close to the face. You want the fixative to be distributed lightly. Give her two passes with spray per coat and complete at least two coats. Dry thoroughly after each coat. The muslin can absorb quite a lot!
3. Resist the urge to touch the face until the fixative is completely dry. It might feel a bit rough and stiff after drying. That's okay. The real deal are wooden, remember?
Congratulations!
Your Queen Anne is now a lady with her own personality and fashionable 18th Century look.
And you get to play with styling wigs and researching for the perfect outfit.
This is Lavinia finished and fixed. Abigail is in process. The boss has at last approved my blog post. Let us know if you use the same techniques or what others you might have in your pocket.