DIY - Making some hat stands
It was mentioned in a previous blog post that hat stand supplies for the Queen Annes were on the thrifting list. Most items for creating them were already in shop craft tubs. (There are a lot of those tubs!). A few items came from the dollar store, so the buyer blew the budget with that six dollar purchase.
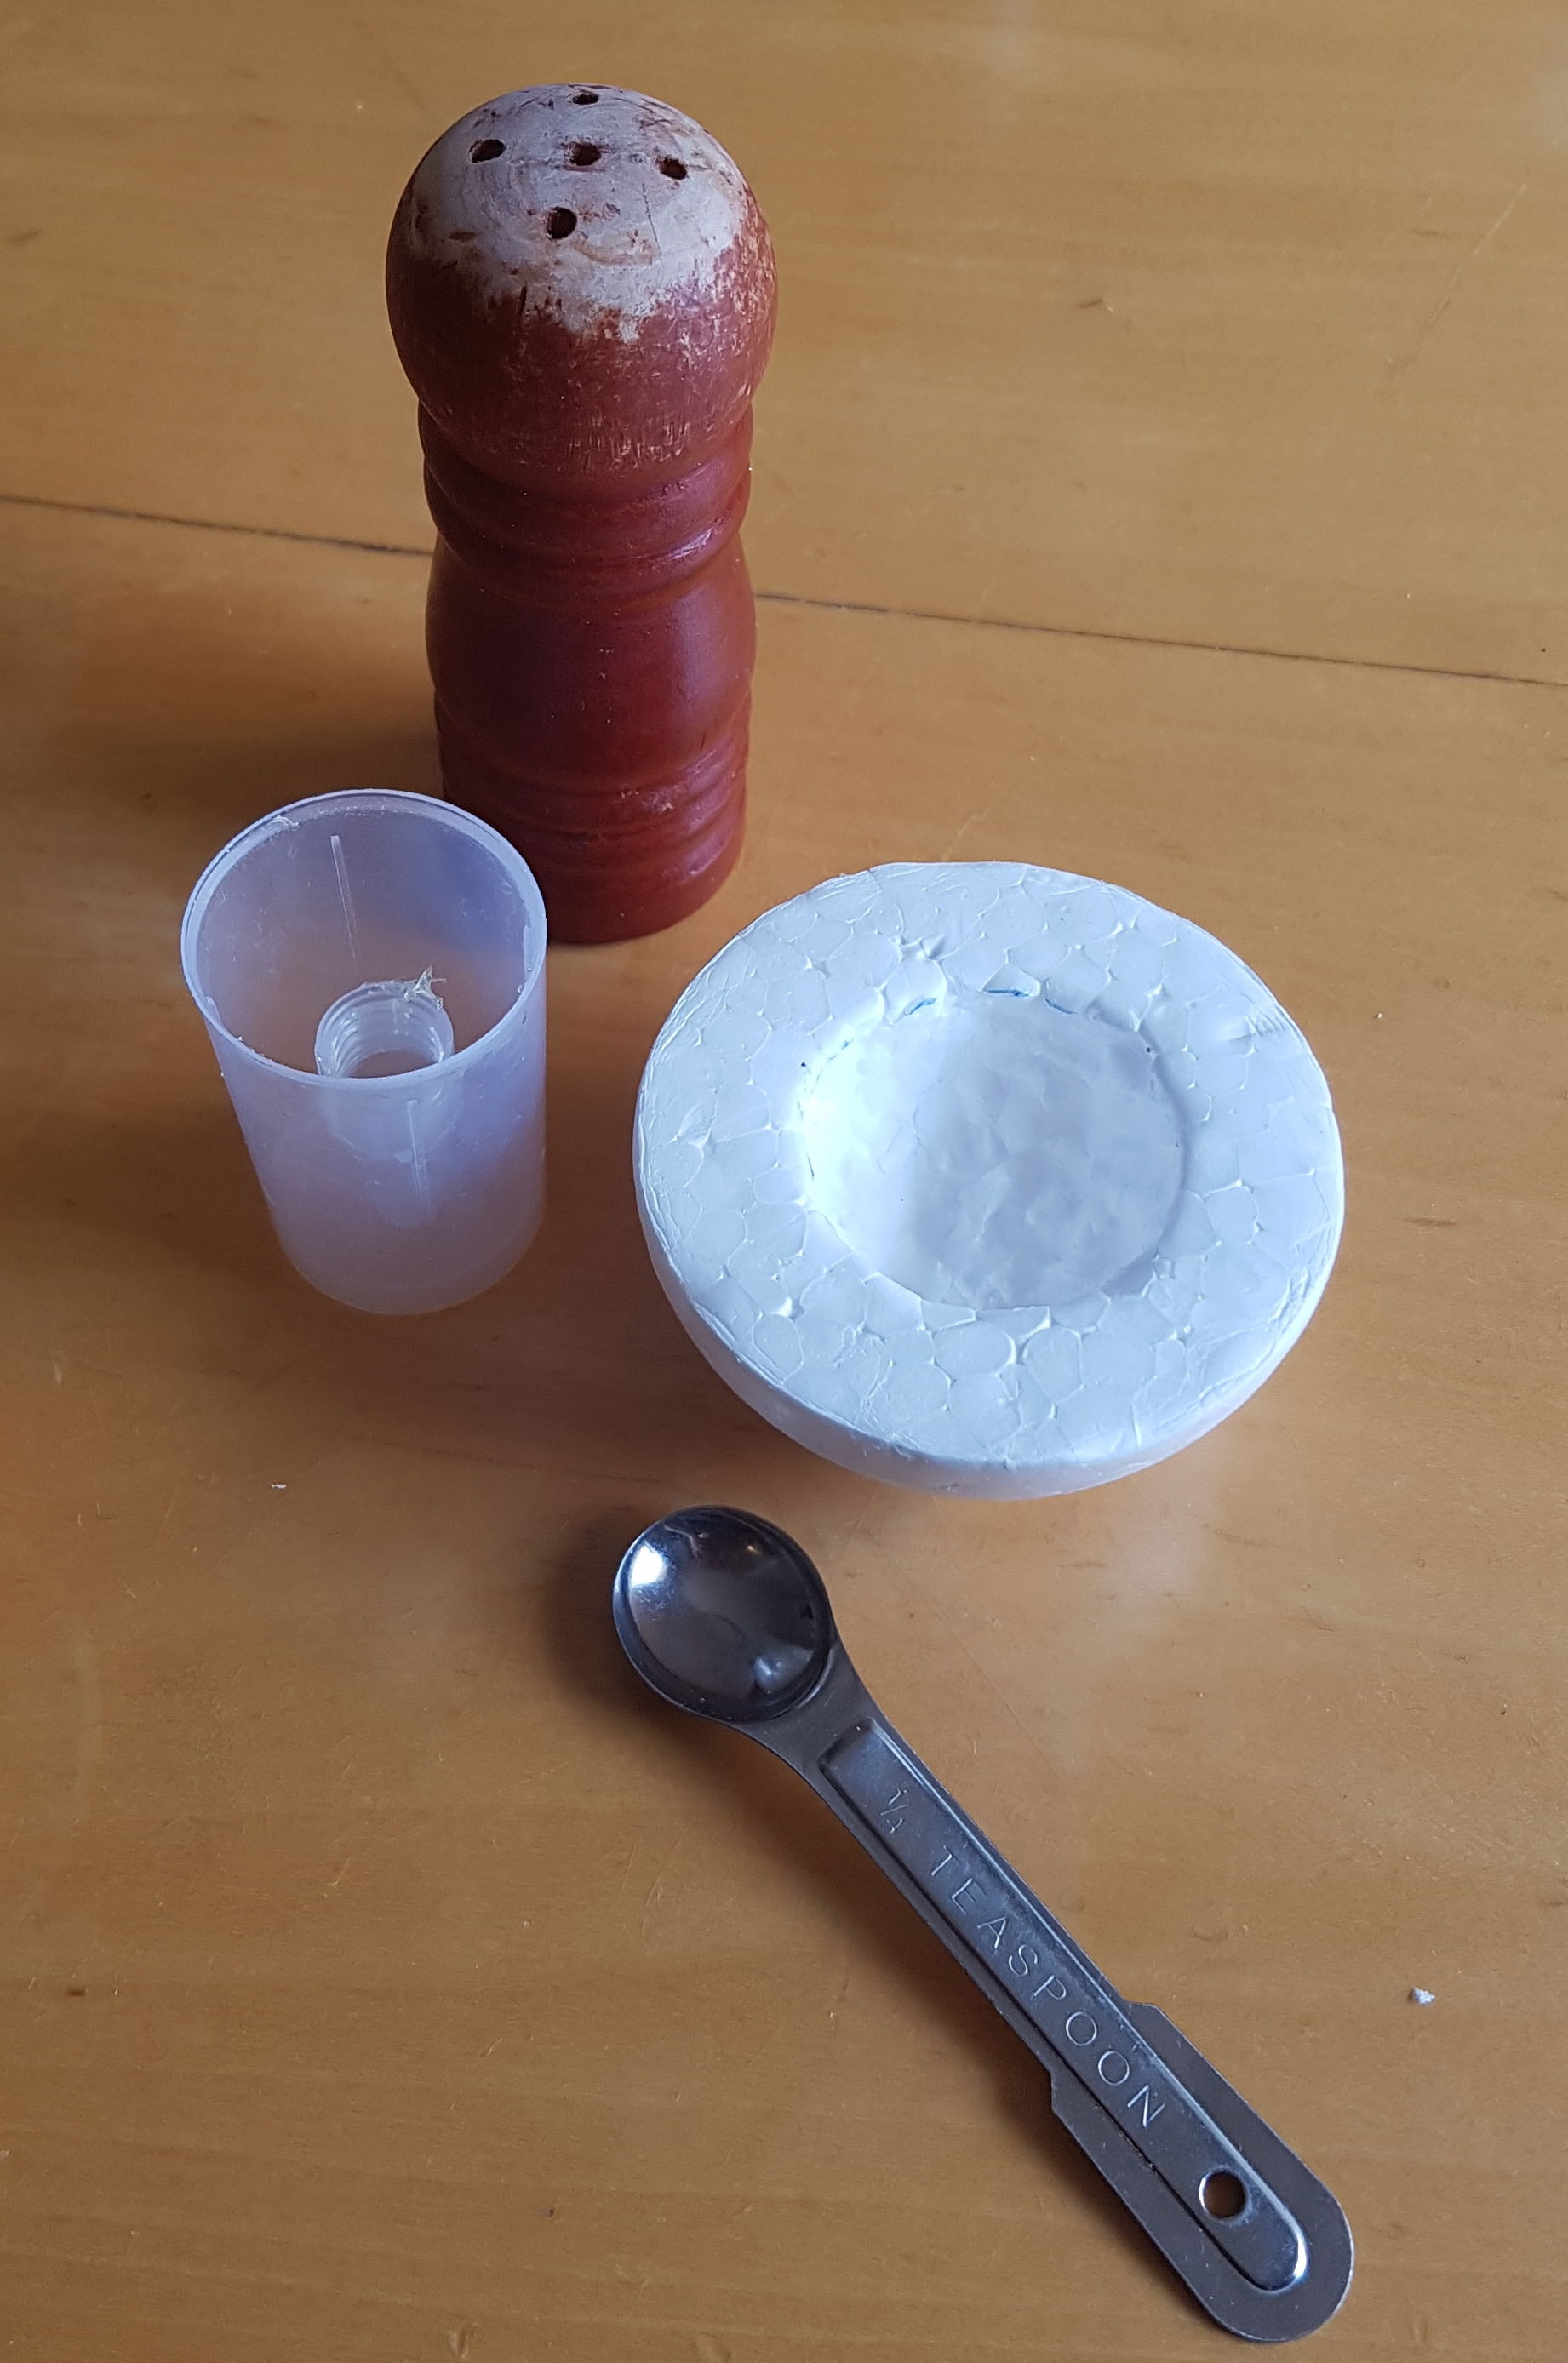
Here is a list of what was used:
1. Two (2) wooden salt and pepper shakers
2. A junky paint brush or toothbrush
3. Tacky or white glue
4. A pen or felt pen
5. Styrofoam half spheres. I call 'em mushrooms.
6. A cap conveniently the right size for marking digging out areas on the mushrooms.
7. Acrylic paint
8. A small measuring spoon
9. A fine (220 grit) sand paper
10. A wet rag or paper towel.
The steps for putting it all together:
1. Make sure the salt shakers are clean of any price stickers or goop.
2. Sand the top of the shakers so the glue will adhere well
3. Find a 'something' that works, or measure around the centre of the top of the shaker, to mark where the styro mushroom fits to it.
4. Mark the shaker placement at the centre of the flat bottom of the mushroom with your pen.
5. Use the small spoon to dig out the styro so the shaker fits snugly. Go slow, the styro breaks up easily and unevenly. The Dremel tool was way too messy and not so easy to control. Keep checking the fit until you are satisfied.
6. Spread some glue on the top of the shaker and inside the dug out styro.
7. Gently press the styro on to the shaker. Turn the shaker around to ensure the mushroom is set evenly.
8. Use the wet rag or towel to wipe away any escaping glue.
7. Walk away and let it dry. Leave it overnight. We have an impatient crafter and this was hard!
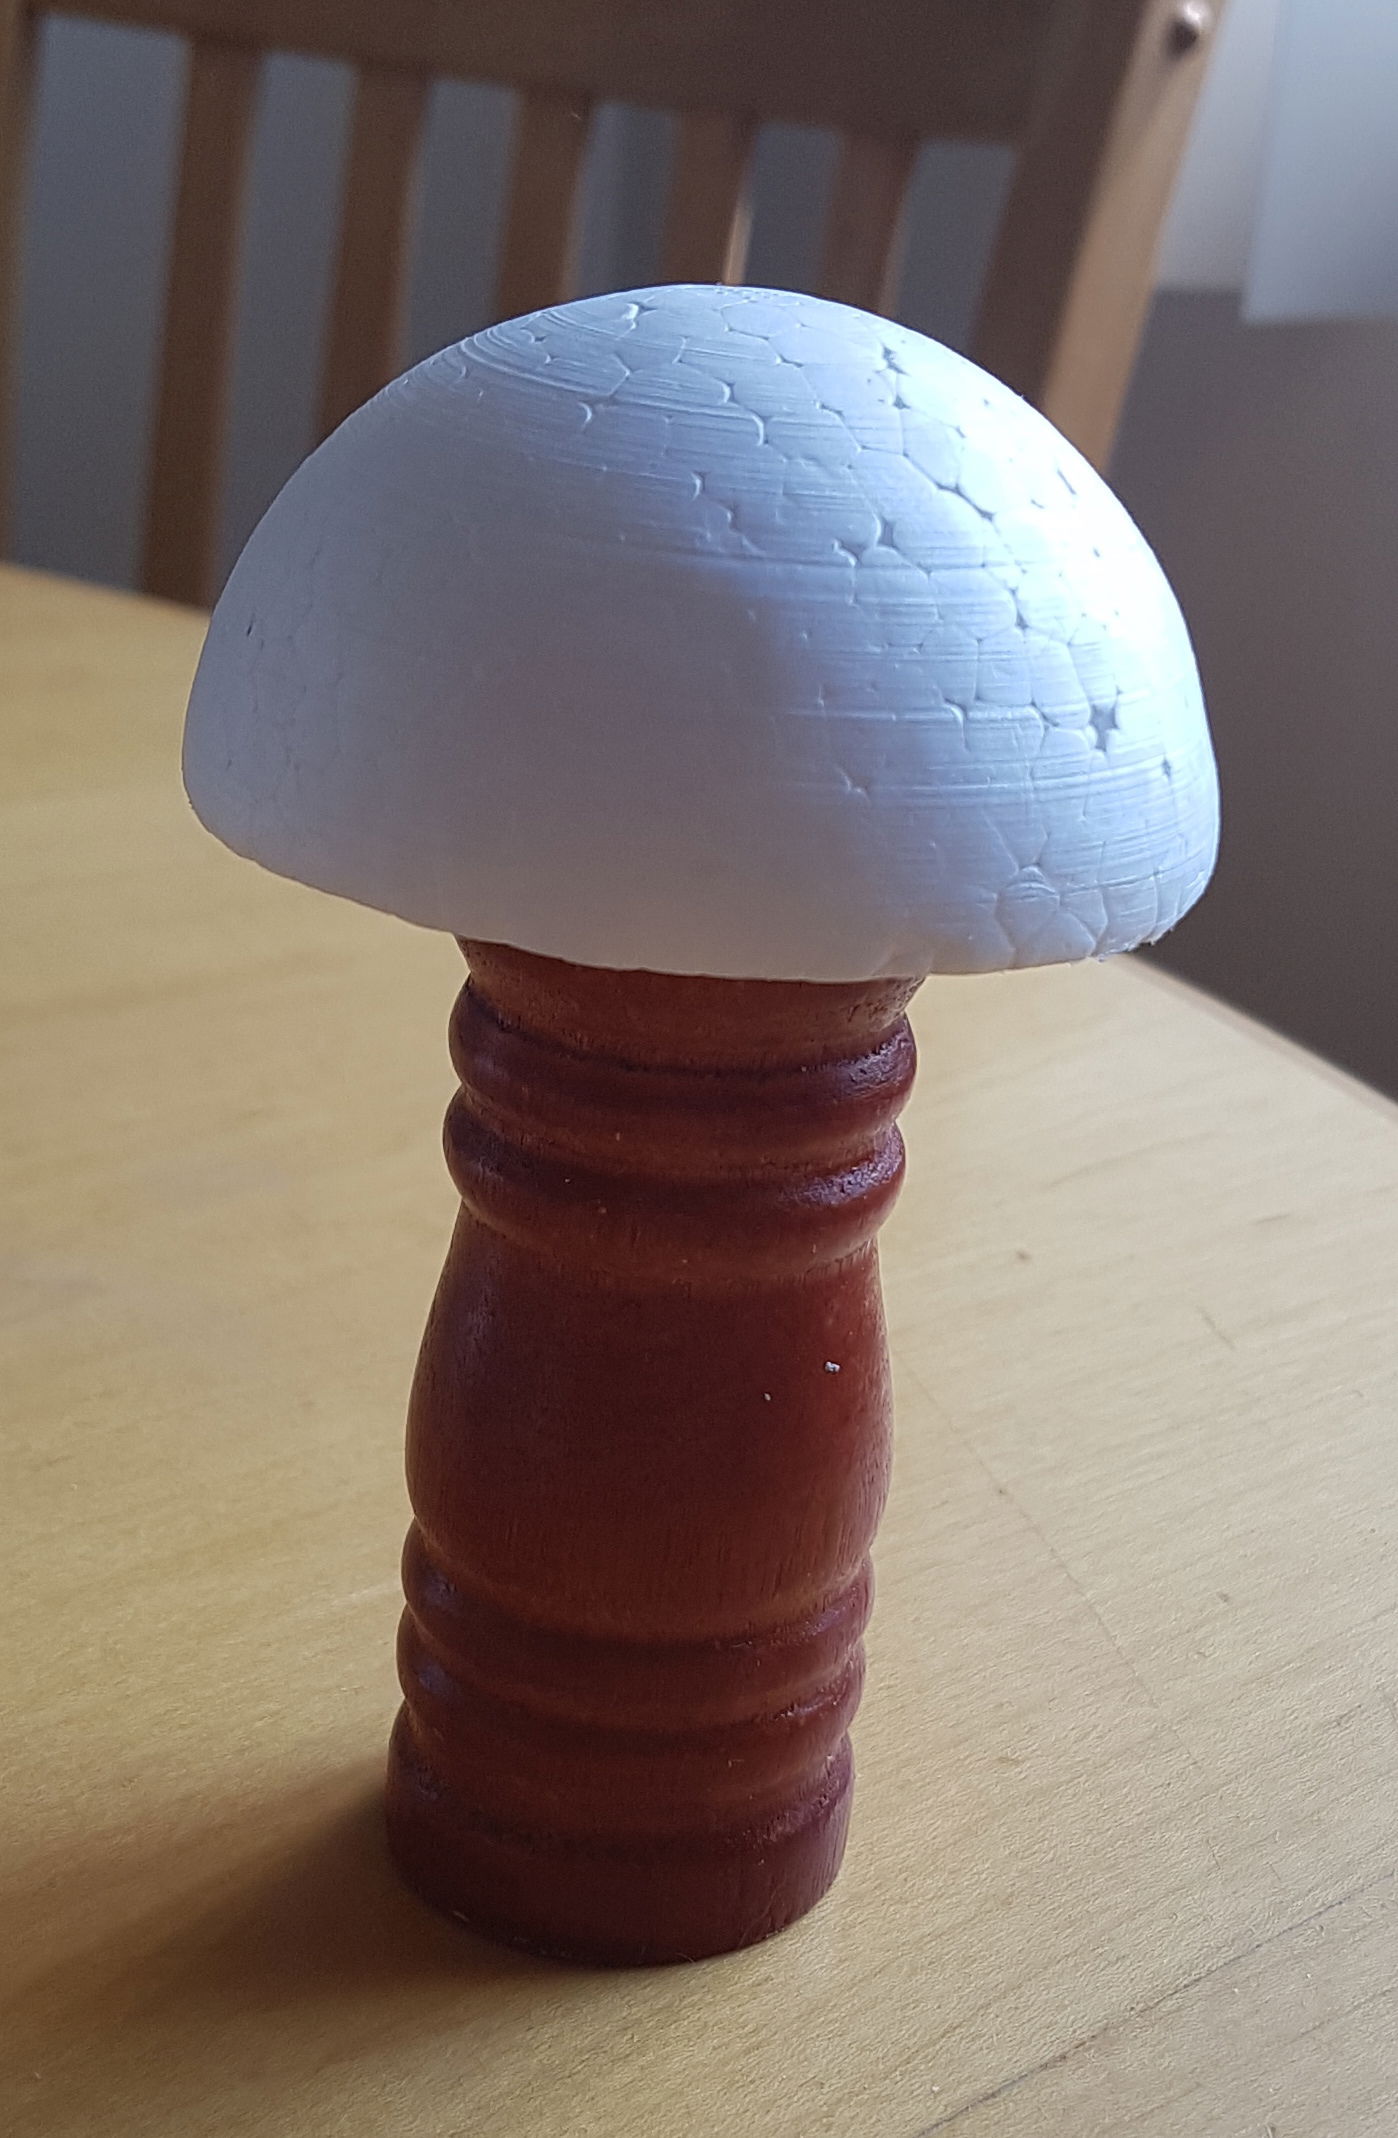
8. Coat the styrofoam top and bottom with the glue. Let it dry completely and then do another coat, maybe two. This helps protect the styrofoam and fill in any dimples.
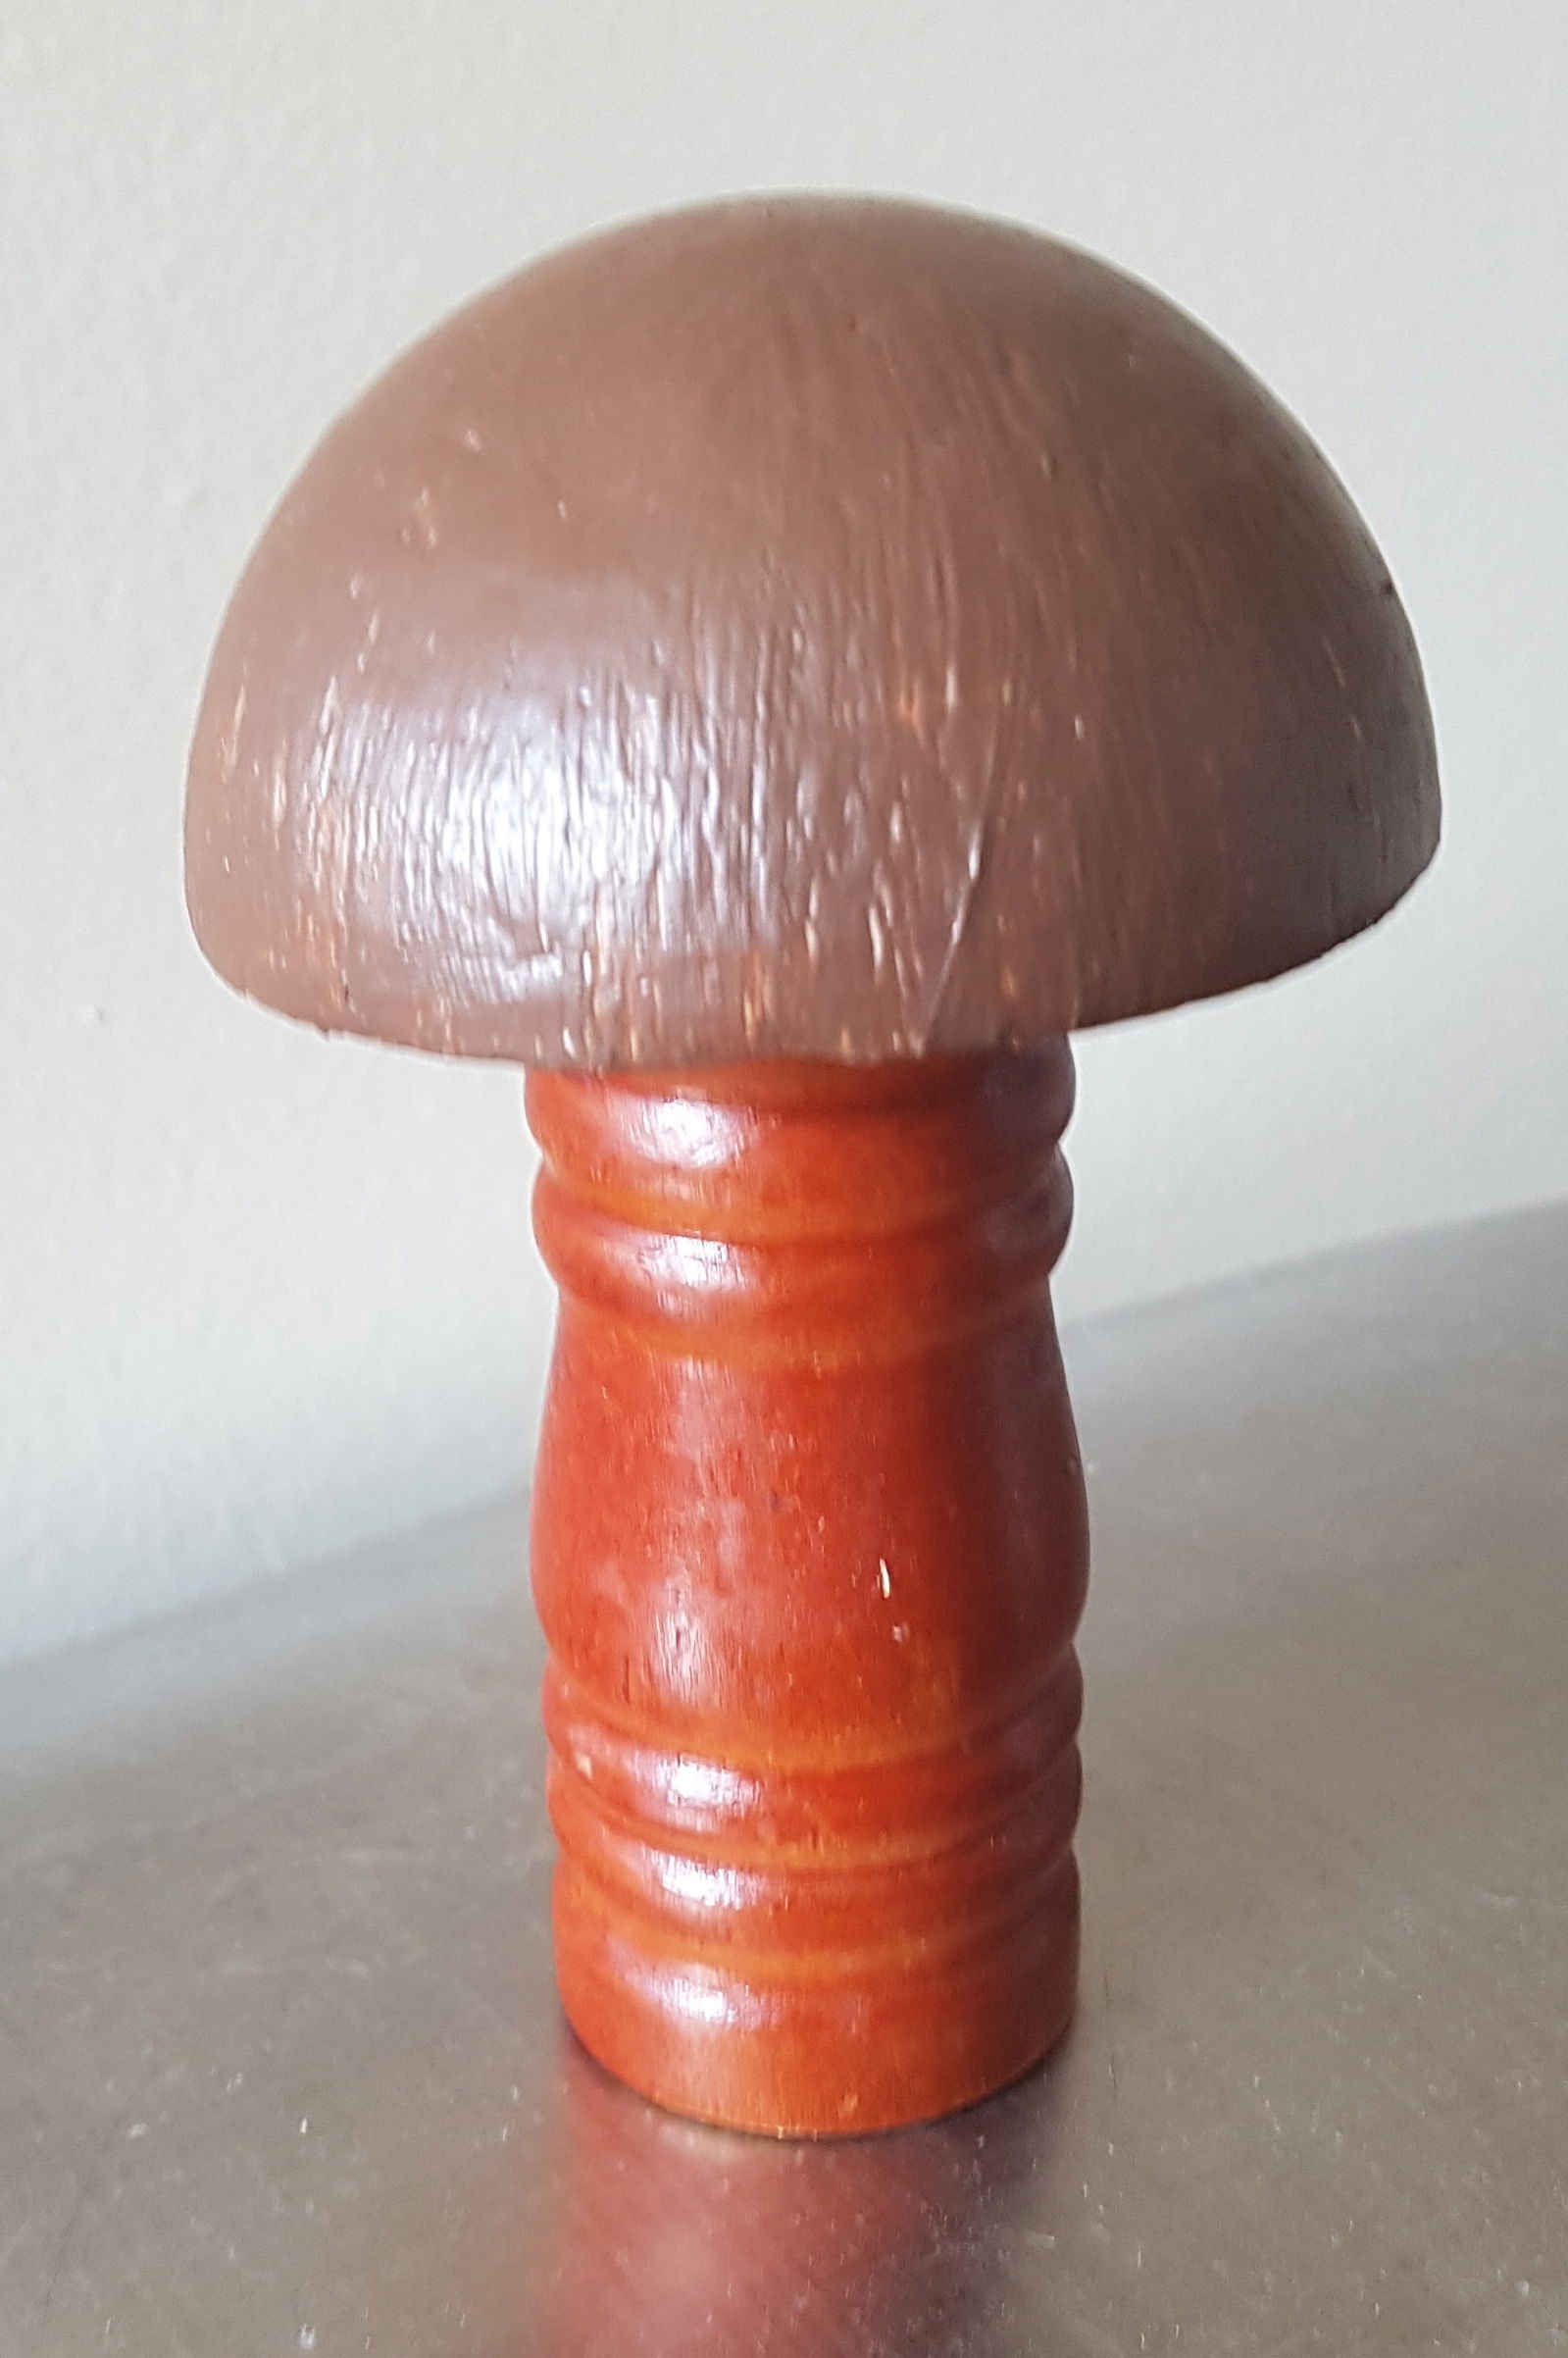
9. Once the glue has dried you can paint the mushroom any colour you want. Acrylic paint works best. Keep the wet rag handy to wipe up any paint that ends up on the shaker. (She is also a messy crafter.)
10. Walk away and let the paint dry. Add more coats if necessary, letting them dry completely.
Tah Dah! A hat stand.
In retrospect:
This turned out as envisioned, but as usual there are a few things to do differently or experiment with.
-Next time, rather than painting the mushroom, a layer of paper mache or fabric should make the mushroom stronger. The glue layers do help and you can pin into the stryo, but no guarentee it will hold up well over time.
-Use a good brush! See all those thick paint lines. Yuck.
-Smaller half spheres of styro are in order. This was too big for Charlotte's Bergere hats and any of Arabella's caps. Shoot.
Live and Learn!
Overall, The boss is happy with this project. Let us know if you give this a try. We are always happy to refine instructions.